In RAAS, an Applicable Installation is an aircraft model and can be selected for any part number.
As we know, everything in RAAS has the same data structure. That is, everything is assigned to an Item Type and has a part description, a part number, and a serial number. As such, inspections have part numbers just as engines, propellers, and components do.
It is at the part number level that routine maintenance requirements are defined. When a maintenance item is issued from a maintenance forecast for an aircraft, whether that maintenance item is component maintenance, a structural inspection, or a letter/hours check inspection, the item's applicable installation tells RAAS what information the resulting job card must be populated with.
A part number's applicable installation tells RAAS not only which aircraft model a part number is applicable to, but also to which aircraft serial numbers in that aircraft model fleet a part number is applicable to.
Once an applicable installation is selected for a part number, a Job Card Template can be defined for that part number. See Planning and Production - Job Card Templates. Job Card Templates can include parts lists, trade requirements and graphic attachments, as well as links to inspection tasks and/or groups defined in the Inspection Documents module.
When a letter/hours check inspection is issued from a maintenance forecast for an aircraft, RAAS looks for an applicable installation at the letter/hours check's part number and knows whether or not the inspection is applicable to the aircraft in question. If the inspection is applicable, RAAS will populate the resulting job card with the contents of the Job Card Template AND the contents of any Inspection Documents module tasks or groups linked through the Job Card Template.
Due to the fact that a part number (an engine, propeller, component, part or inspection) can be applicable to multiple aircraft types and models, multiple applicable installations can be selected for a single part number.
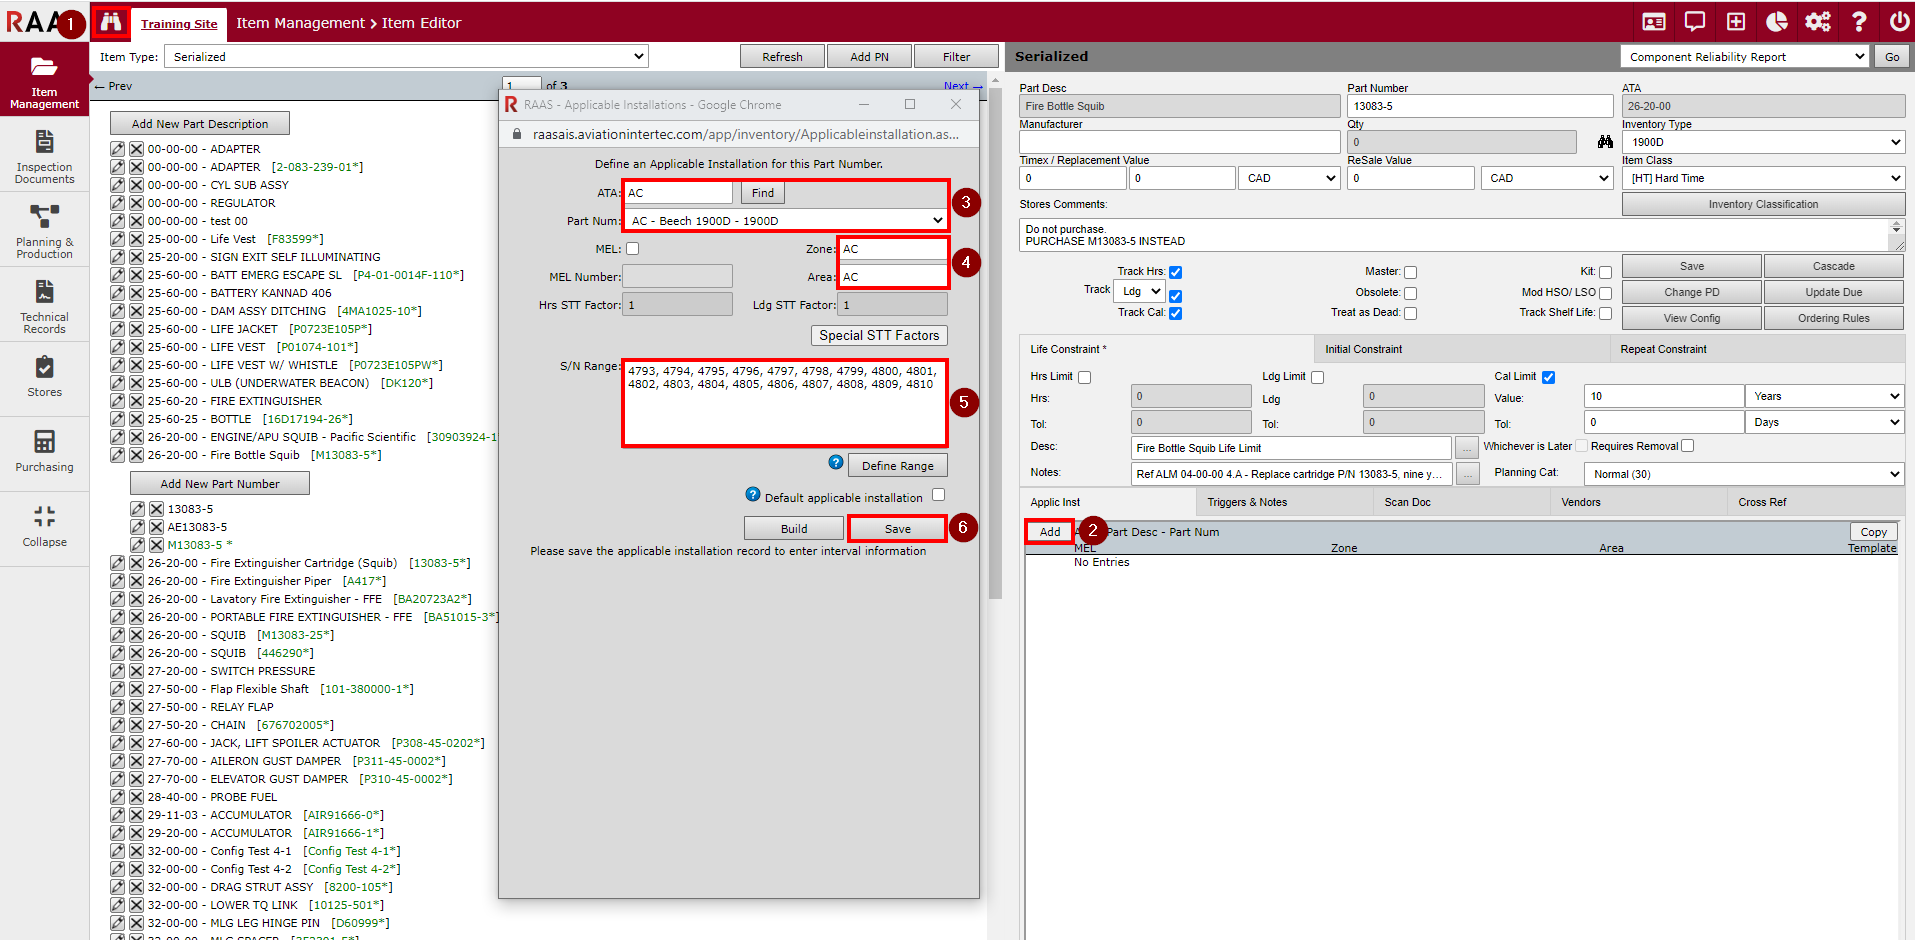
Selecting an Applicable Installation for a Part Number
-
Navigate to the part number in the Item Editor using the Quick Find.
-
On the part number Applic Inst tab, click the Add button.
-
In the Applicable Installation window that opens, select the aircraft part number by entering "AC" in the ATA field, clicking Find, and selecting the aircraft part number from the Part Number dropdown.
-
Enter Zone and Area values.
-
Enter the aircraft serial number range to which this part number applies by typing the serial numbers into the S/N Range text box, or clicking the Define Range button and entering the starting and ending serial numbers. The Define Range starting and ending serial numbers must be numeric values only. If serial numbers contain alpha characters, a comma-separated list must be typed into the S/N Range text box.
-
Click Save.
-
Optionally, Positions and corresponding quantities can be added. Position information is used by RAAS to verify that the required quantity of a part number is present on an aircraft and is in the correct position(s).
-
For part numbers with maintenance requirements that are based on the number of removals, such as wheel assemblies, the interval can be defined here.
-
If this applicable installation was selected for a new inspection, the Build function can be used to create the serial numbers for all aircraft the inspection is required for. The Build window will contain a list of aircraft serial numbers listed in the S/N Range text box that exist in the Item Editor. Select all aircraft the inspection is to be created for and click OK.
Note: When using the Build function, it is highly recommended that an audit be carried out on all serial numbers created to ensure the accuracy of all data.
-
-
Repeat the steps above if multiple applicable installations are required.
Once the applicable installation is defined, a Job Card Template (JCT) can be created for items with scheduled maintenance requirements/constraints. See also Planning and Production - Job Card Templates.
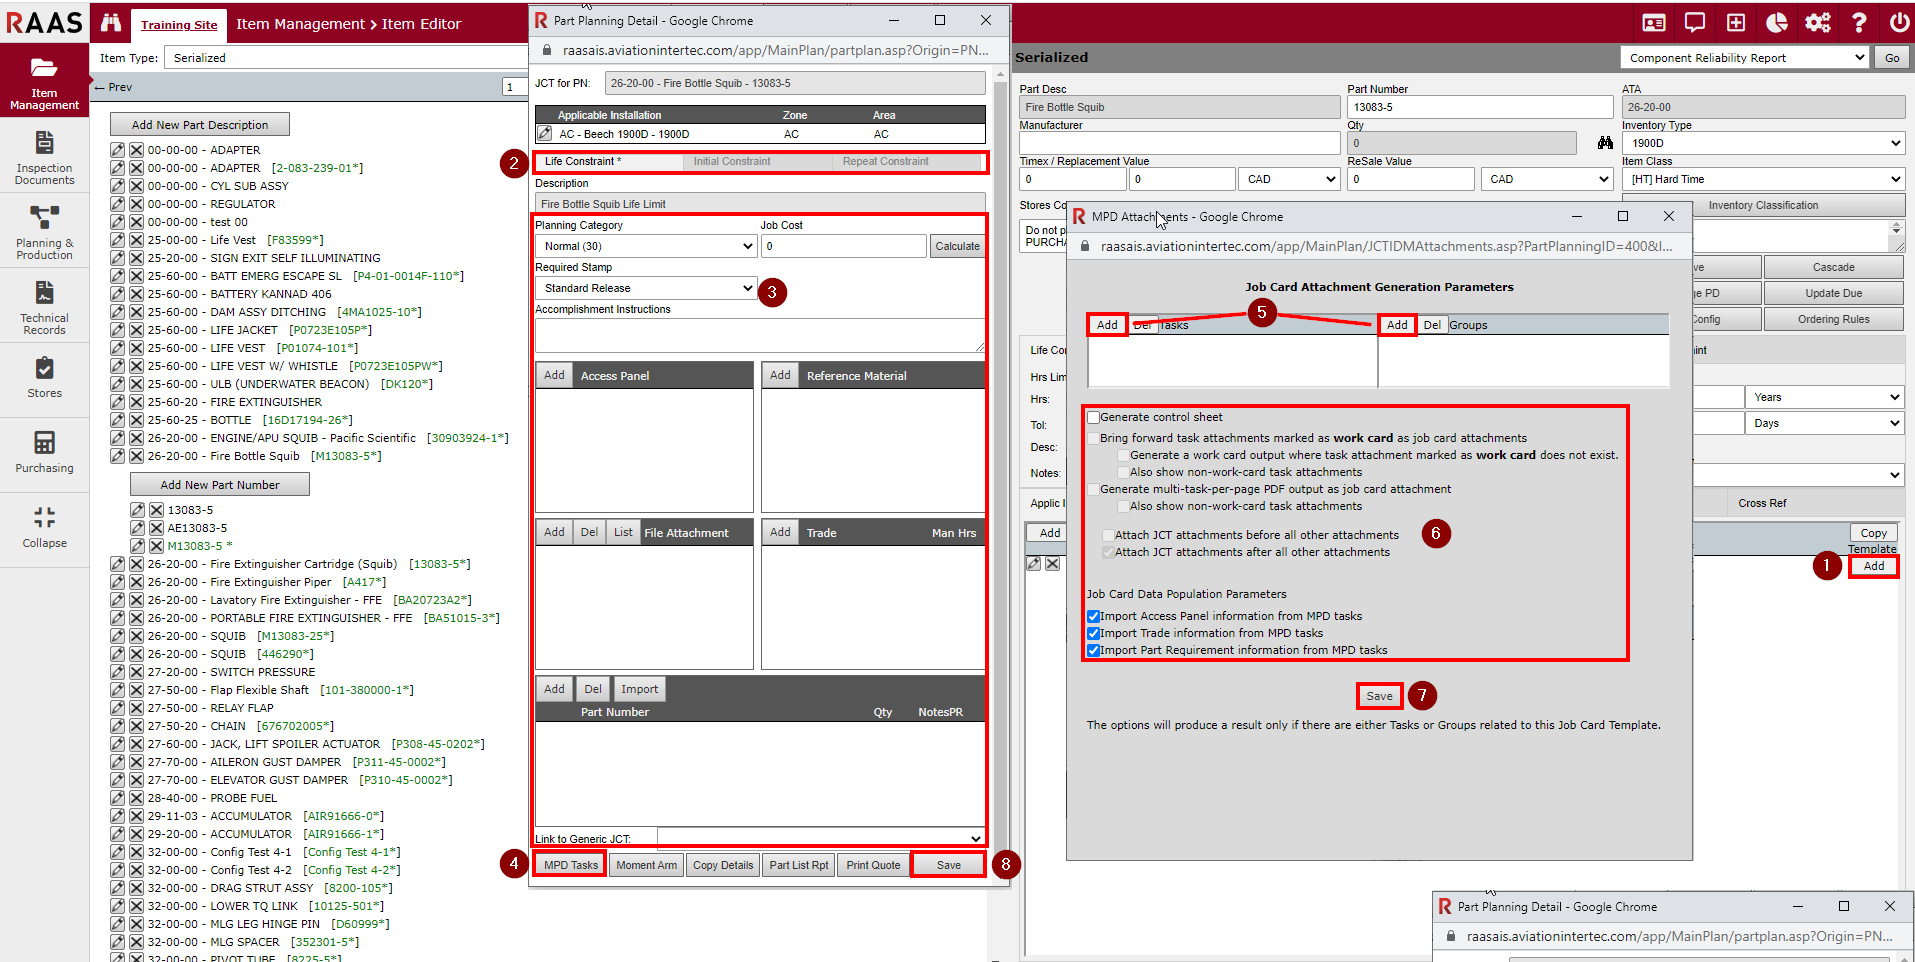
Creating a Job Card Template from the Part Number Applicable Installation Tab
-
Click the Add button on the right-hand side of the Applic Inst tab entry (there may be multiple entries).
Note: After a JCT is added, the Add button changes to an Edit button. -
In the Job Card Template window, select the applicable constraint (Life, Initial, Repeat) for this JCT, if there are multiple active constraints.
Note: If the same JCT is required for multiple constraints and/or applicable installations, JCT details can be entered once and the details copied using the Copy Details function. -
Enter all required information.
Note: File attachments are selected from the Document Library. See Planning and Production - Document Library. -
If this part number has a corresponding task(s) or a corresponding group in the Inspection Documents module, establish the link to the applicable task(s) and/or group by clicking the MPD Tasks button.
-
In the MPD Attachments window that opens attach a group and/or tasks to the JCT by clicking the Add Tasks and/or Add Groups button.
-
Select the desired job card output options - generic, single, or multi-task-per-page attachments, or actual task attachments from the Inspection Documents module Task Details page, control sheet, the desired MPD task information, and the ordering of JCT attachments.
-
Click Save to save the MPD Attachments.
-
Click Save to save the JCT.