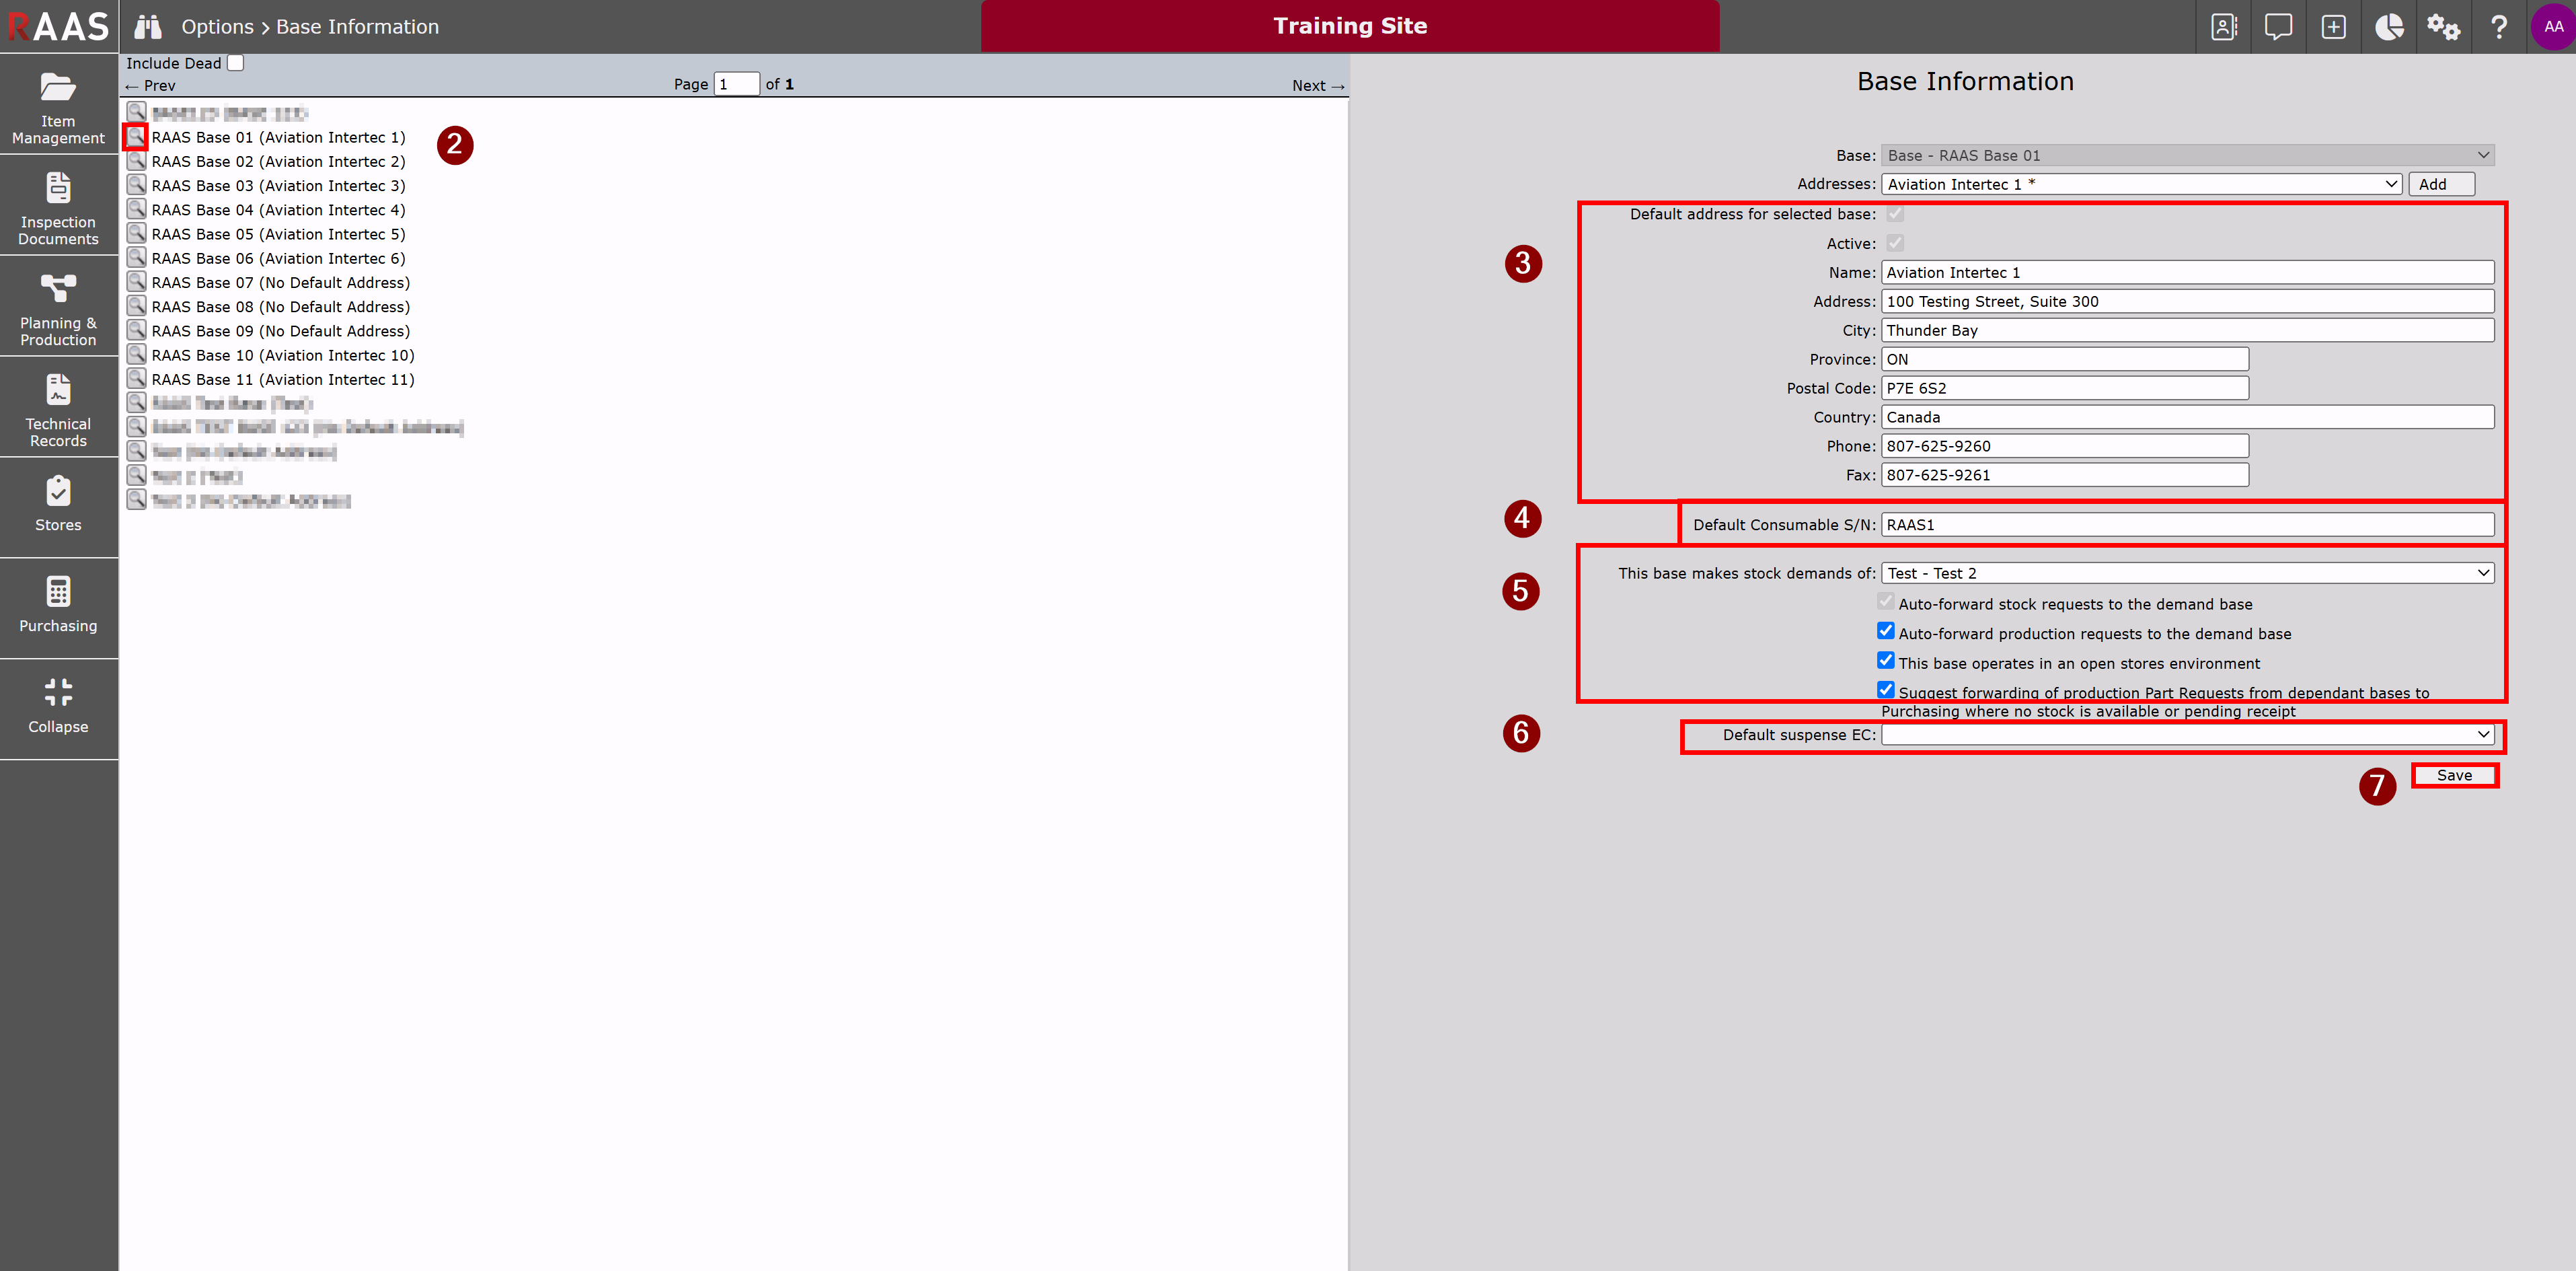
Base Information allows users to add the base details to RAAS when a new base serial number is added in Item Editor. This is where the address comes from when processing orders and shipping bills.
To Add a Base:
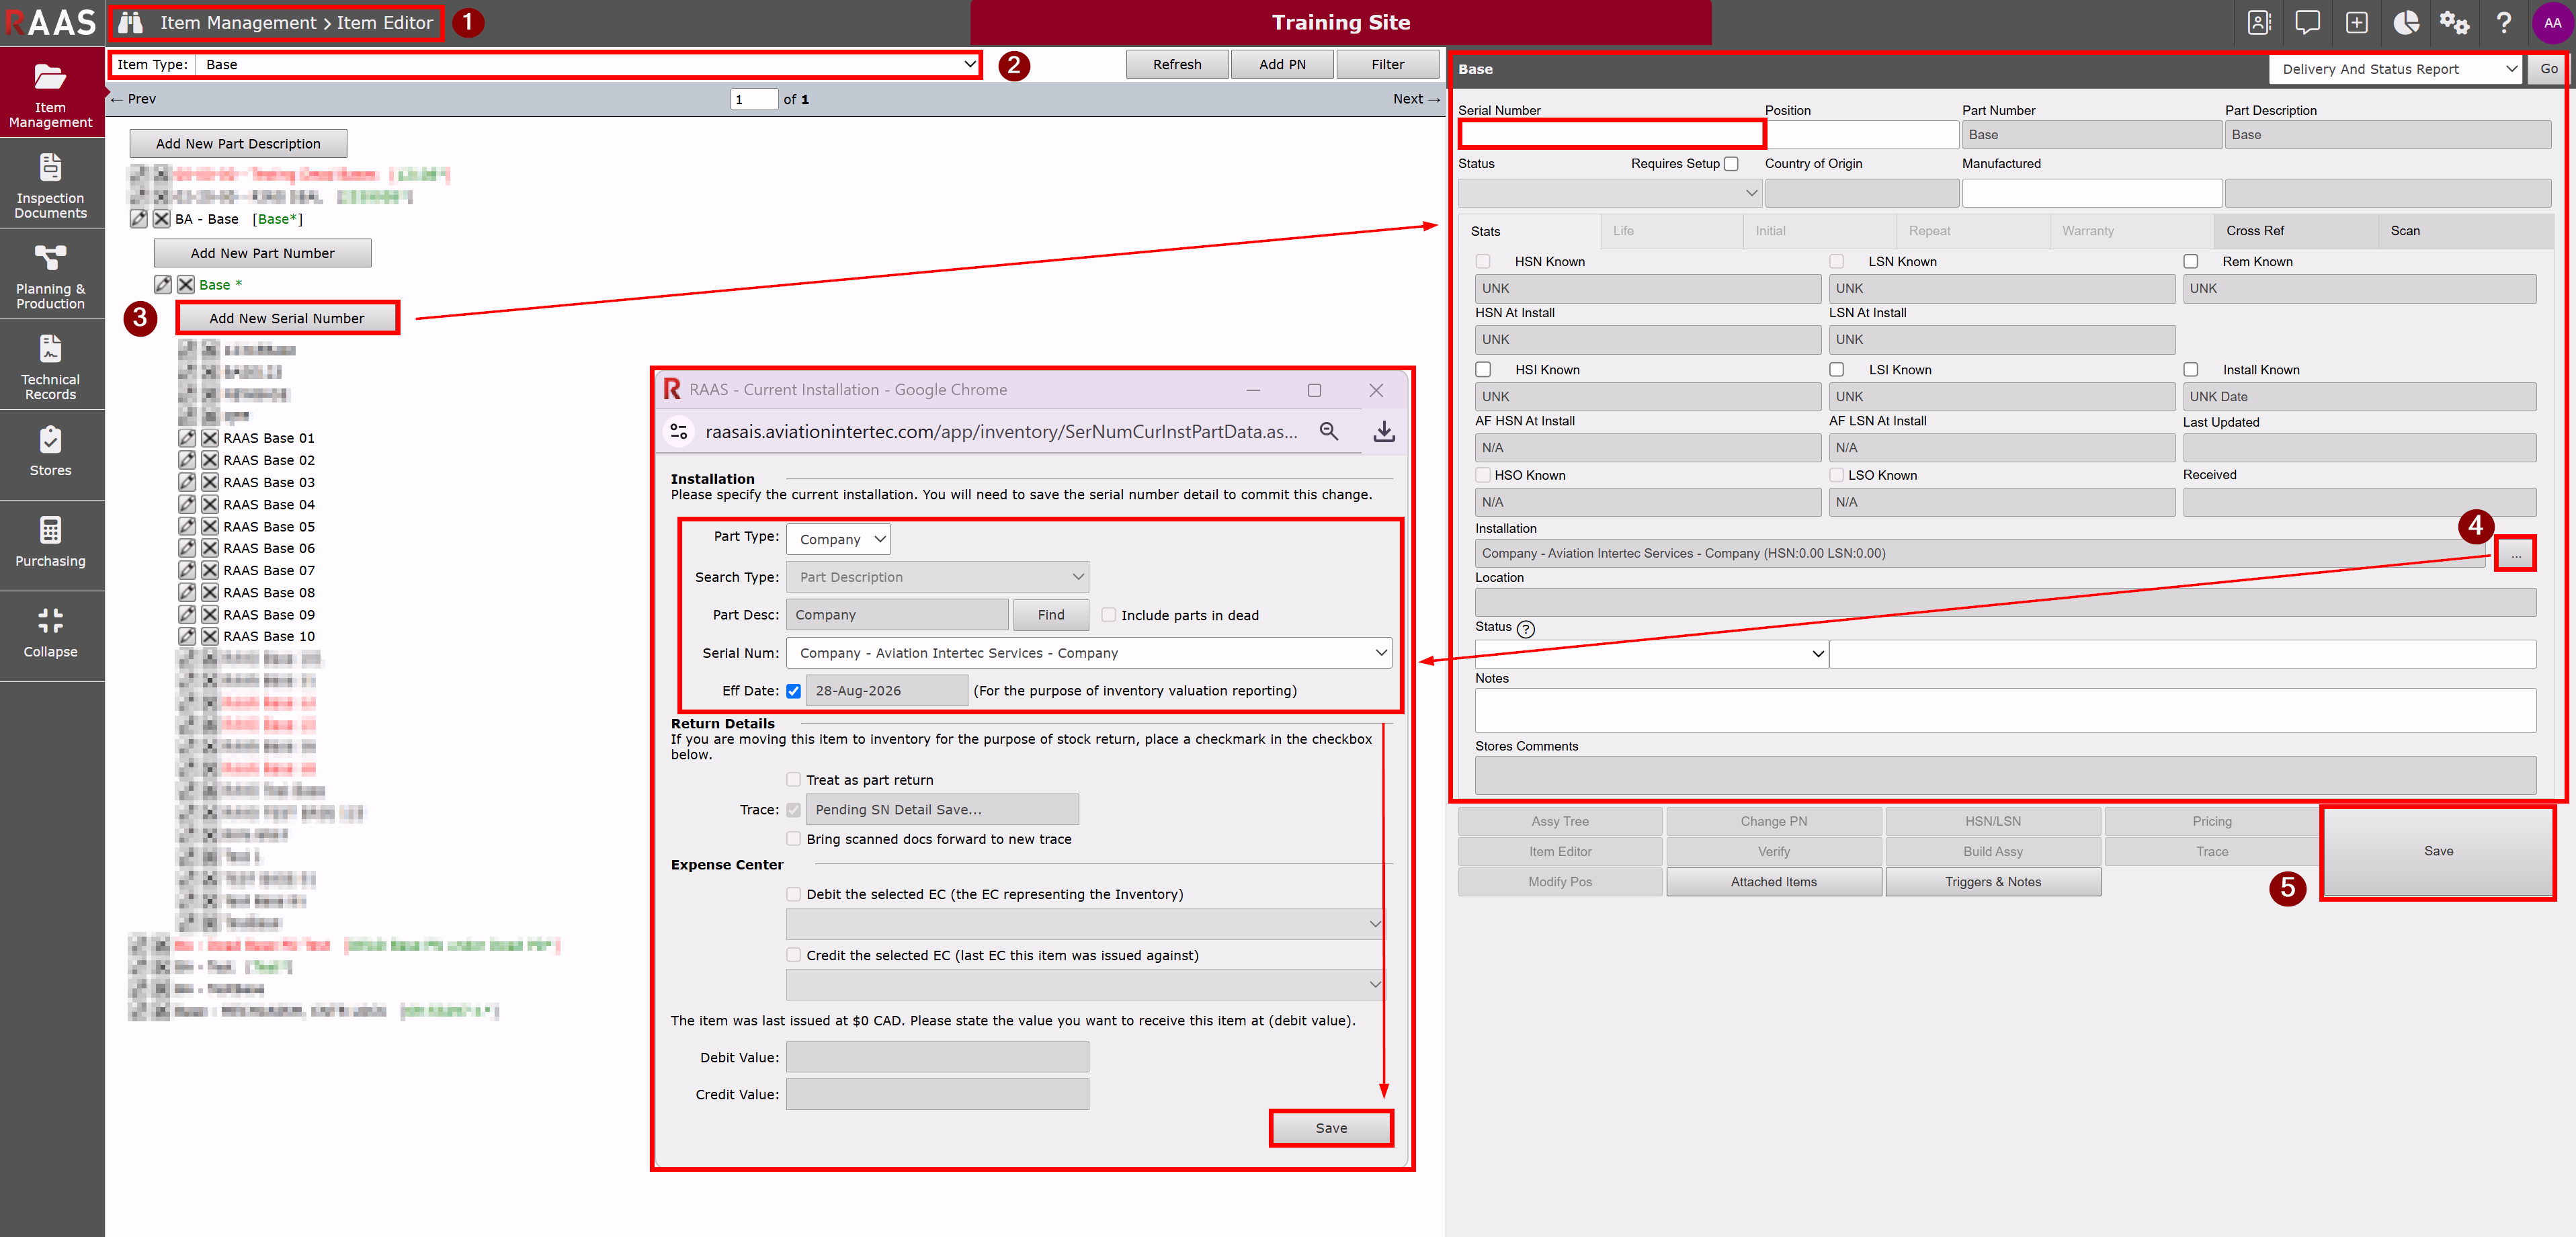
Create a new Base Serial Number in Item Editor. After it is created, it will appear automatically in Base Information, where you can update the address and any other applicable details.
-
Navigate to Item Management > Item Editor.
-
Change Item Type to Base.
-
Click Add New Serial Number to display the Item Editor for the serial number level on the right side of the window. Enter Base name in Serial Number field.
-
Click on the ellipsis (...) button at the end of the Installation text box to open the Current Installation pop-up window. (Company).
-
After selecting and saving an installation, click Save.
-
Navigate to Options > Base Information. The new base appears in the list. Select the magnifying glass icon next to the base to review or edit its details.
To Edit a Base:
-
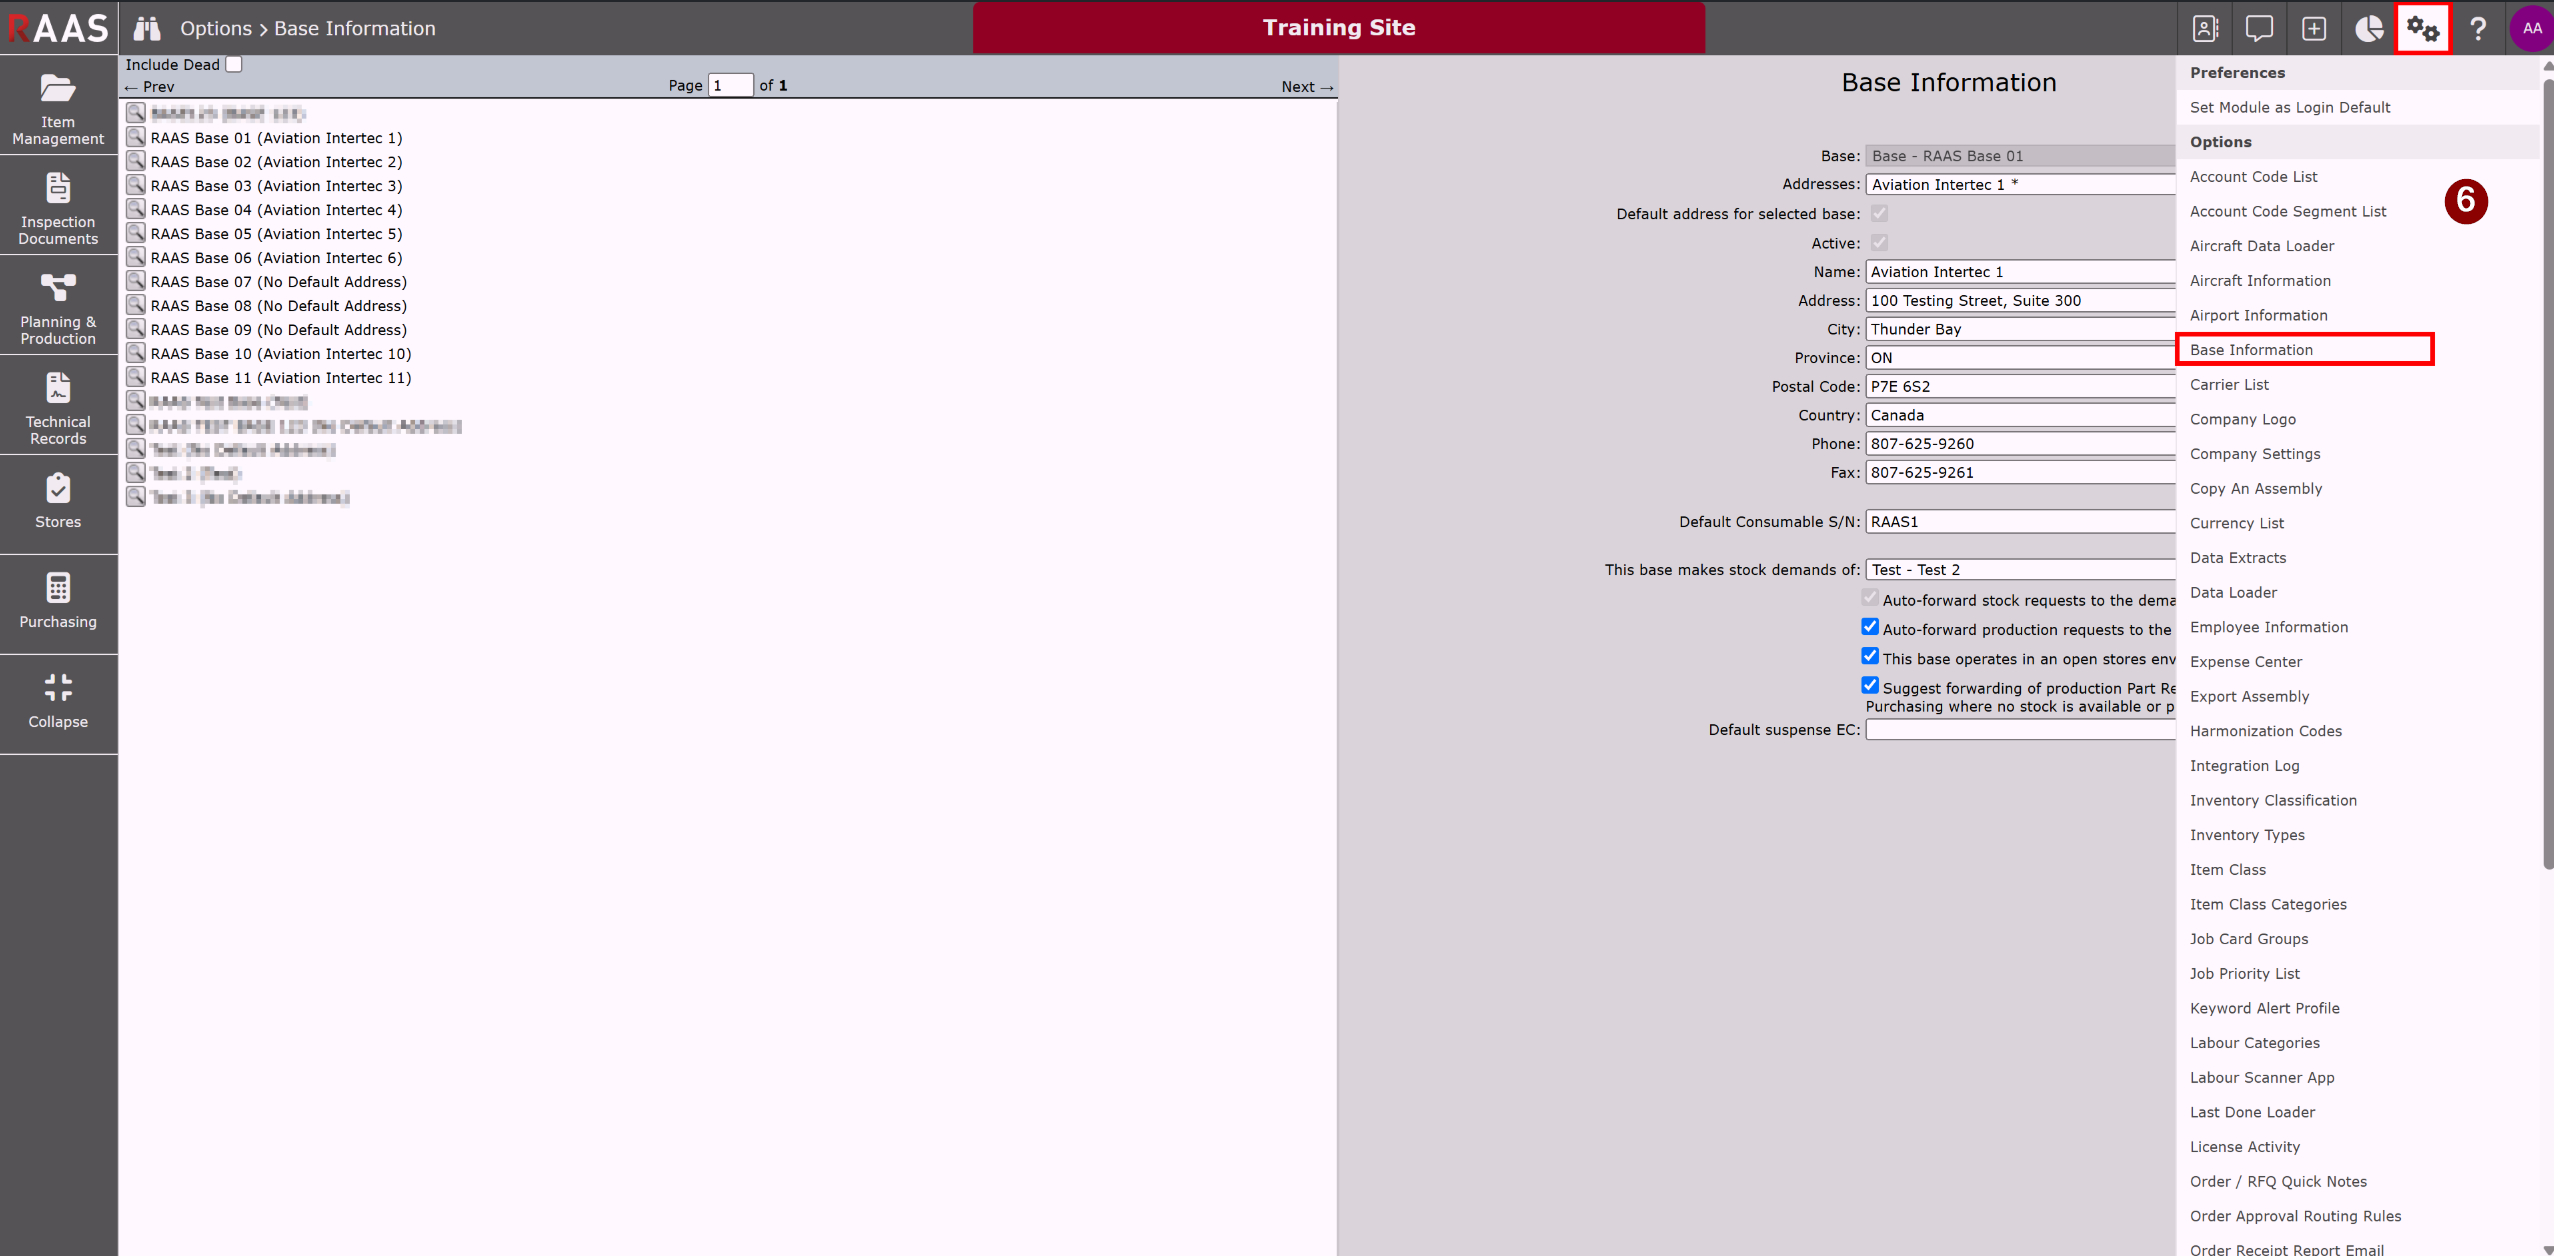
Click on the Settings icon and select Base Information from the drop-down menu.
-
Click on the magnifying glass icon to the left of a Base to edit it.
-
Add or edit the Address of the Base.
-
Enter or edit the Default Consumable S/N.
-
“This Base makes stock demands of:” can be used to automate the flow of Part Requests for a multi-base operation. For example, in Figure 2, Part Requests from Base 4 would be automatically forwarded to Base 10.
-
Auto-forward production requests to the demand base: select this option to automate the flow of part requests from Job Cards.
-
This base operates in an open stores environment: select this if the base operates in an open stores environment.
-
Suggest forwarding of production Part Requests: select this option to automatically forward a part request to the purchasing inbox.
-
-
Select a Default suspense EC, if applicable.
-
Click Save.