Setting up and maintaining aircraft assemblies is a complex process in any maintenance environment. The need to track modifications, alternate part numbers, effectivities, and update as airworthiness requirements change can be a full-time job.
The RAAS Configuration Utility is used to define configuration for a particular assembly (an arrangement of the parent/child relationships between part/inspection installations within RAAS), provide support in performing batch part builds, as well as reporting on configuration violations within the utility itself.
Configuration Glossary
There are a few key concepts and terms to be defined to support the full understanding of the Configuration Utility, as mentioned below:
-
Master Configuration
-
This represents the ideal configuration for a particular Part Number. This will ideally include all potentially applicable components and tasks associated to a particular Part Number, such as a weight check, an Airworthiness Directive, and hydrostatic test installed to a Fire Extinguisher.
-
-
Header Item
-
This refers to the top-most item within a RAAS assembly hierarchy. For an Aircraft, this would be the tail itself.
-
-
Alternate Part Numbers
-
Part numbers within RAAS which belong to the same Part Description and are interchangeable (in most cases) in terms of component installation, or stores receipt processes.
-
-
Built Assembly
-
A built assembly refers to an assembly that exists within RAAS data structures. This would be any example of an assembly that you can find within the Assembly Tree.
-
-
Unbuilt Assembly
-
An item which has a Master Configuration defined, but does not yet have any of the required items created within RAAS.
-
-
Local Assembly
-
A Built Assembly when viewed by the Configuration Utility in reference to the Header Item of an Assembly.
-
-
Nested Configurations
-
Nested Configuration refers to the concept that a large Master Configuration for a particular item (ie an Aircraft) will contain many smaller Master Configurations, such as an Engine, a Propeller, Fire Bottles, etc. These can in-turn, also have their own Nested Configurations.
-
-
Recursive Configurations
-
Recursive Configurations refers to the concept that a Nested Configuration may contain the same Part Number at multiple levels of a Configuration hierarchy. For example, a complex Landing Gear structure, may use the same Part Number for bolts installed to the Main Landing Gear, as well as installed to the Shock Strut. If the need for a Recursive Configuration is identified, this may point to a need to configure a particular assembly differently. This will require discussion with operational stakeholders for that particular assembly.
-
Defining a Master Configuration
The Master Configuration may only be defined on the Part Number Detail window for a particular configuration. There are two methods in which a configuration may be defined:
-
Build from Serial Number
-
The Build from SN function will re-create the Master Configuration using the Local Assembly of the selected Serial Number. Existing Nested Configurations will be replaced.
-
By selecting the Build button in the Master Configuration window, you will be prompted to select an existing Serial Number for that particular Part Number.
-
By choosing a Serial Number, the existing configuration (if any) will be deleted, and a new configuration will be created using that Serial Number’s Local Assembly as the basis.
-
Note: If a Nested Configuration needs to be changed, it is recommended that you make modifications to the Master Configuration for that Part Number.
-
Manual Addition
-
By selecting the Add button in the Master Configuration window, you may utilize RAAS' tiered search function to add individual Part Numbers to a given configuration.
-
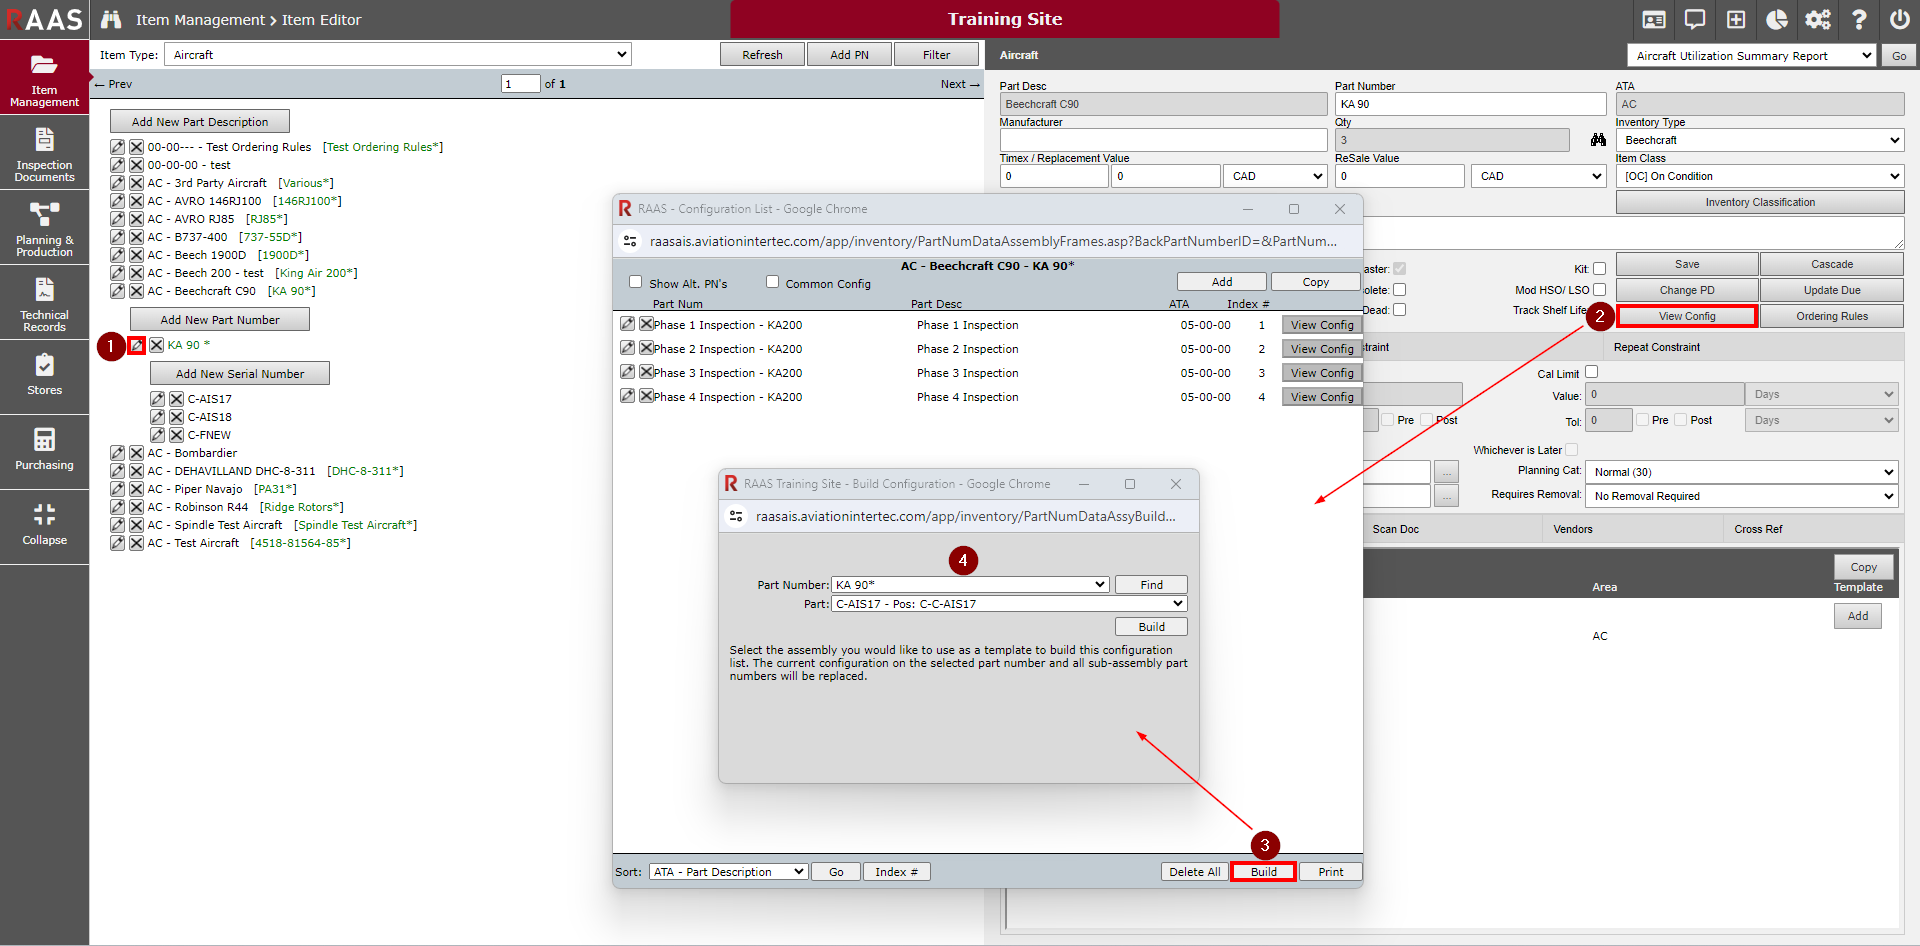
Building a Configuration from a Serial Number
Navigate to Item Management > Item Editor
-
At the Part Number level, click on the pencil icon.
-
Click the View Config button.
-
Click Build to open a new window.
-
Select a Part Number from the dropdown and click Find. Select the Serial Number from the dropdown that you would like to use as a template to build the configuration from. Click Build to create the configuration based off of the selected Serial Number.
-
Note: This will delete any existing configuration info for the Part Number you are building the configuration for, replacing it with the new info.
-
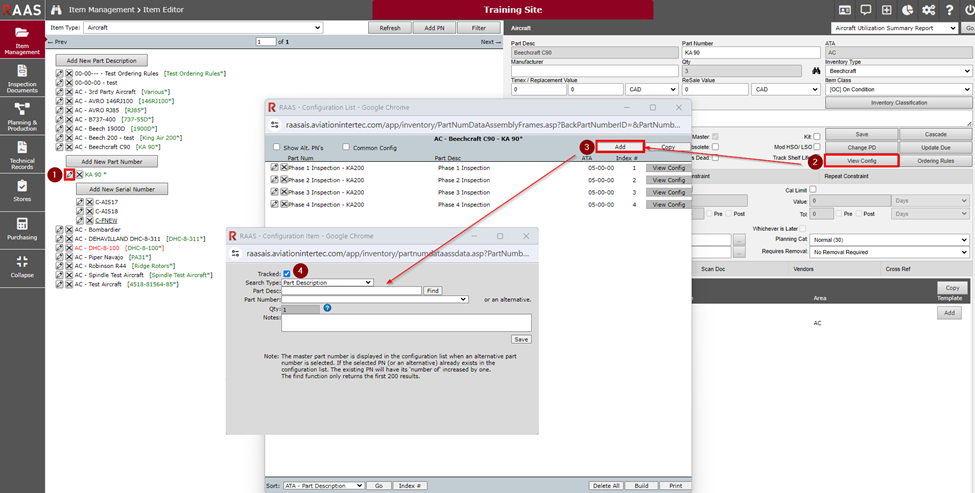
Manually Adding Parts to a Configuration
Navigate to Item Management > Item Editor
-
At the Part Number level, click on the pencil icon.
-
Click the View Config button.
-
Click Add to open a new window.
-
Utilize RAAS' tiered search function to add an individual Part Number to the configuration by clicking Save.
-
Repeat Steps 3 and 4 for each additional item.
Utilizing the Configuration
When a Master Configuration is created for a Part Number, it can be used to quickly create many Serial Numbers at once when creating or editing a Serial Number under a Part Number that has a configuration setup.
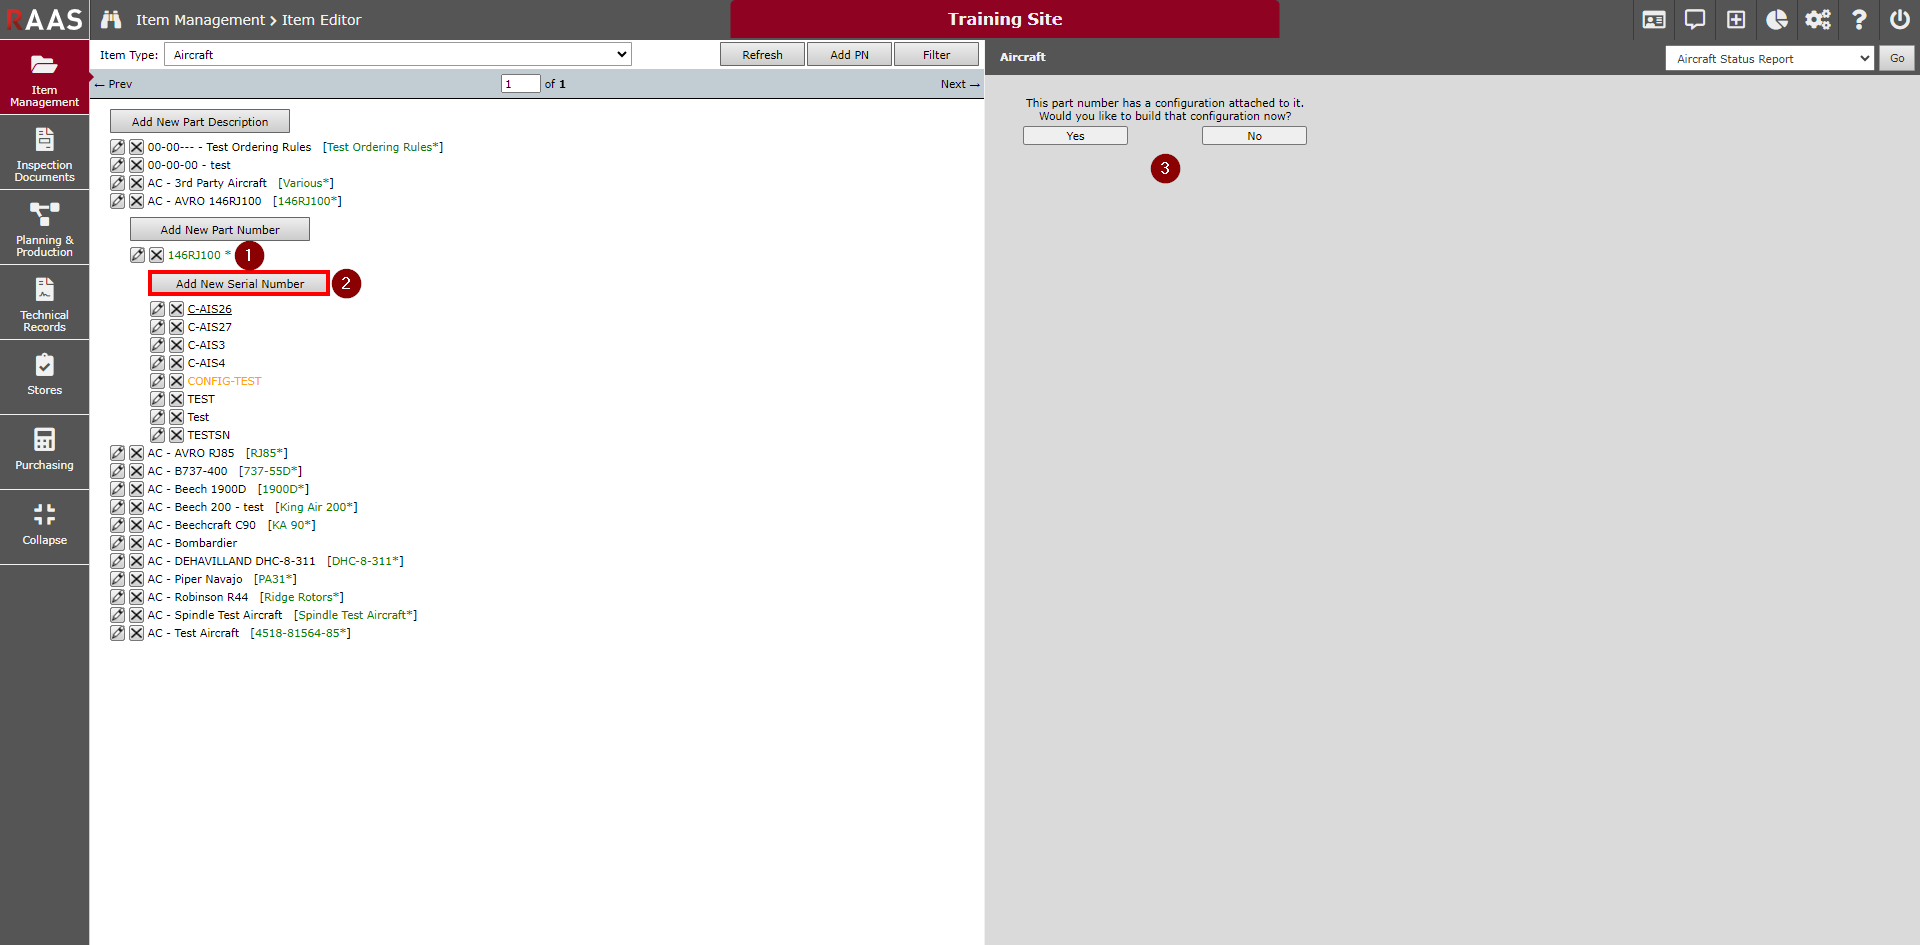
Building an Assembly for a New Serial Number
Navigate to Item Management > Item Editor
-
Click on a Part Number for which you would like to create a new Serial Number under.
-
Click on the Add New Serial Number button and enter the appropriate info for the Serial Number.
-
Once you click Save when creating the new Serial Number, the right-side pane will change to what is shown for Step 3 if a configuration exists for the Part Number that this Serial Number belongs to.
-
-
Click on Yes if you would like to build the assembly based off of the Master Configuration of the Part Number. Click on No if you do not want to do so at this time. To build the assembly at a later time, follow the steps pertaining to Figure 4.
-
Note: When the new items are created, RAAS will turn on the “Requires Set Up” flag by default, allowing the user to identify the newly created items to update any SNs, Hrs/Ldgs, or Next Due data.
-
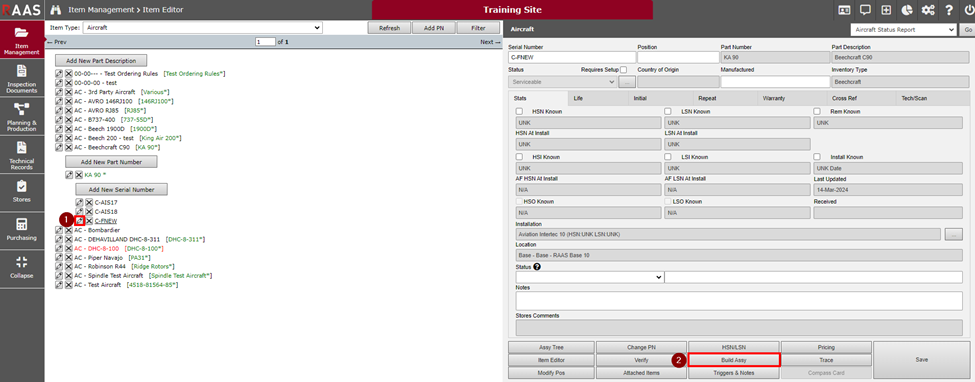
Building an Assembly for an Existing Serial Number
Navigate to Item Management > Item Editor
-
At the Serial Number level click on the pencil icon.
-
Click the Build Assy button.
-
Read through the alert messaging and click OK.
RAAS will consider existing attached items and ignore them but create the items that are missing.
Note: When the new items are created, RAAS will turn on the “Requires Set Up” flag by default, allowing the user to identify the newly created items to update any SNs, Hrs/Ldgs, or Next Due data.