Case collection allows for the grouping of individual defect reports into “Cases”.
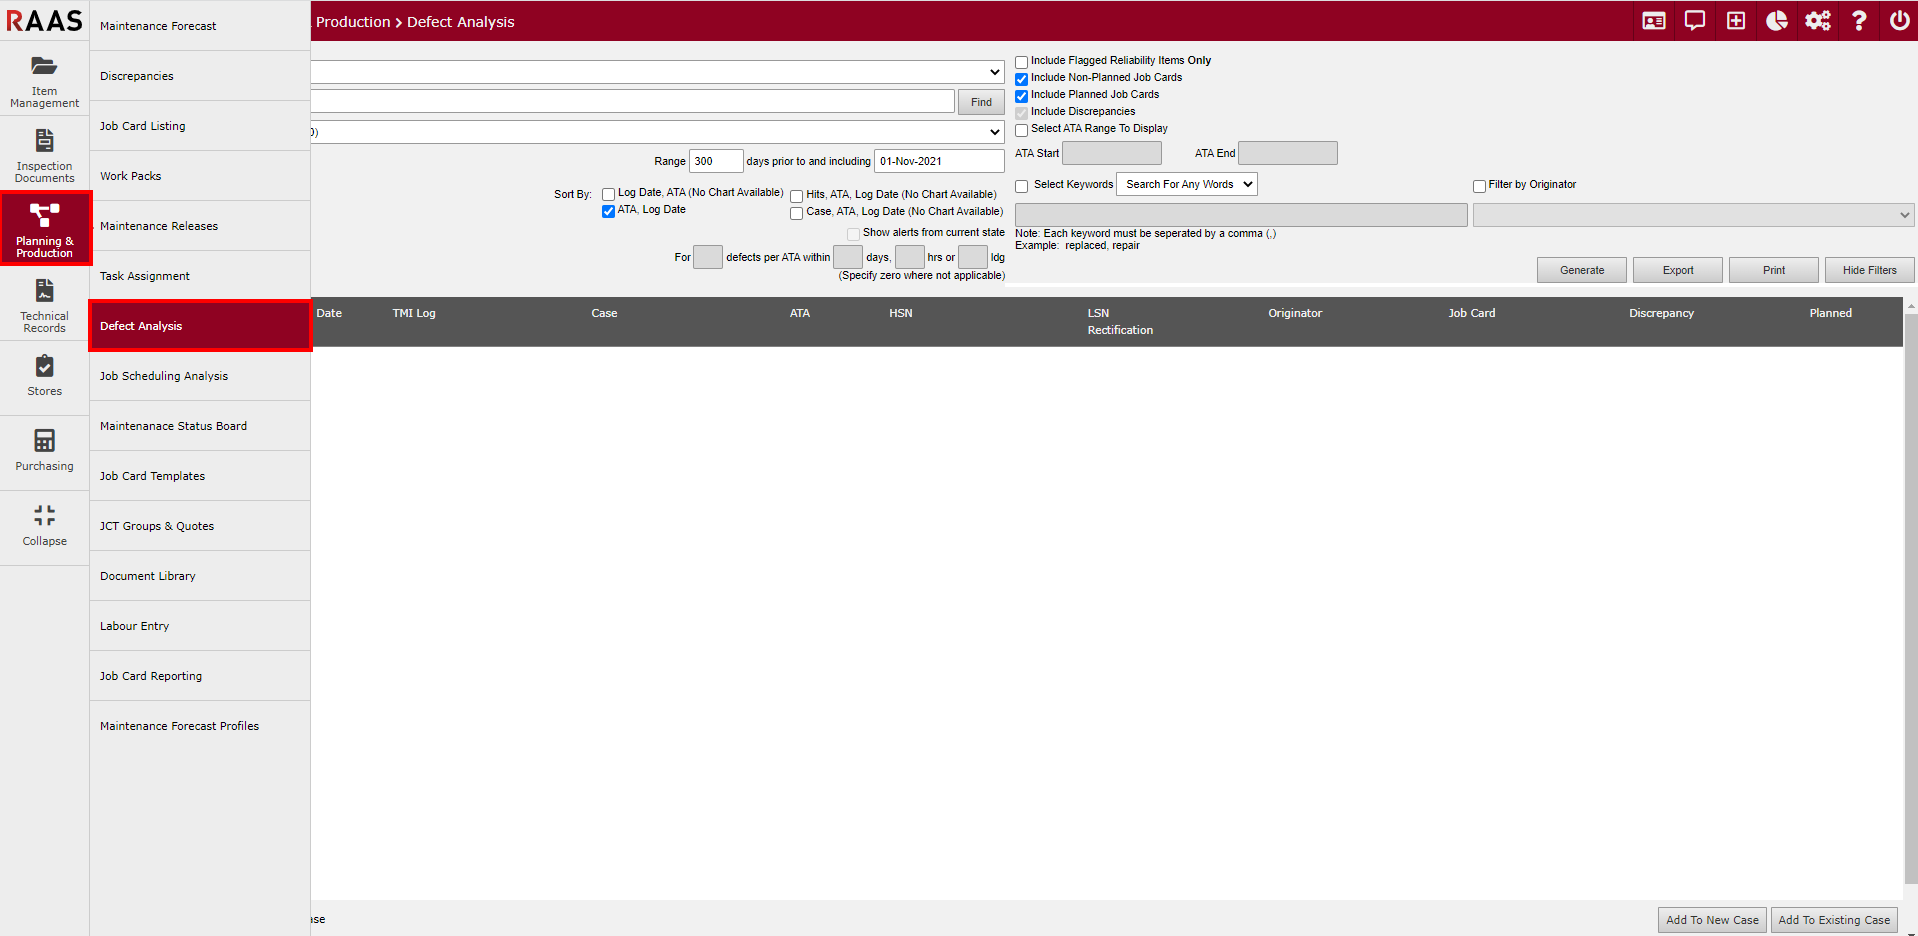
The Case details page can be opened directly from the Defect Analysis page.
Create Case
-
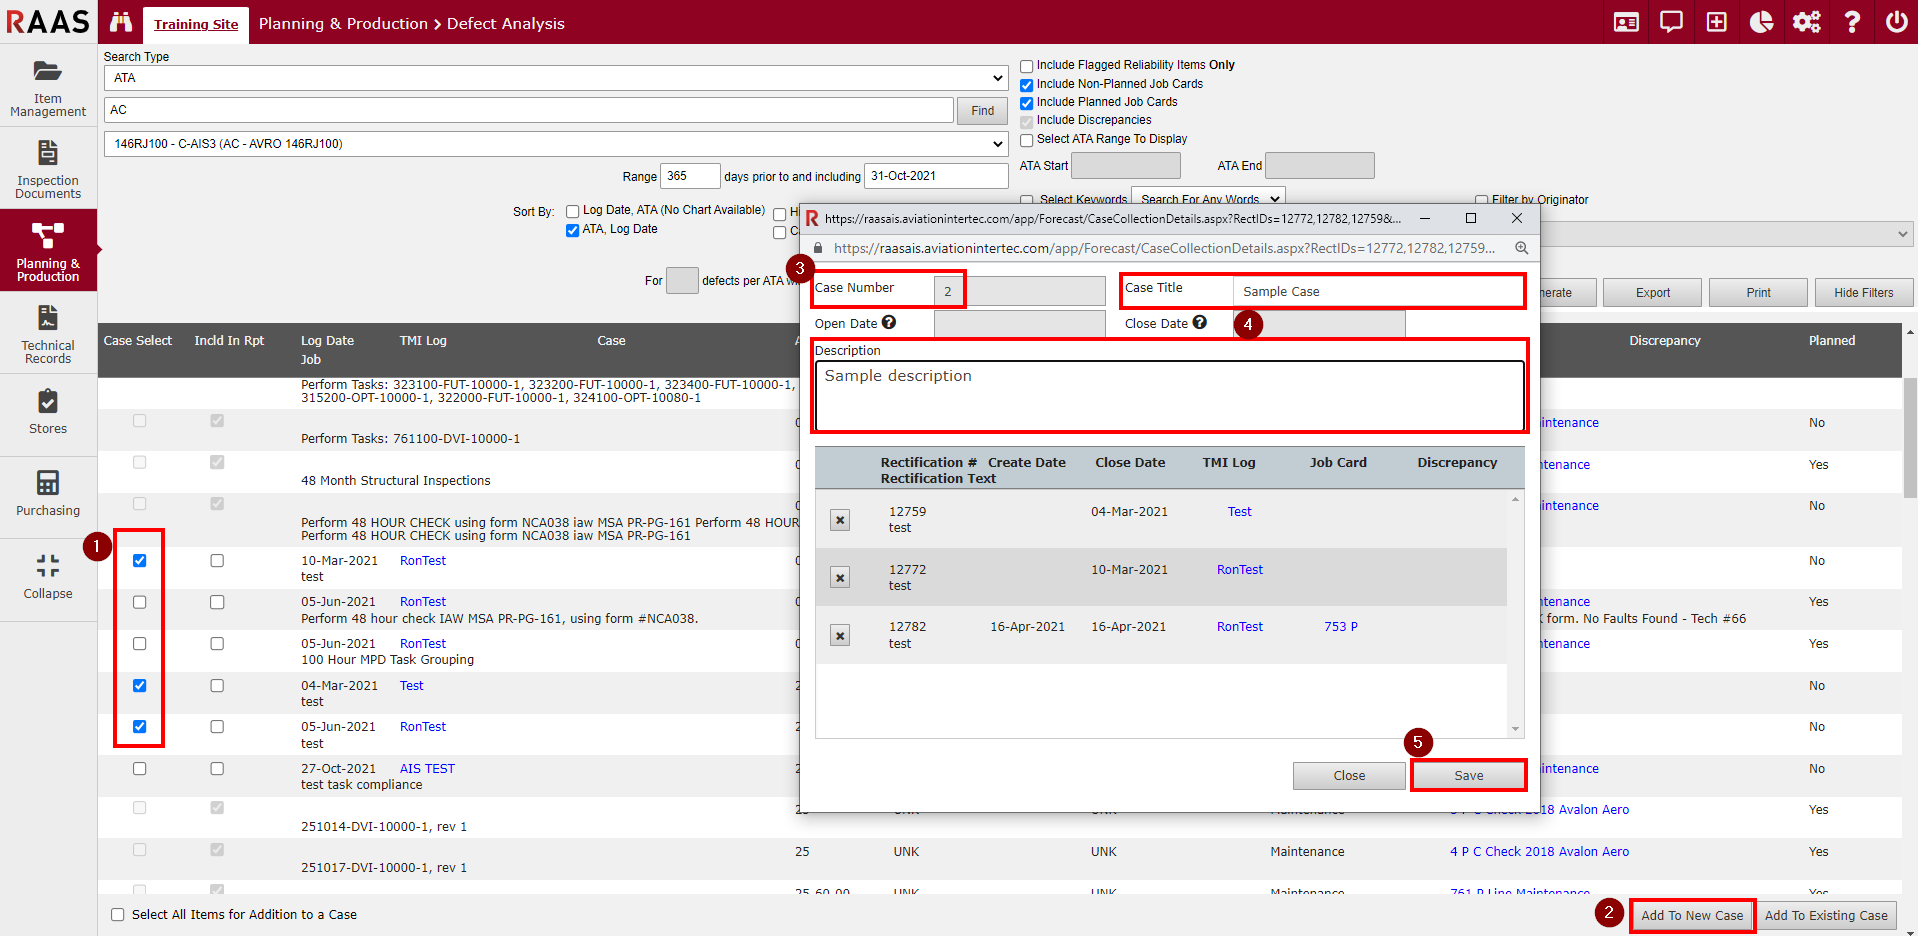
Select items using Case Select check box to add to a case.
-
Select Add To New Case.
-
Case Number is automatically generated.
-
Enter Case Title and Description as desired.
-
Select Save.
Add to Existing Case
-
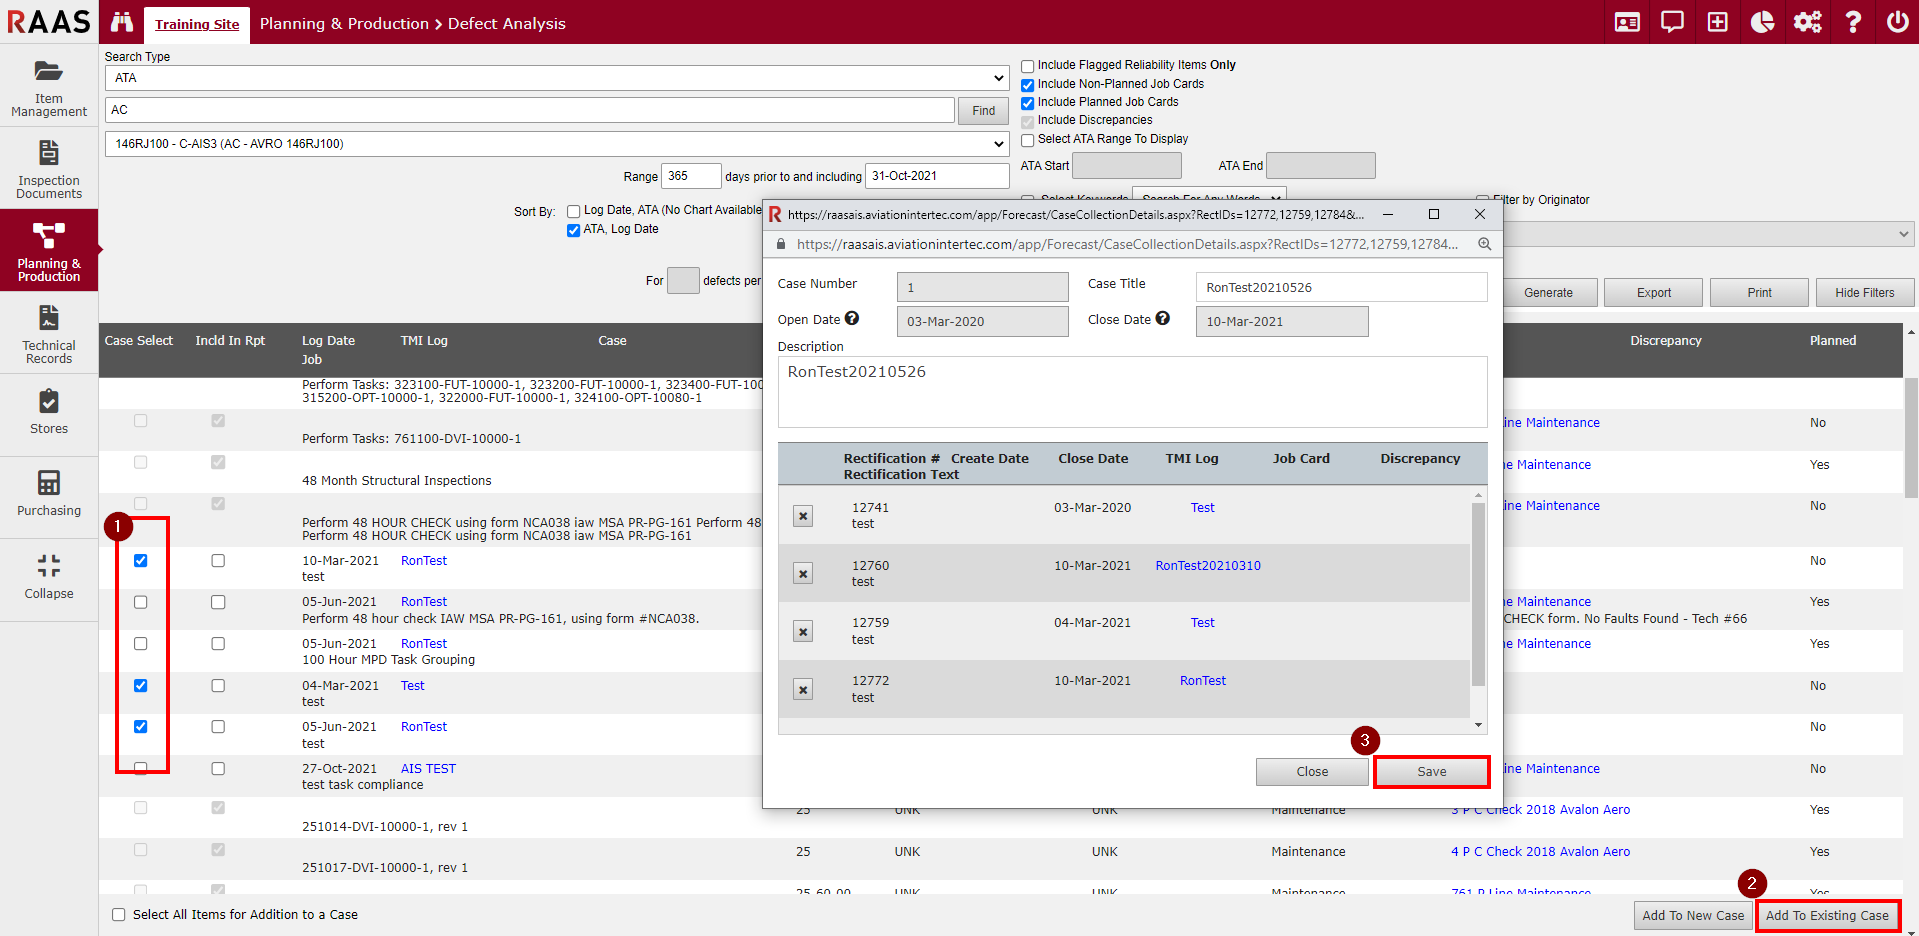
Select items using the Case Select check box to add to a case
-
Select Add To Existing Case
-
Select Save
Edit a Case
-
Navigate to a Case via the case number link in the defect listing.
-
Select ‘x’ to remove a defect.
-
Select Save.
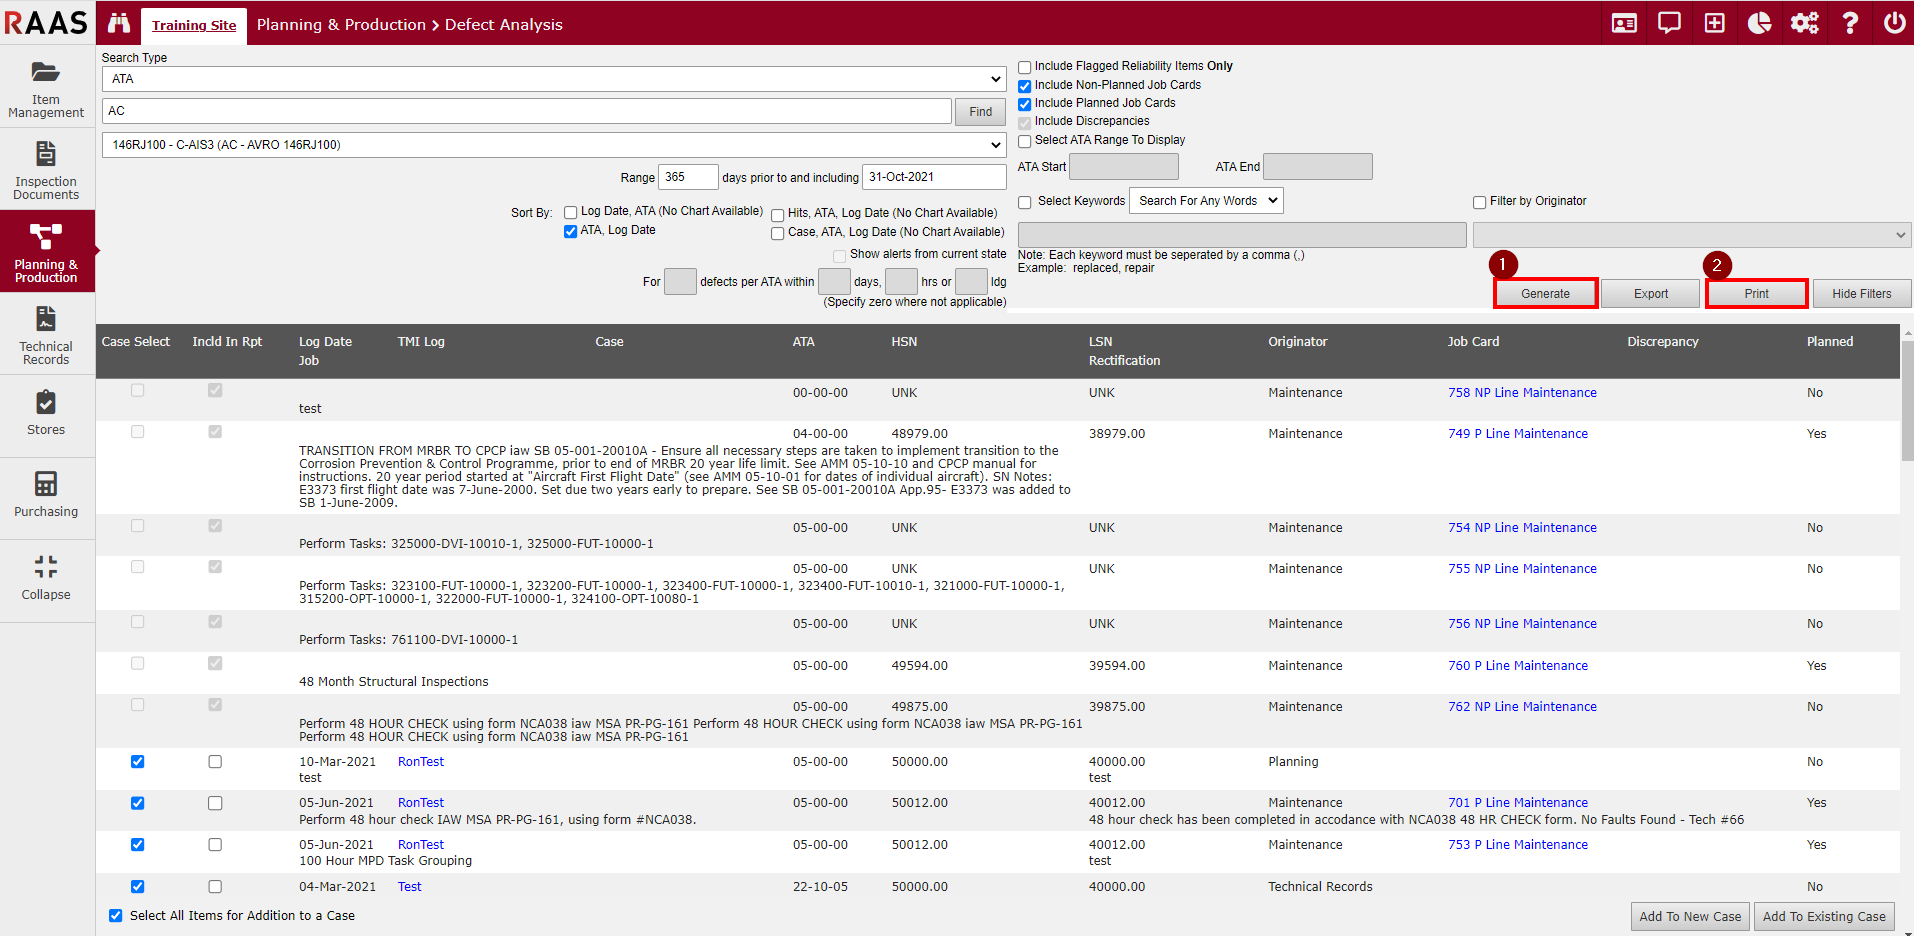
Print or Export
-
Select Export for xml extract
-
Select Print for PDF output
Cases are included in regular Defect Analysis Reports.