To delete a part, you must begin by deleting items from the lowest level up. If you want to delete a Part Description, you must first delete all Serial Numbers associated to all Part Numbers listed under the Part Description you want to delete. Then you must delete all Part Numbers listed under the Part Description. Now, you can delete the Part Description.
Note:
Serial numbers cannot be deleted once history has been accumulated. When this is the case, a serial number's current installation can be changed to Dead. If not all serial numbers under a part number can be deleted, the Treat as Dead flag can be checked at both the part number detail and part description detail screens. The Item Editor part listing can be filtered to show serial numbers in Dead and part numbers and part descriptions with Treat as Dead checked on.
Navigation
-
Click on Item Management and select Item Editor. Click on the binoculars to open the Quick Find.
-
Using Quick Find, select the desired search type from the dropdown, enter the criteria and click Find.
-
Select the applicable resultant and click the Item Editor button. The Quick Find window will close, the window will refresh and display the selected resultant's details.
Deleting a Part
When there is more than one Part Number located under a Part Description, delete all associated serial numbers and that part number before moving on to the next Part Number in the list.
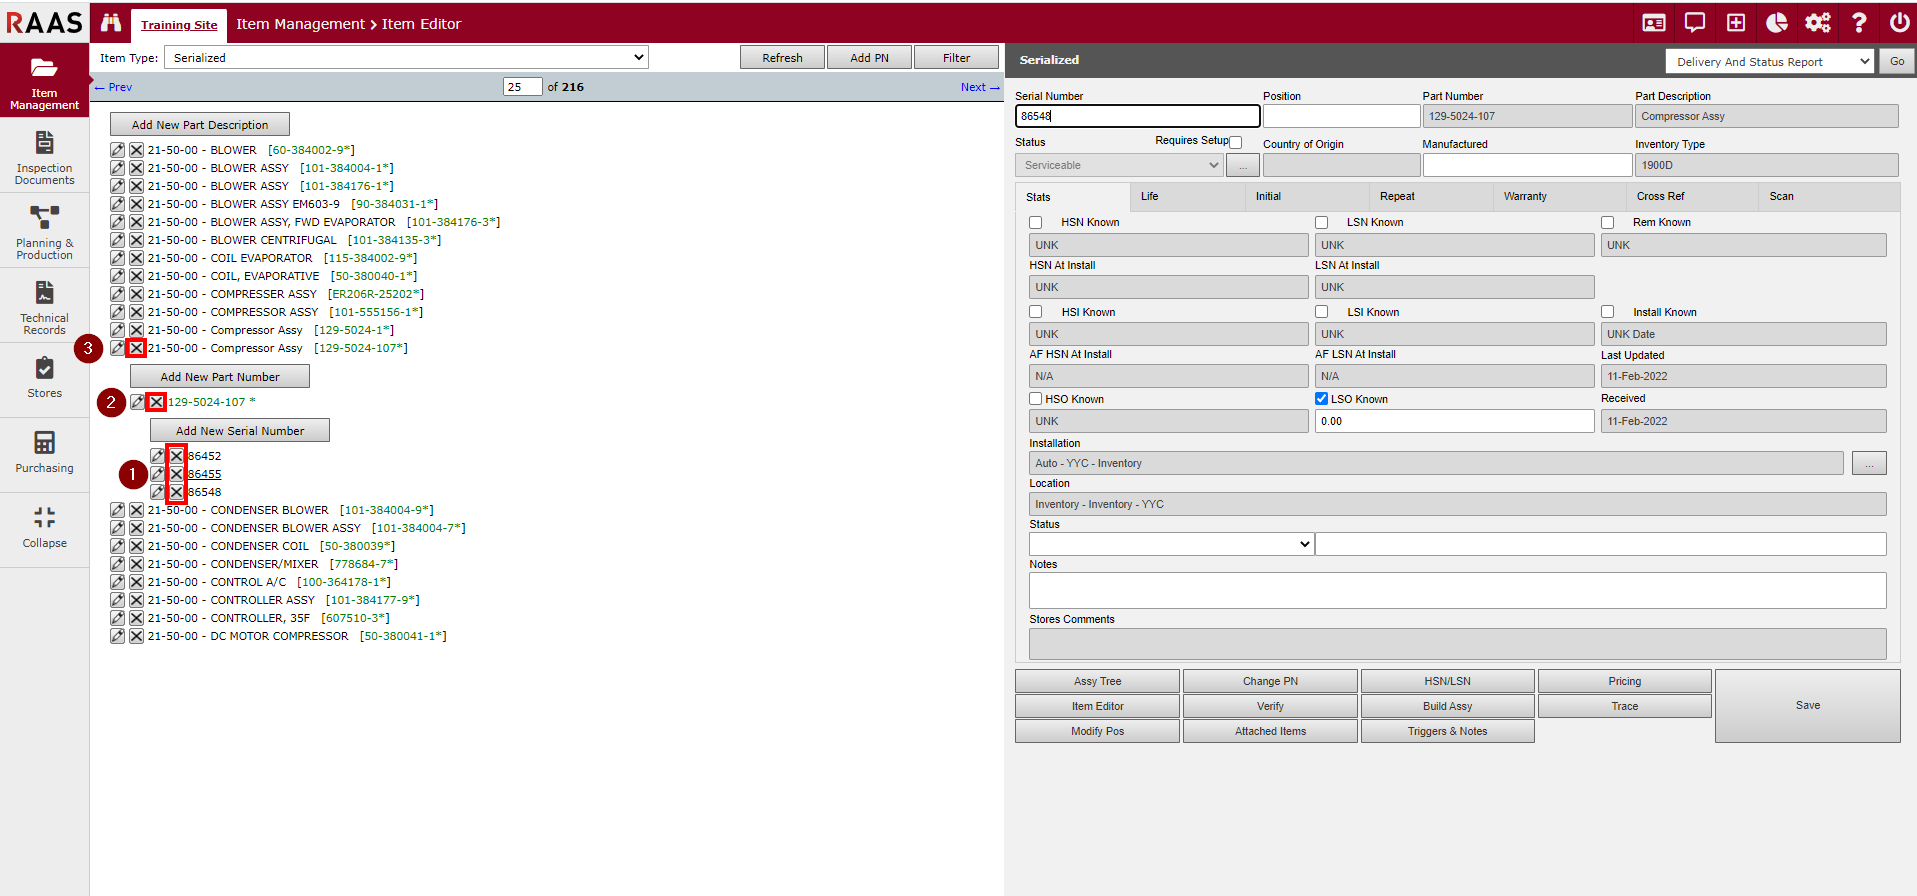
Use the Navigation instructions above to locate the Part Description to be deleted. Click the part description to display the associated part numbers. Click the part number to display the associated serial numbers.
If serial numbers have no history
-
For each Serial Number listed, click the 'X' button to delete it. Click OK when asked if you are sure you want to delete this.
-
Click the 'X' to delete the Part Number.
Repeat steps 1 and 2 to delete any additional Serial Numbers and Part Numbers under the targeted Part Description. -
Click the 'X' to delete the Part Description.
If serial numbers have history
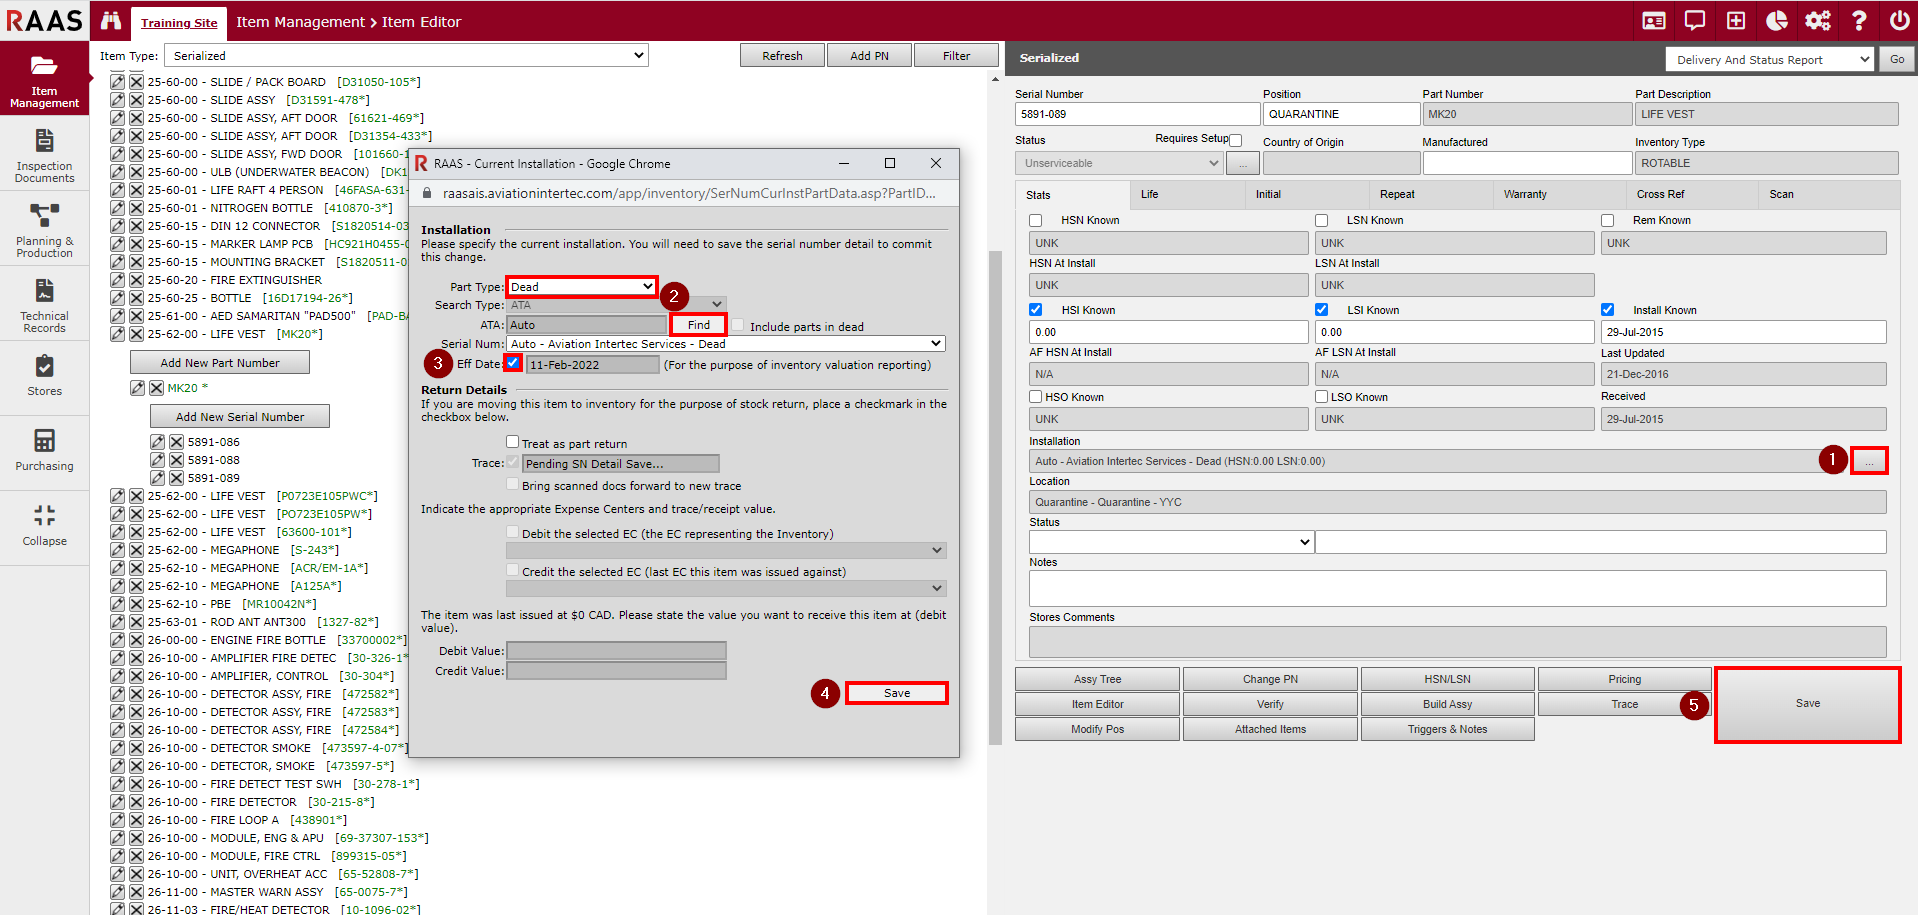
Move Serial Numbers to Dead
-
On the Serial Number, click on the ellipse (...) to the right of the Current Installation.
-
The Part Type will need to be changed to ‘DEAD’.
-
Enter the Effective Date (Eff Date).
-
Click Save to update the Current Installation.
-
Click Save on the Serial Number.
-
Repeat until all Serial Numbers associated to the targeted Part Number have been moved to Dead.
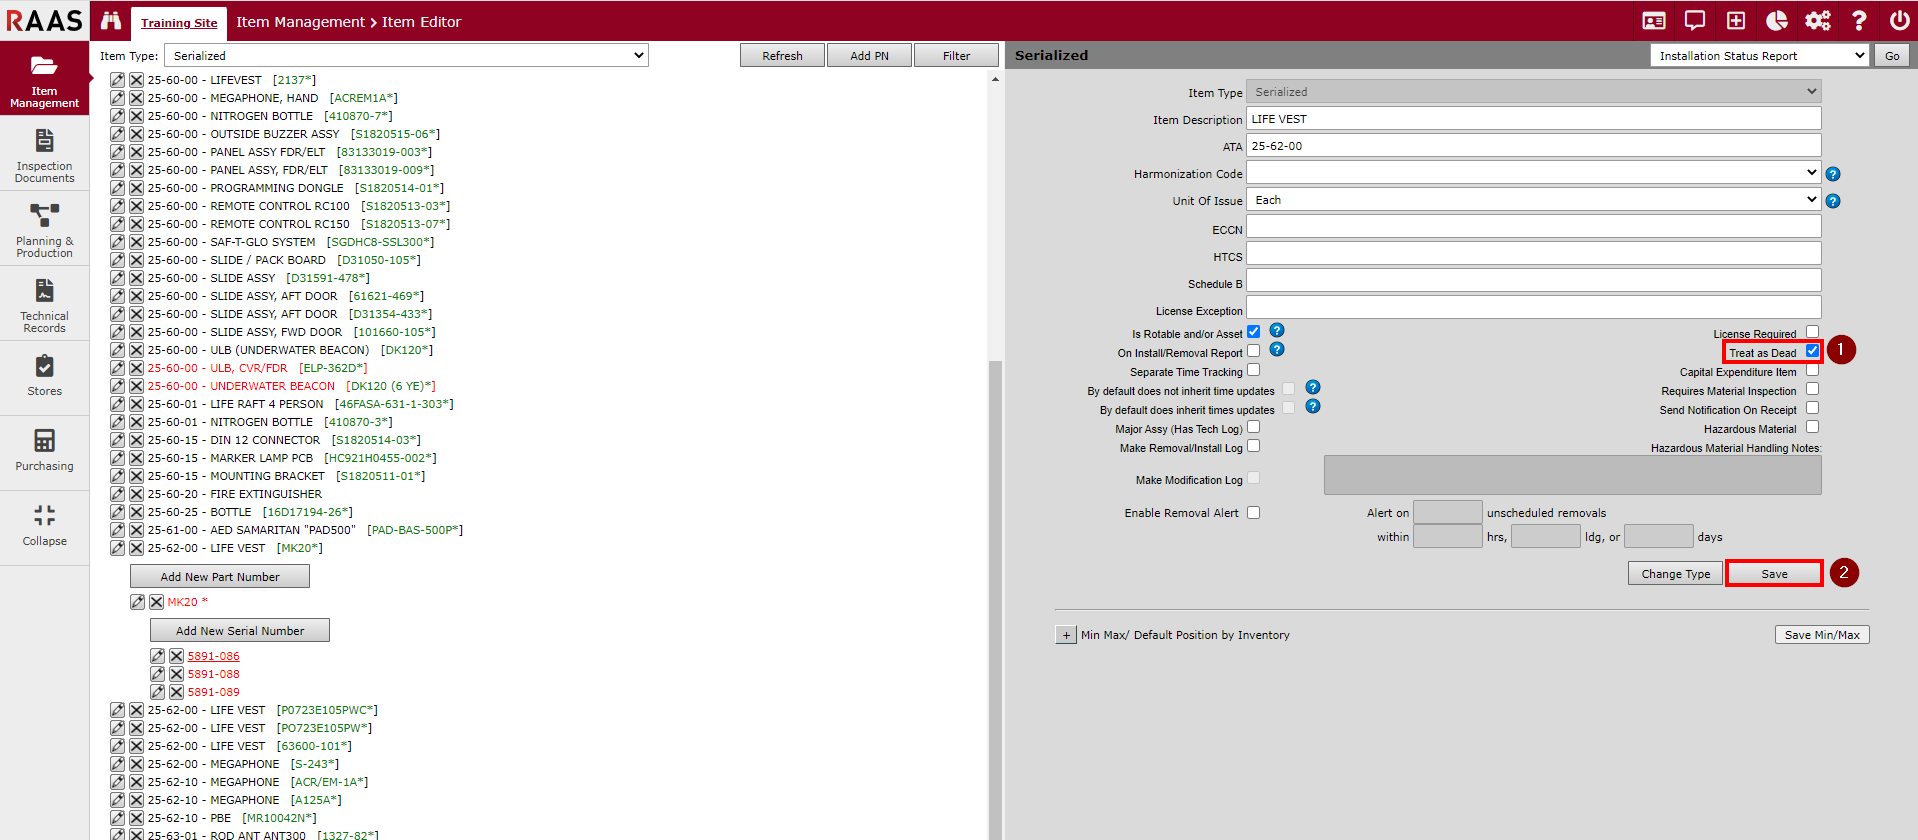
Treat Part Numbers as Dead
-
On the Part Number, select the Treat as Dead checkbox.
-
Click Save.
-
Repeat until all Part Numbers associated to the targeted Part Description are being treated as Dead.
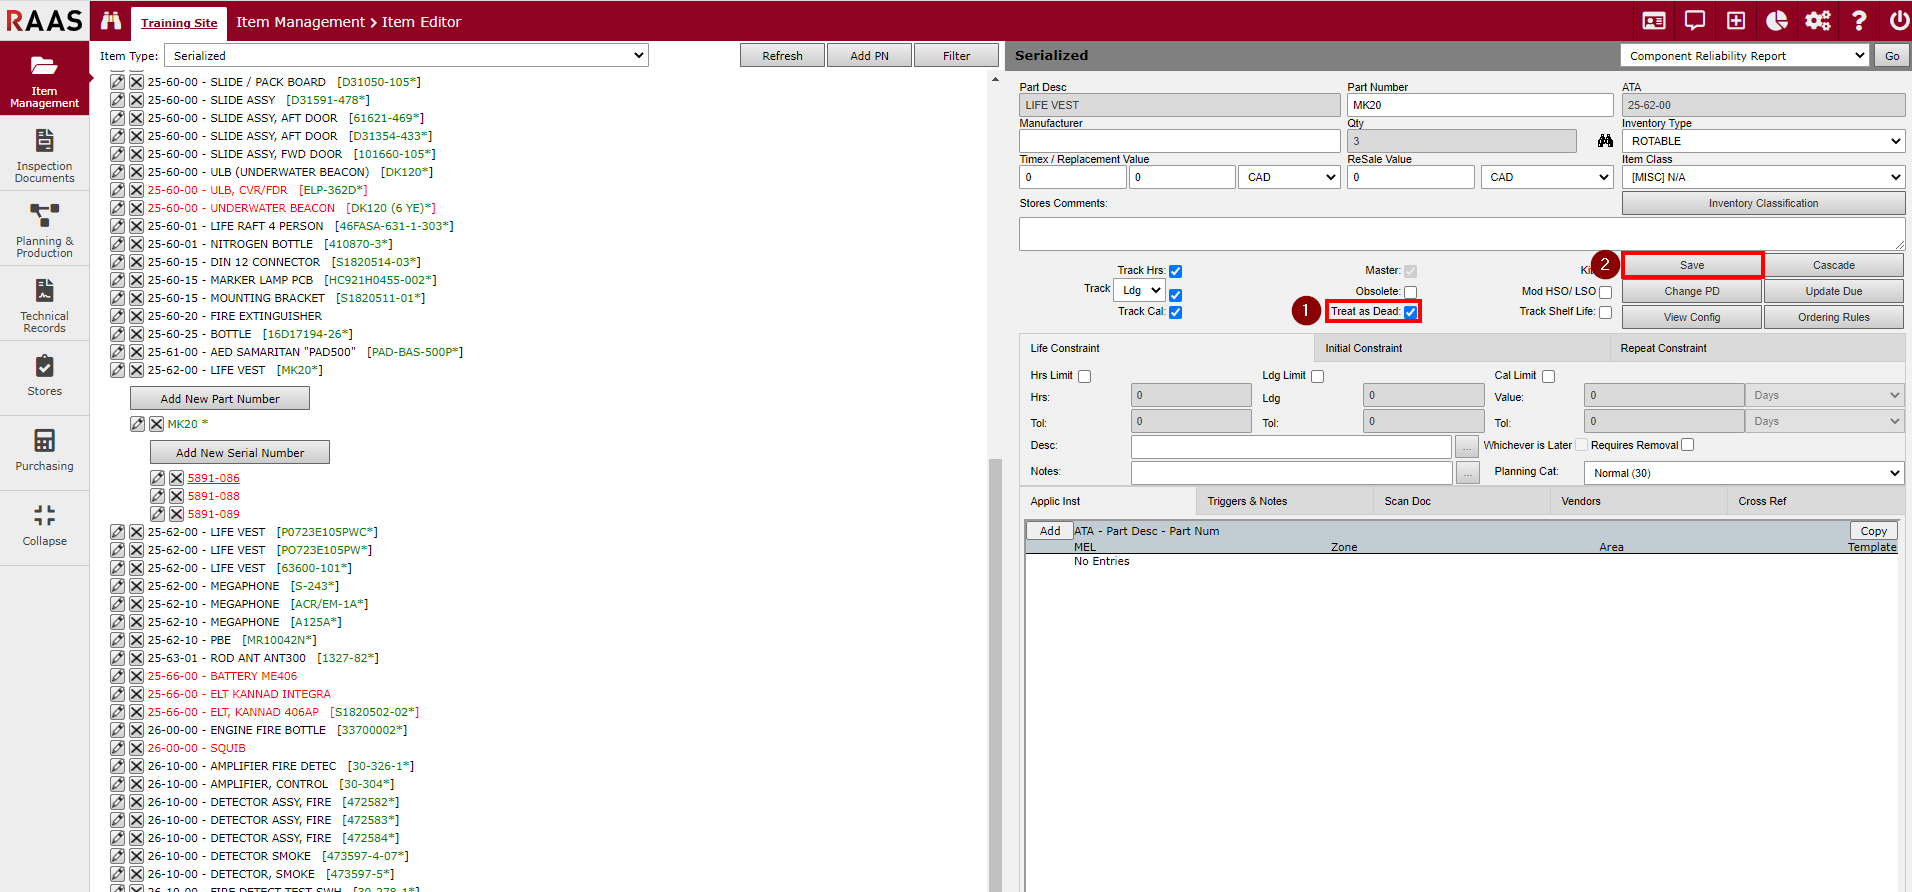
Treat Part Descriptions as Dead
-
On the Part Description, select the Treat as Dead checkbox.
-
Click Save.