The Document Library is a repository for any documentation that the user wishes to store within RAAS which in turn can be attached and brought forward to Job Cards via the Job Card Template.
-
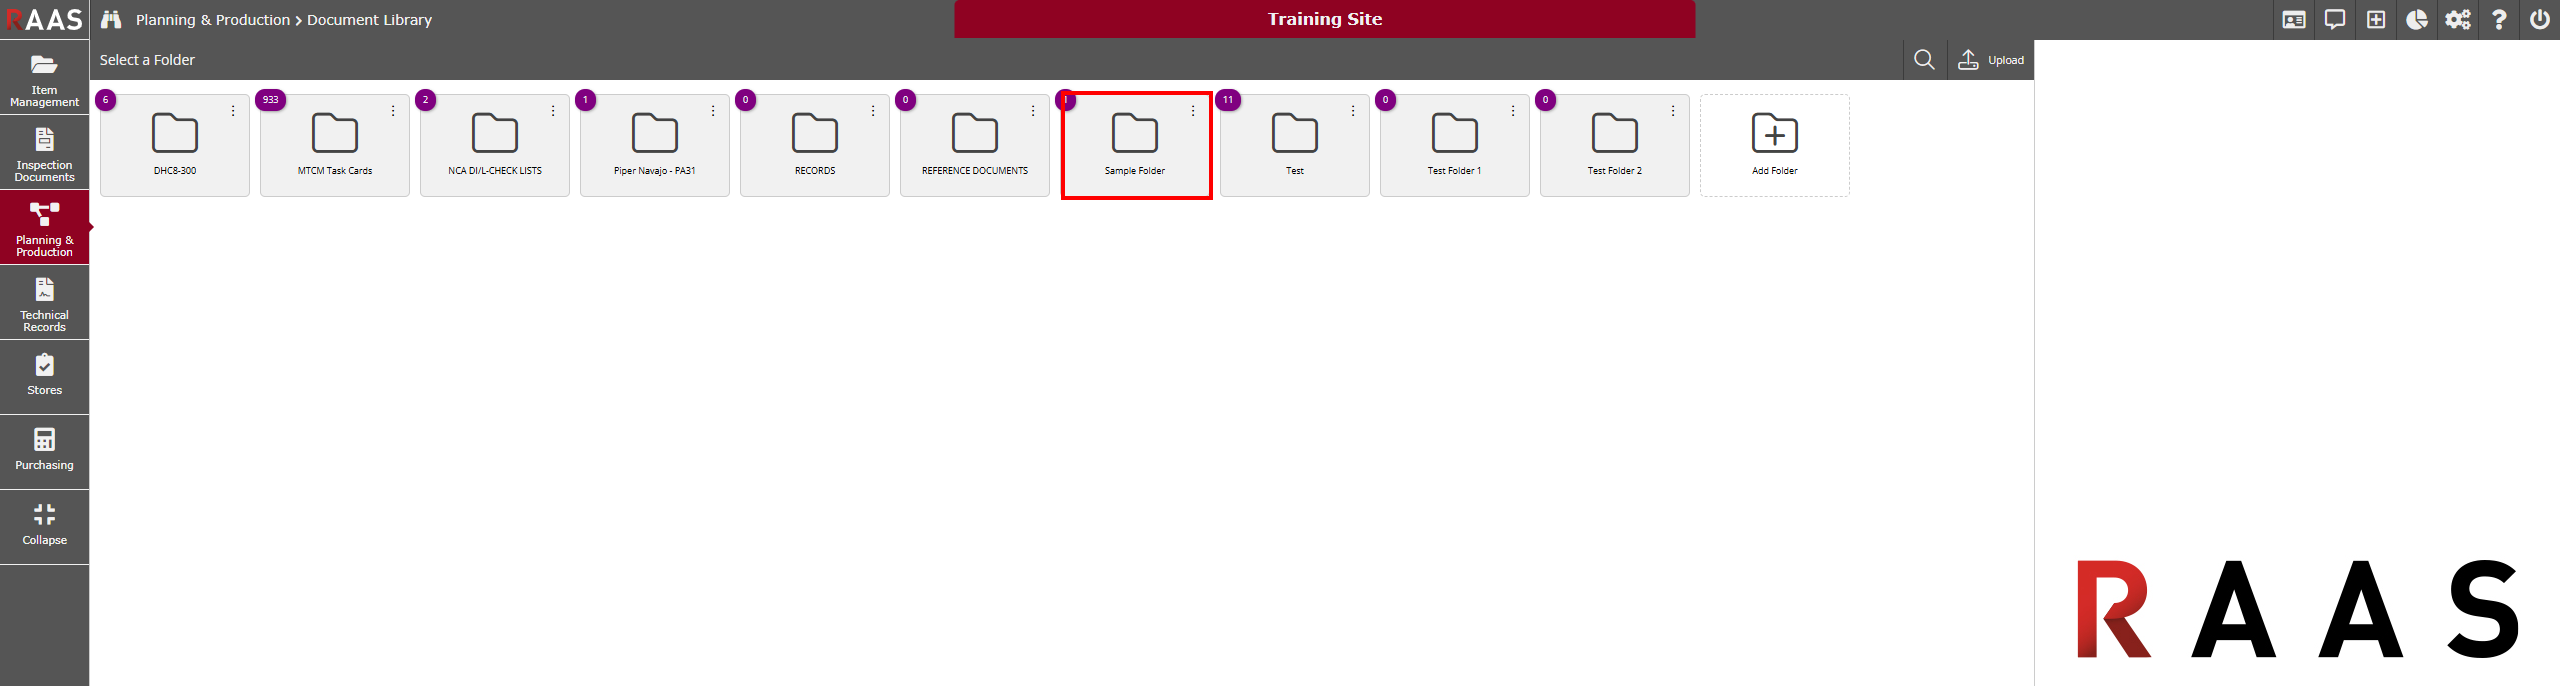
To view the Document Library, navigate to Planning & Production -> Document Library.
-
The number at the top-left of each folder shows how many files are within each folder.

Creating a Folder
-
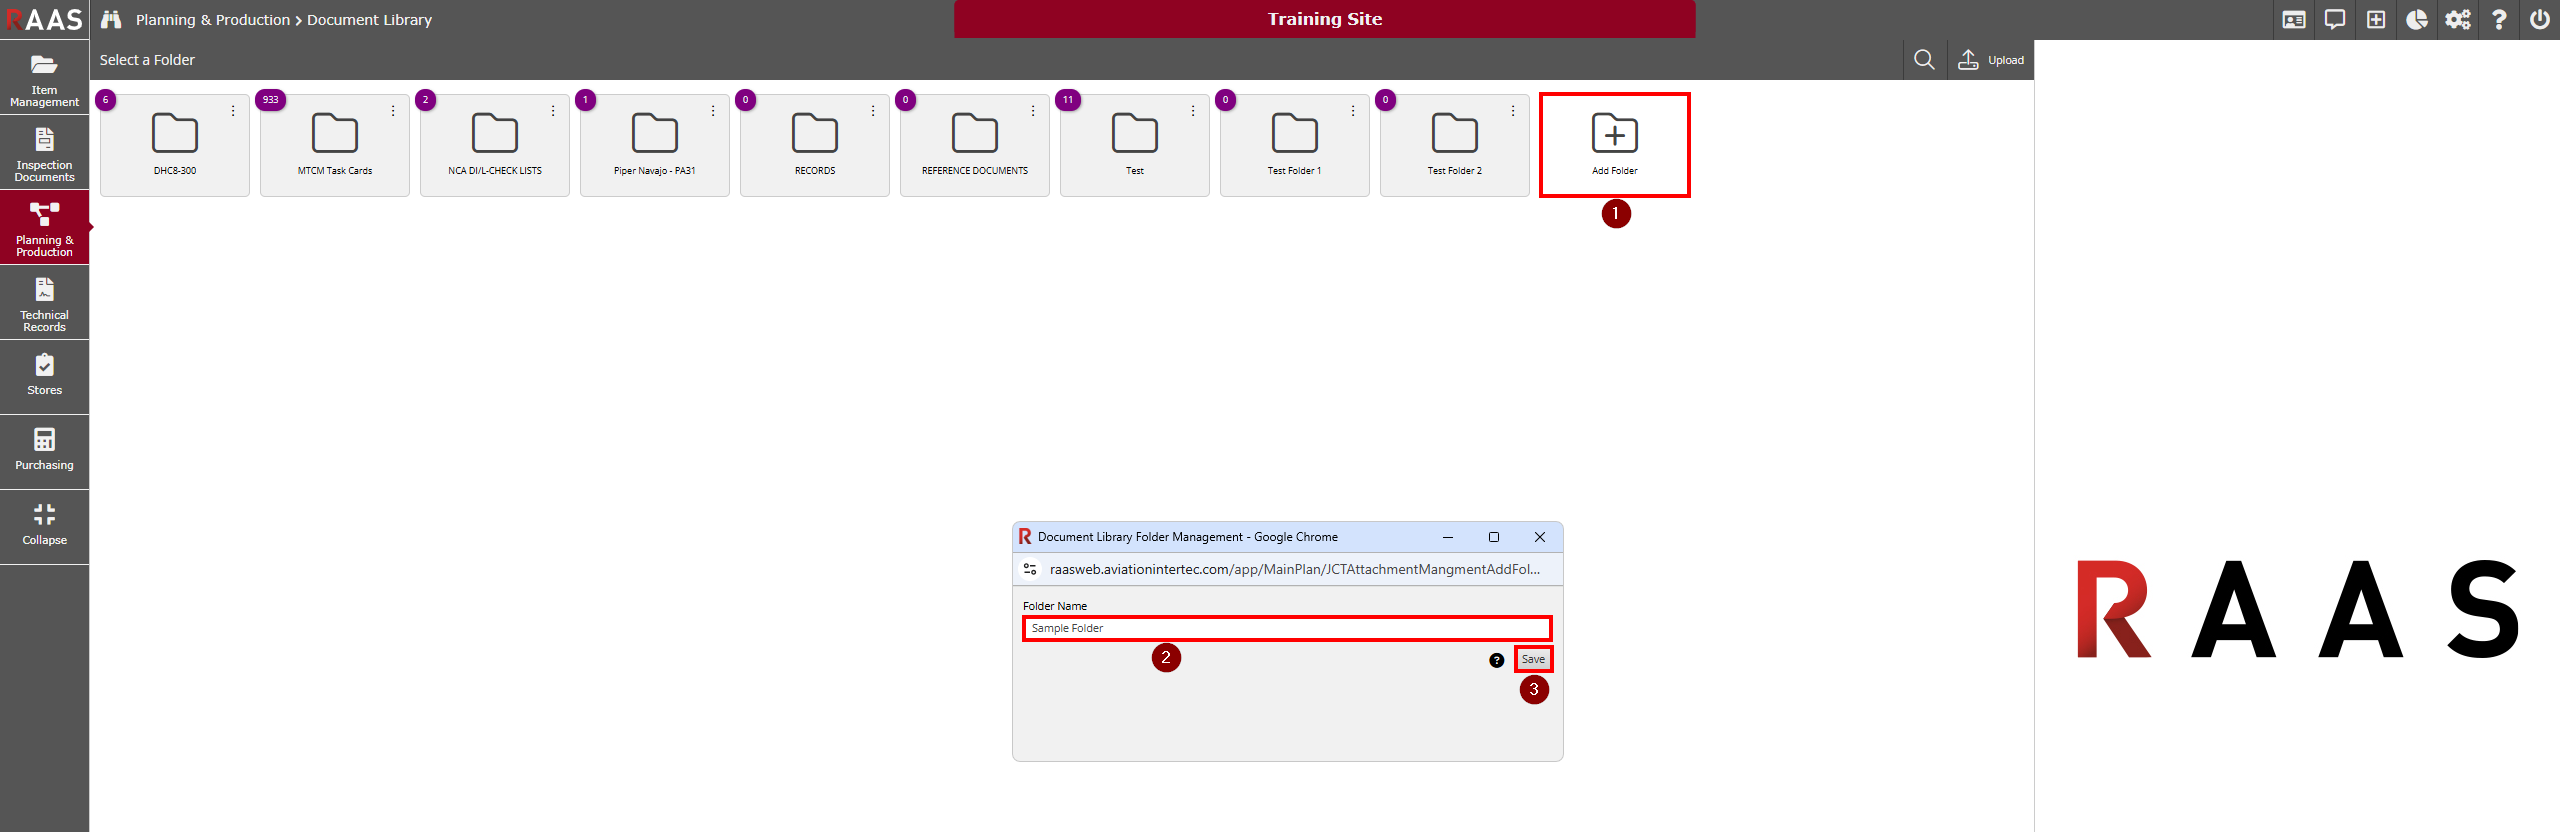
From the Document Library sub-module, click Add Folder.
-
Enter a folder name.
-
Click Save.
Note: The permissions for this folder will need to be set once the folder is saved. You can access folder permissions by clicking the folder options ellipsis on the main folder listing (see Folder Settings section below).
Folder Settings
-
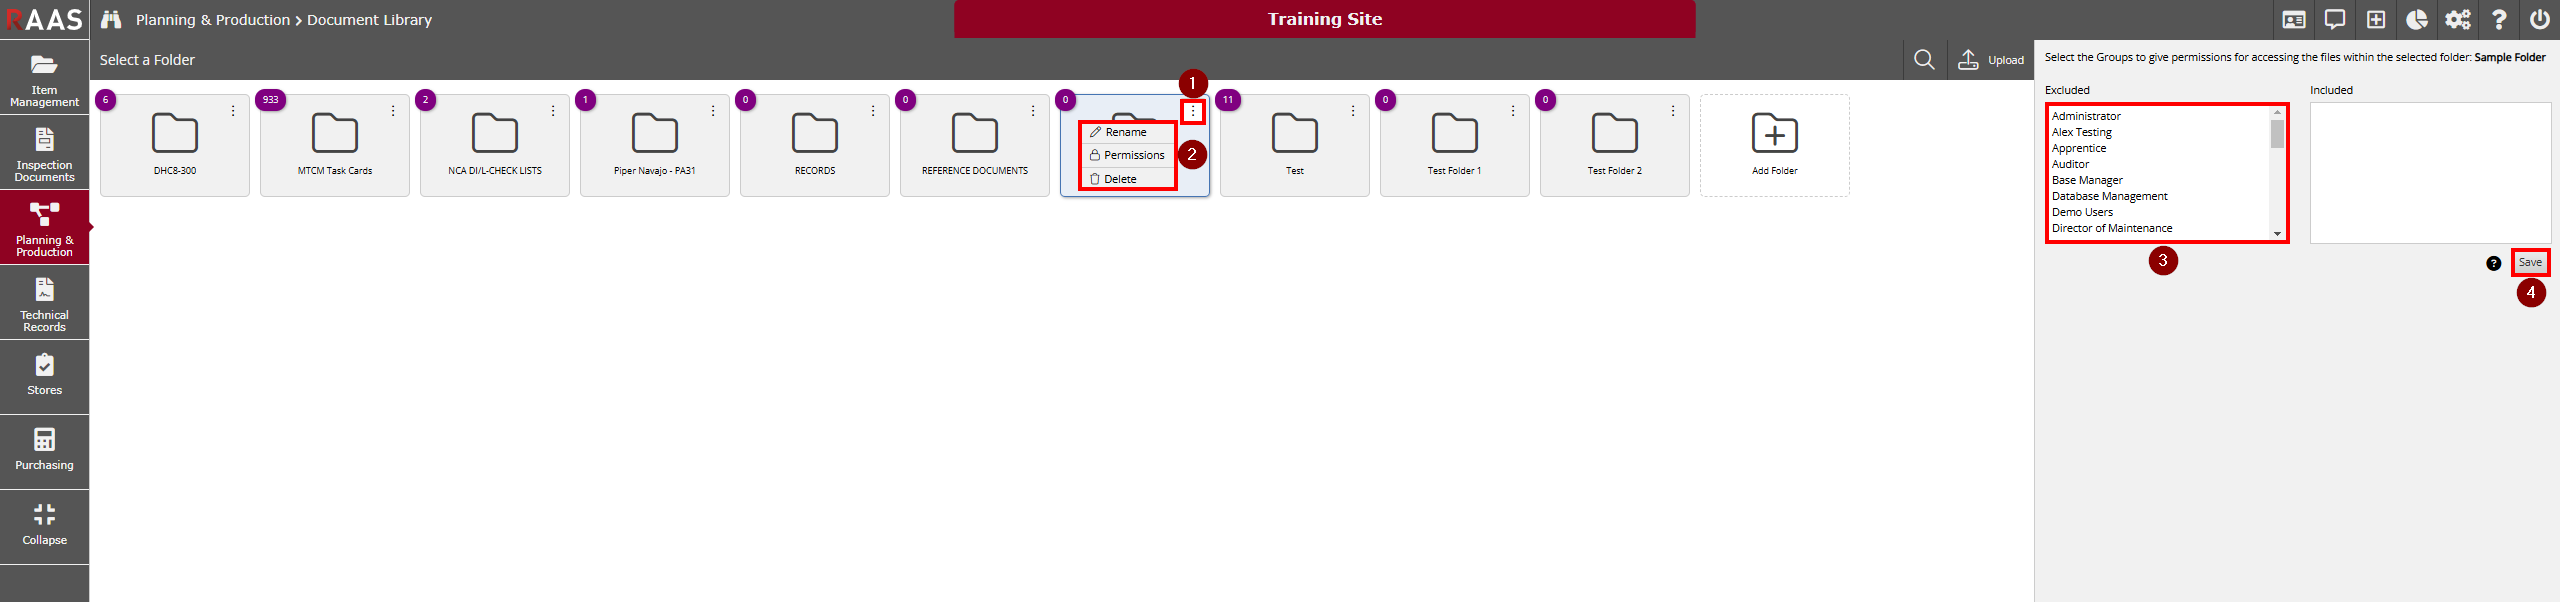
Click the vertical ellipsis of the folder you want to edit.
-
The following options are available:
-
Select Rename to change the name of the folder.
-
Select Permissions to add or remove User Groups from the permission list.
-
Select Delete to delete the folder.
-
-
Clicking on a User Group in the Excluded listing will add it the the Included listing and vice versa.
Note: The security role "Planning: View JCT File Attachment Repository" will supersede any permissions established here. Users with the stated security role will be able to view files across the repository but will only be able to manipulate the folders to which they have been assigned permission. -
Click Save.
Uploading File Attachments
-
From the Document Library sub-module, click the folder you would like to upload file attachments to (See Figure 6).
-
If selecting the wrong folder, click on the icon containing a folder with an up arrow in it.
-
-
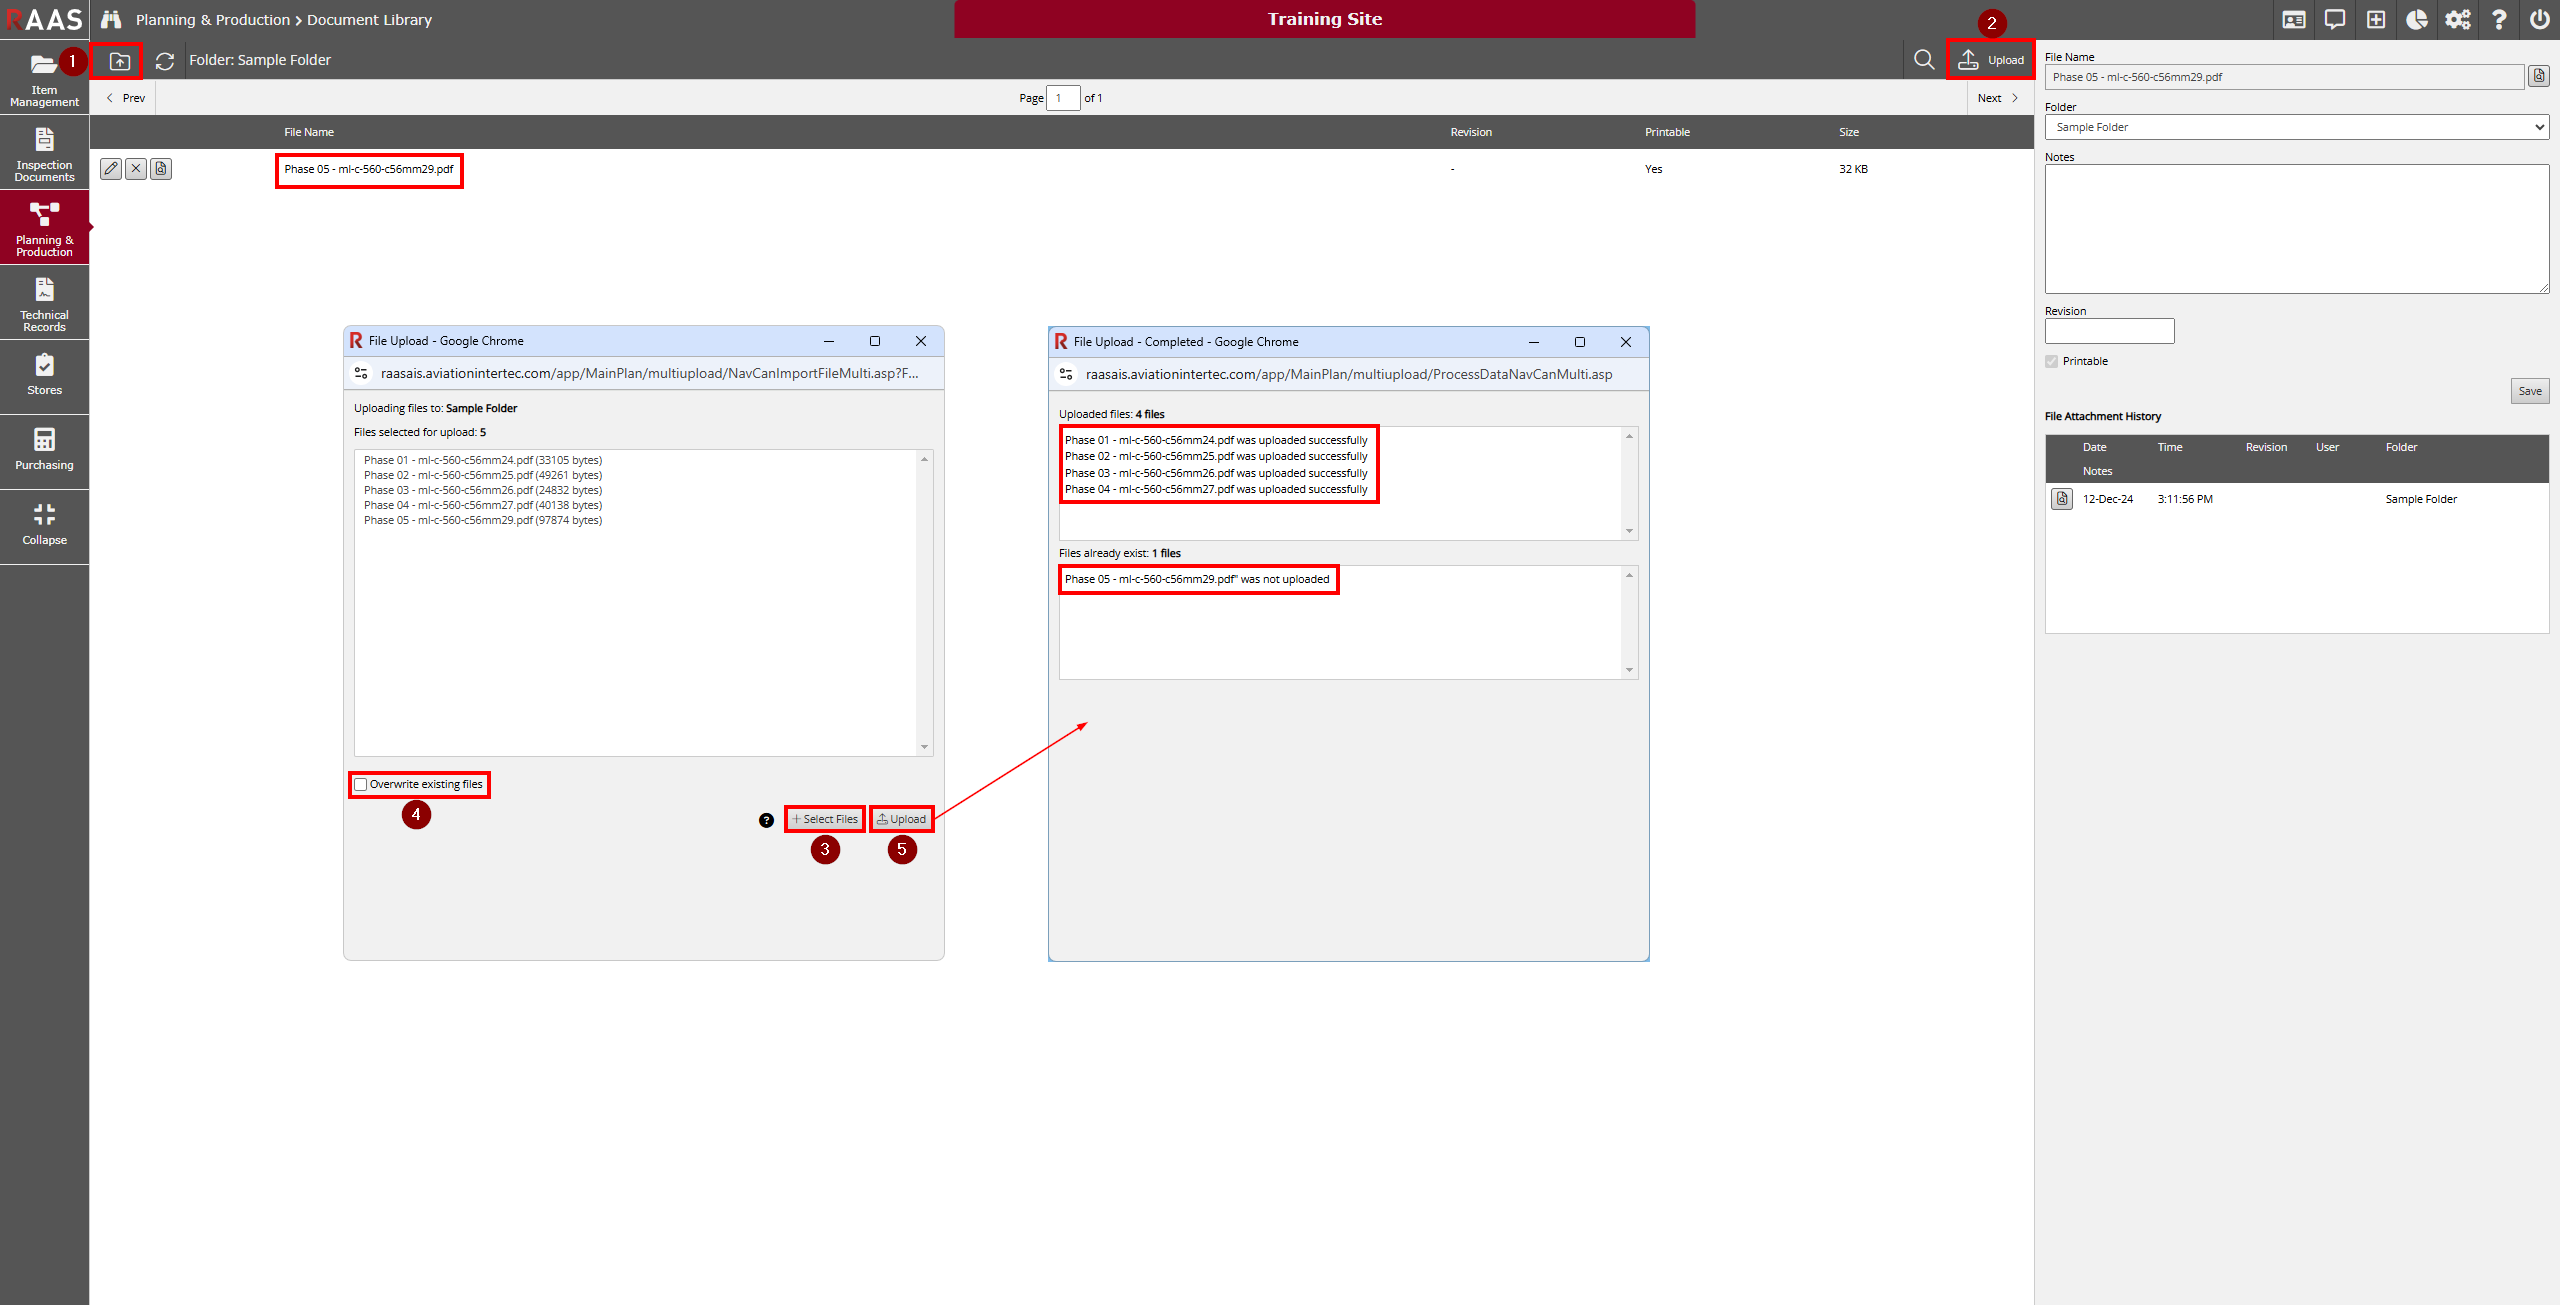
Click Upload to open the File Upload window.
-
In the File Upload window, click Select Files and select the file(s) to be uploaded.
Note: Multiple files can be selected by holding down the 'Ctrl' key while clicking the file names. If wanting to upload multiple files at once, they must all be selected at this time (selecting a few files and then selecting more within the same upload step by clicking Select Files again before clicking Upload will replace the previously selected files with the newly selected files to be uploaded). -
If turning on the “Overwrite existing files” checkbox, any files that have the same name within the selected folder will be replaced by the new file(s). If this checkbox is left off, any files with the same name within the selected folder will not be uploaded. Note: Any overwritten files will show up in the File Attachment History pane and the old file(s) can be viewed from there (See Viewing, Editing, and Deleting File Attachments/Details section below).
-
Click Upload to upload the attachment(s) to the selected folder. The user will be made aware of which files were uploaded and which were not.
Note: The selected folder that is being uploaded to will appear at the top of the File Upload window (“Uploading files to:“). -
The file attachment(s) will now be listed in the applicable folder.
Viewing, Editing, and Deleting File Attachments/Details
-
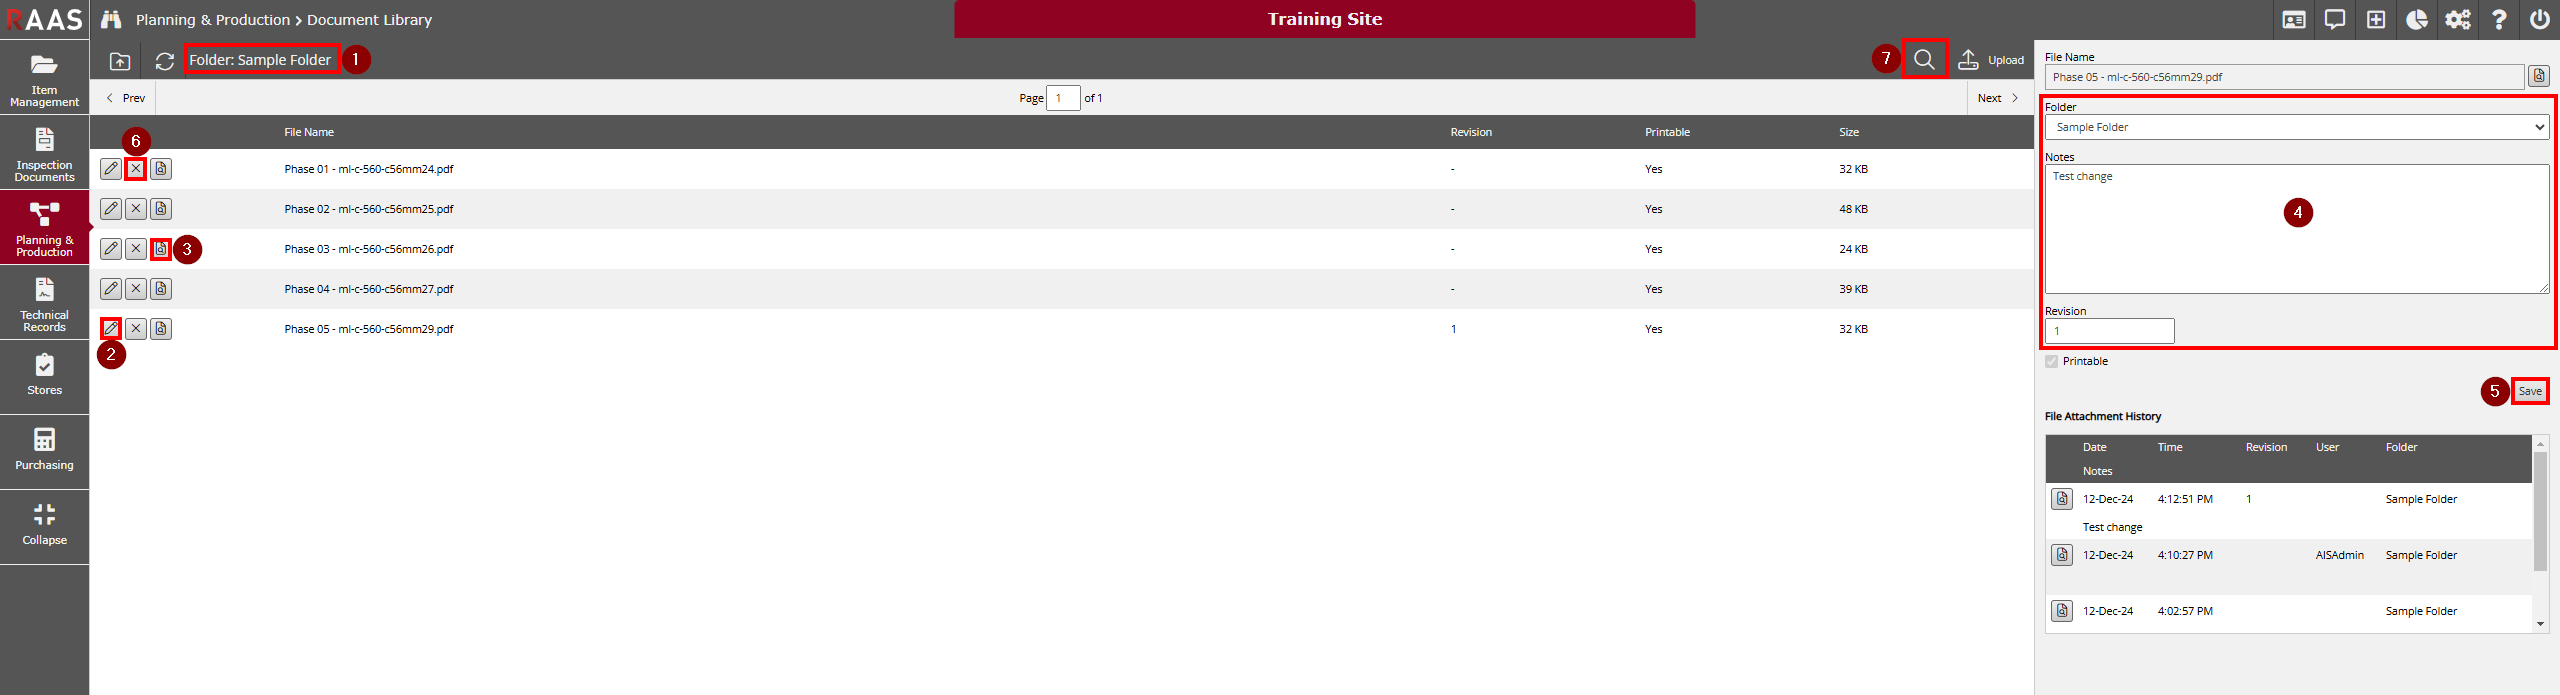
In the Document Library sub-module, select a folder (See Figure 6).
-
To view and edit file attachment details click the pencil icon beside the name of the desired file.
-
To view a file attachment, click on the View File button (page with magnifying glass) beside the name of the desired file or in the File Attachment Details/History panes.
-
The File Attachment Details and File Attachment History will appear to the right of the folder list. The following details can be changed from here:
-
Folder
-
Notes
-
Revision
-
-
Once the applicable changes have been made, click Save. The newly saved changes will replace the previous version which will now appear in File Attachment History.
Note: The File Attachment History will be updated whenever a new file overwrites the previous one or any changes are saved within the File Attachment Details pane. Changes saved to the File Attachment Details will persist for any new file versions uploaded and these details will pertain to the most recently uploaded version of the file (as well as any historical records as appropriate). -
To delete a file attachment click the X button beside the name of the file that needs to be deleted and click OK.
-
Files can also be searched for by filename (can search by partial filename) across all folders by clicking the magnifying glass icon.