
Before you begin to use RAAS, please review the Special Settings section below and make the appropriate recommended adjustments.
To begin your login, open a Google Chrome window, type the RAAS website into the browser address bar and hit enter. Next, enter the following valid login information into the RAAS login screen, as in Figure 1:
Company Name:
User Name:
Password:
Please contact your administrator for a valid login and website address.
If during your login, you are presented with regional settings messages, please follow the instructions outlined in the Regionality and Language Settings listed under Special Settings.

Once you have successfully logged on, you will see the RAAS main screen as seen in Figure 2. The screen you see when you log in can be customized by selecting the option of Set Module as Login Default when currently viewing your screen of choice.
RAAS's main functional areas, referred to as modules, are always listed in the gray navigation bar to the left of the window. Each module is a data entry and reporting tool. Clicking on any of the module icons will take you into the respective module.
The most up-to-date version of Google Chrome is required to run RAAS. If you have a previous version, it is strongly recommended that you visit the Google Chrome website to download and install the most recent version of Google Chrome.
Special Settings
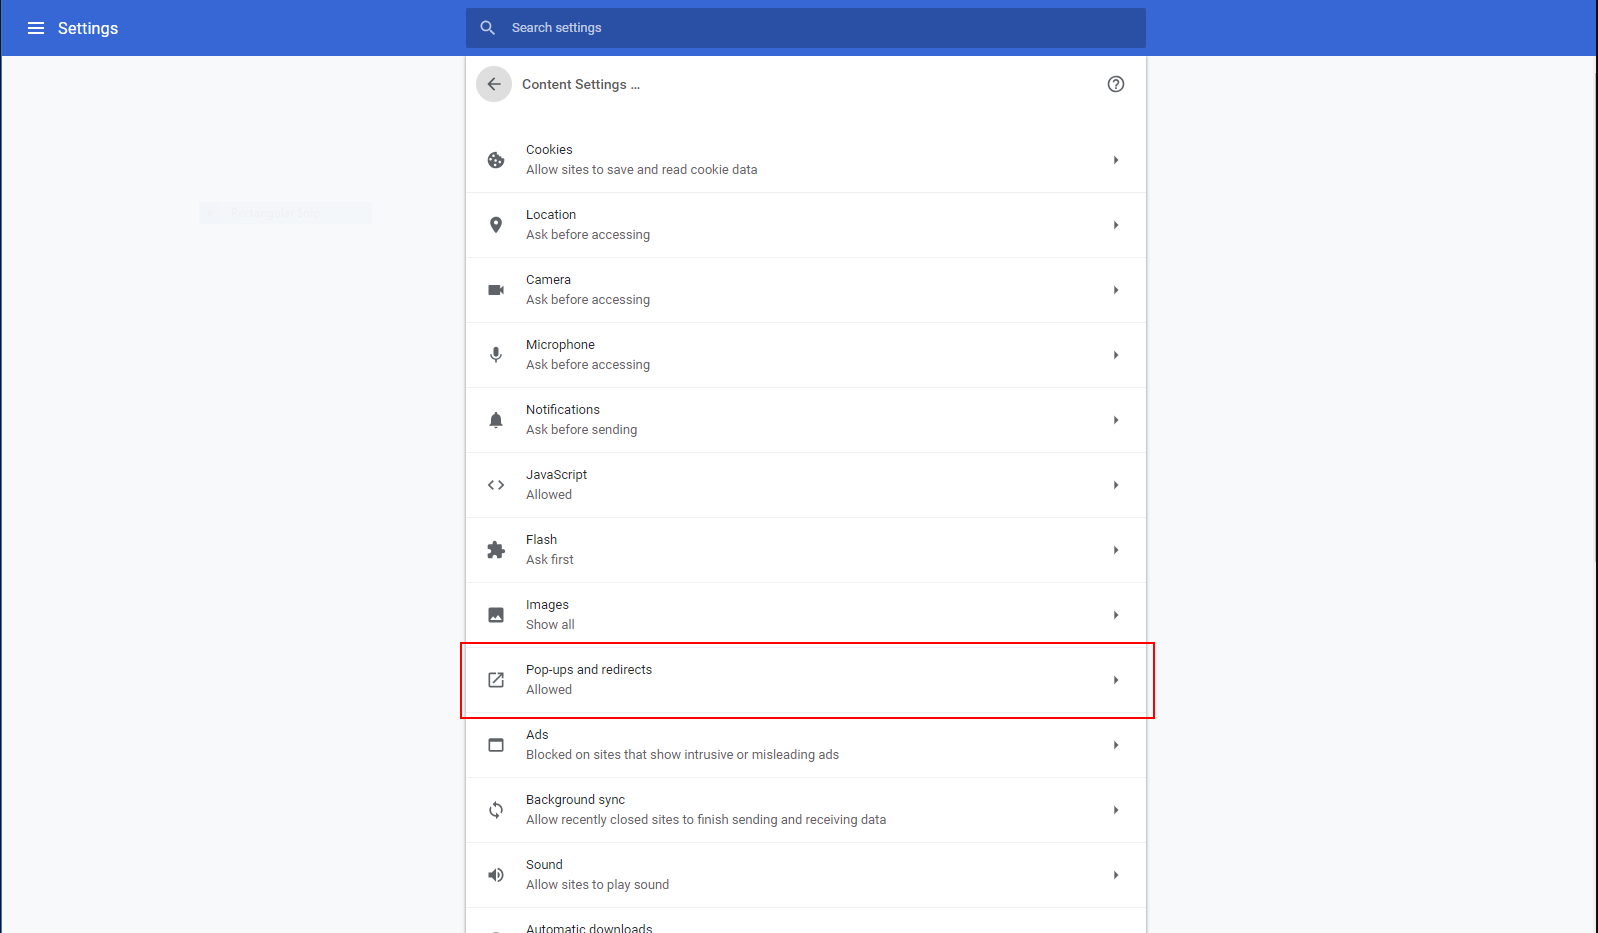
Google Chrome Pop-up Blocker
-
Click on the Elipses "Customise and Control Google Chrome" and select Settings.
-
Open the Advanced dropdown and select Content Settings
-
Click Pop-ups and redirects and activate the Allowed slider
-
Click the Add button under "Allow" and enter your RAAS address and click Add.
Regionality and Language Settings
Windows 10 or Windows 11
-
Open the Control Panel.
-
If on Category view, select Change date, time, or number formats from the Control Panel. The Region dialog box appears.
-
If on Large Icon or Small Icon view, select Region from the Control Panel.
-
-
On the Formats tab, under Format, for most cases select English (United States) or ask your administrator for the correct language settings.
-
Click Apply to enable the settings.
-
Click OK and close the Control Panel.
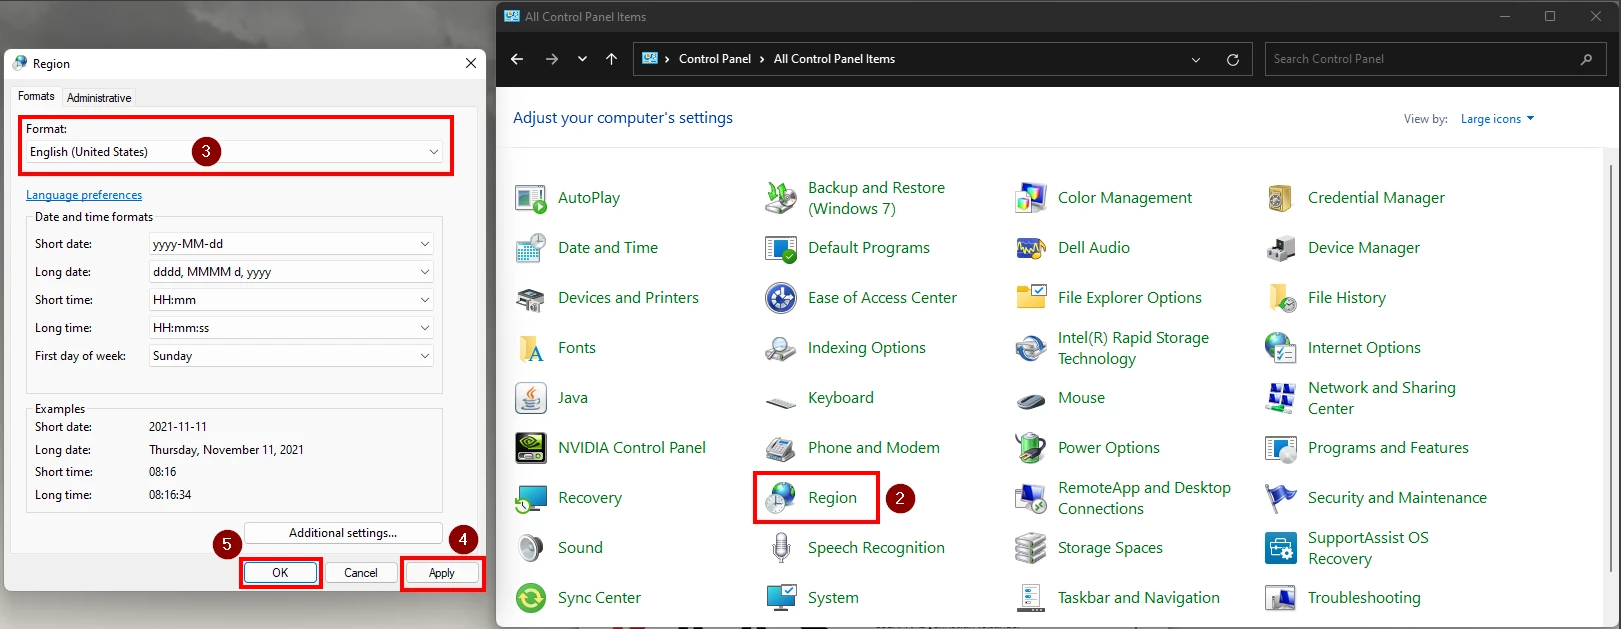
Figure 4: Windows 11 Regionality and Language Settings