
Job Card Importing from an External Source allows users to create Job Cards in RAAS by importing the job details from a spreadsheet rather than by issuing from the Maintenance Forecast or creating Job Cards manually. It is useful for MRO users who want to create Job Cards to track work on their customers' aircraft without tracking the aircraft in RAAS.
Exporting a Template
-
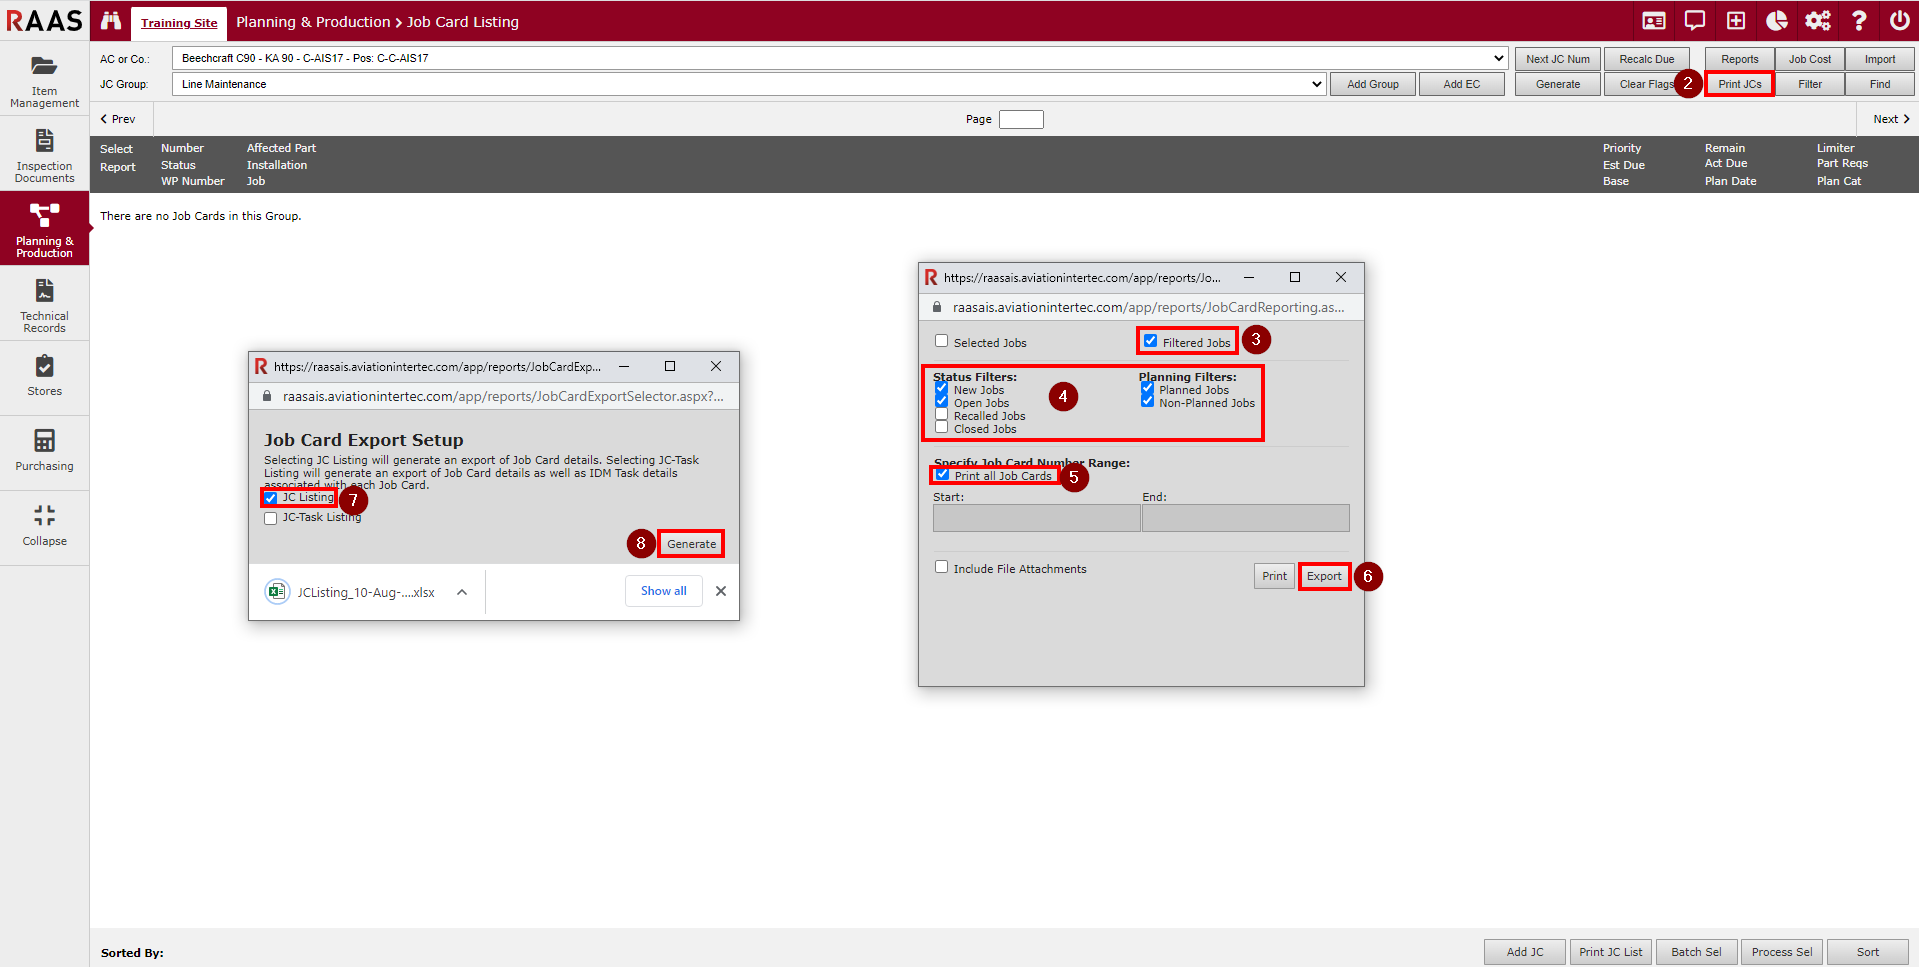
Click on Planning & Production and select Job Card Listing. Generate the listing.
-
Click Print JCs.
-
Select Filtered Jobs.
-
Select Status Filters and Planning Filters.
-
Select Print all Job Cards (there does not need to be any Job Cards in the JC Group to produce the export, but Print all Job Cards must be selected).
-
Click Export.
-
Select JC Listing.
-
Click Generate.
This will export a file that can be used as a template by deleting the details of the job cards that are exported and replacing them with the details of the job cards to be imported.
Below is an example of the template file that shows the formatting of each column. See

Job Card Import Rules
The table below outlines the rules and requirements for each column in the spreadsheet.
|
Column Name |
Required |
Format Required |
Max Length |
Notes |
|
JC Aircraft |
yes |
AC SN |
50 |
|
|
JC Number |
yes |
123 P
|
- |
A number must be entered but only the Planned or Unplanned portion will be used. The JC number will be generated upon import. |
|
JC Work Pack Number* |
N/A |
N/A |
N/A |
Will not be used in import. |
|
JC Job |
no |
text string |
2400 |
|
|
JC Instructions |
no |
text string |
unlimited |
|
|
JC Planner Notes |
no |
text string |
unlimited |
|
|
JC Affected Part |
yes |
Part Description - Part Number - Serial Number |
50 |
|
|
JC Notes |
no |
text string |
unlimited |
|
|
JC ATA |
yes |
##-##-## |
10 |
Must match a pre-defined format if the “Enforce ATA Format” company setting is turned on. |
|
JC Trade |
no |
Trade, Trade, Trade |
100 |
Must be a valid comma separate list of trades that already exist and each trade must have a JC Estimated Trade Hours in the next column. |
|
JC Estimated Trade Hours |
no |
#, #, # |
unlimited |
Must be a comma separated list of decimal values and the total number of trade hours must match the total number of trades. |
|
JC Zone |
yes |
text string |
300 |
|
|
JC Planning Category |
yes |
text string |
100 |
Must match a pre-existing Planning Category |
Importing Job Cards
Once the Excel file is ready to be imported, return to Planning & Production - Job Card Listing.
-
Click Import.
-
Go to the External Source tab.
-
The Aircraft or Company and Job Card Group will default to the AC/Co and JC Group currently on-screen. These can be changed if required.
-
Select an Expense Center.
-
Enter an Estimated Due Date.
-
Choose the file to upload.
-
Click Validate & Import Data or Validate.
-
Validate and Import Data will check the data in the file to ensure the Job Card Import Rules were followed and import only the job cards that were validated.
-
Validate will check the data in the file to ensure the Job Card Import Rules were followed.
-
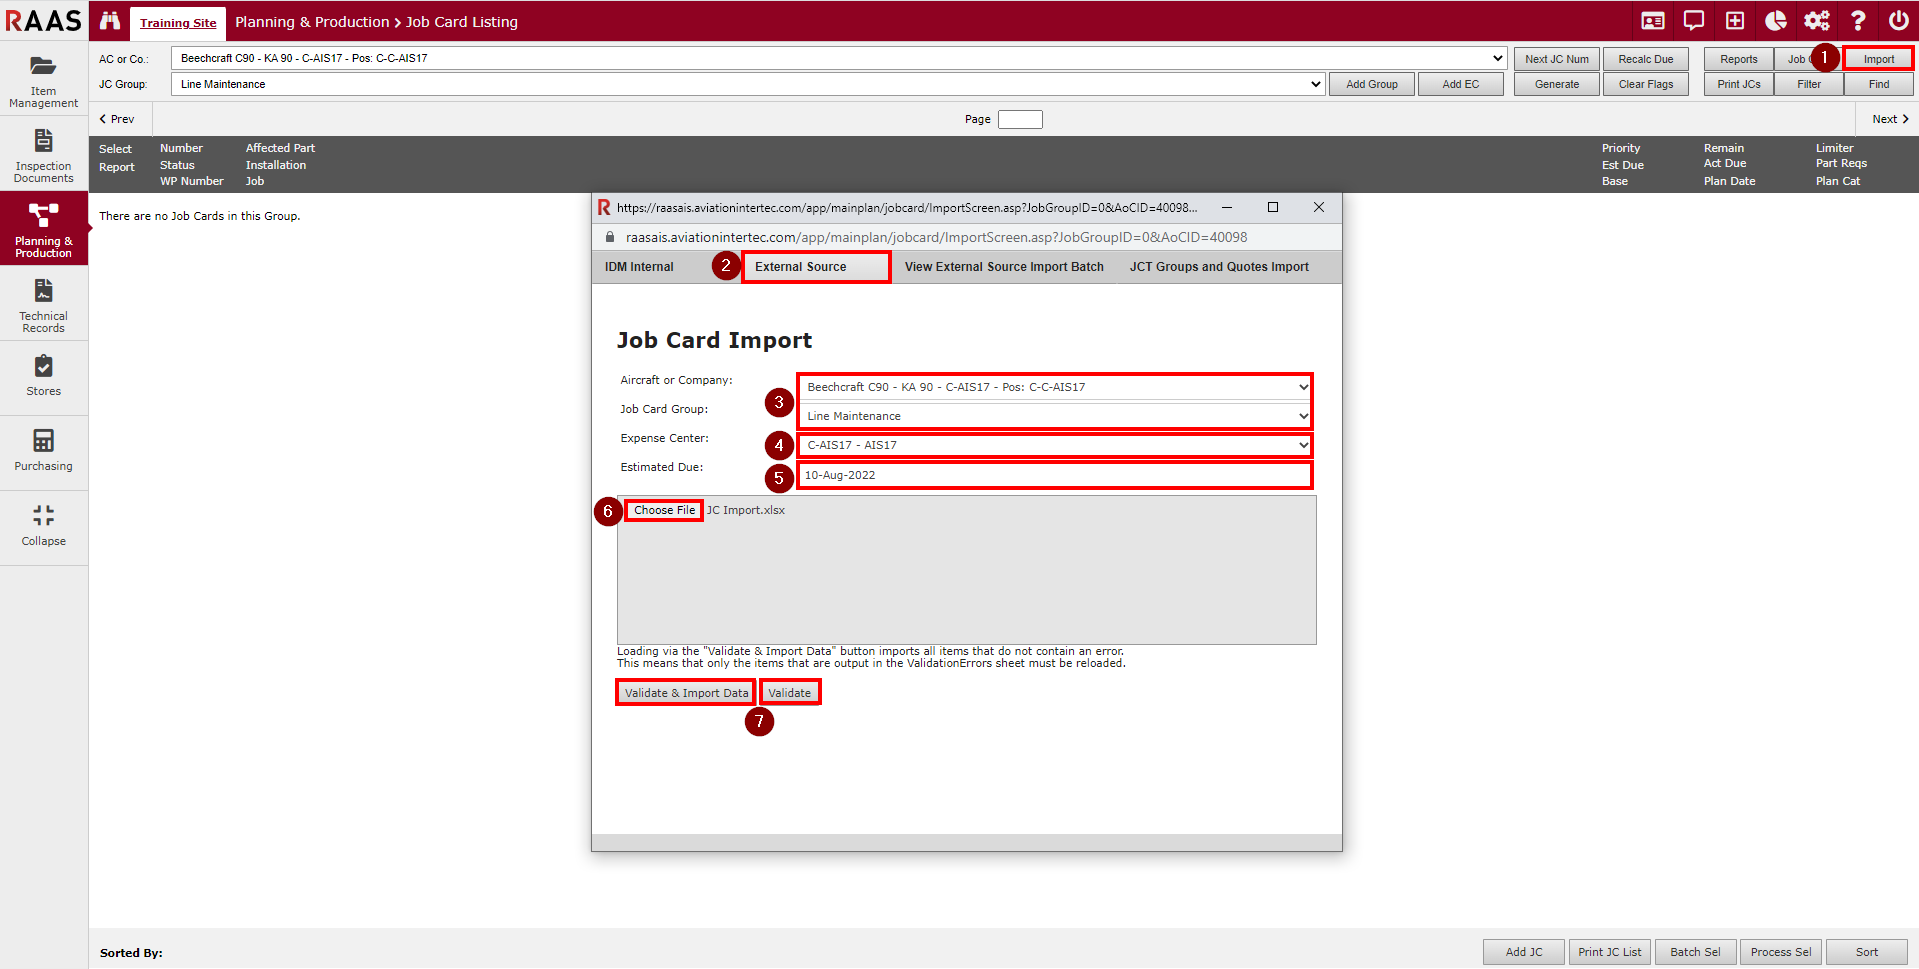
Once the Import is complete, a message will come up that says, “The load has completed”. Click OK and close the Import window. Click Generate on the Job Card Listing to view the newly created Job Cards.
Note:
If the Job Card Import Rules are not followed, an export will be generated upon validating that highlights the cells with errors as seen in the example below.
