A constraint is used to specify the maintenance interval of a part or an inspection. There are 3 types of limiters: hours, landings, or calendar(D/M/Y). The landing limiter can be changed, if necessary, to instead track cycles, starts, or RINS. These limiters are used to set up the 3 different types of constraints; Life, Initial and Repeat.
-
Life Constraint: indicates the life of the part in terms of limiters
-
Initial Constraint: indicates when the first part check should occur based on the limiter being set
-
Repeat Constraint: indicates when additional part checks should occur based on the limiter settings until it reaches the Life Constraint limiter value.
Navigation
Click on Item Management and select Item Editor. Click on the binoculars that appear to the right to open the Quick Find.
Using Quick Find, select the desired search type from the dropdown, enter the criteria and click Find.
Select the applicable resultant and click the To Item Editor button. The Quick Find window will close, the window will refresh and display the selected resultant's details.
Part Number Constraints
The Part Number detail window is the only location where the constraint and limiter values can be set and adjusted. For demonstration purposes, we have stacked the Life, Initial and Repeat Constraints in Figure 1. An asterisk (*) on a constraint tab indicates that a limiter has been set up. It may be necessary to select the Track Hours, Track Landings, or Track Calendar checkboxes in order to make the limiter available within each constraint tab.

Update Due
-
Use the Navigation instructions to locate the appropriate part number. Entered or edit the desired limiter values and a description for each applicable constraint.
-
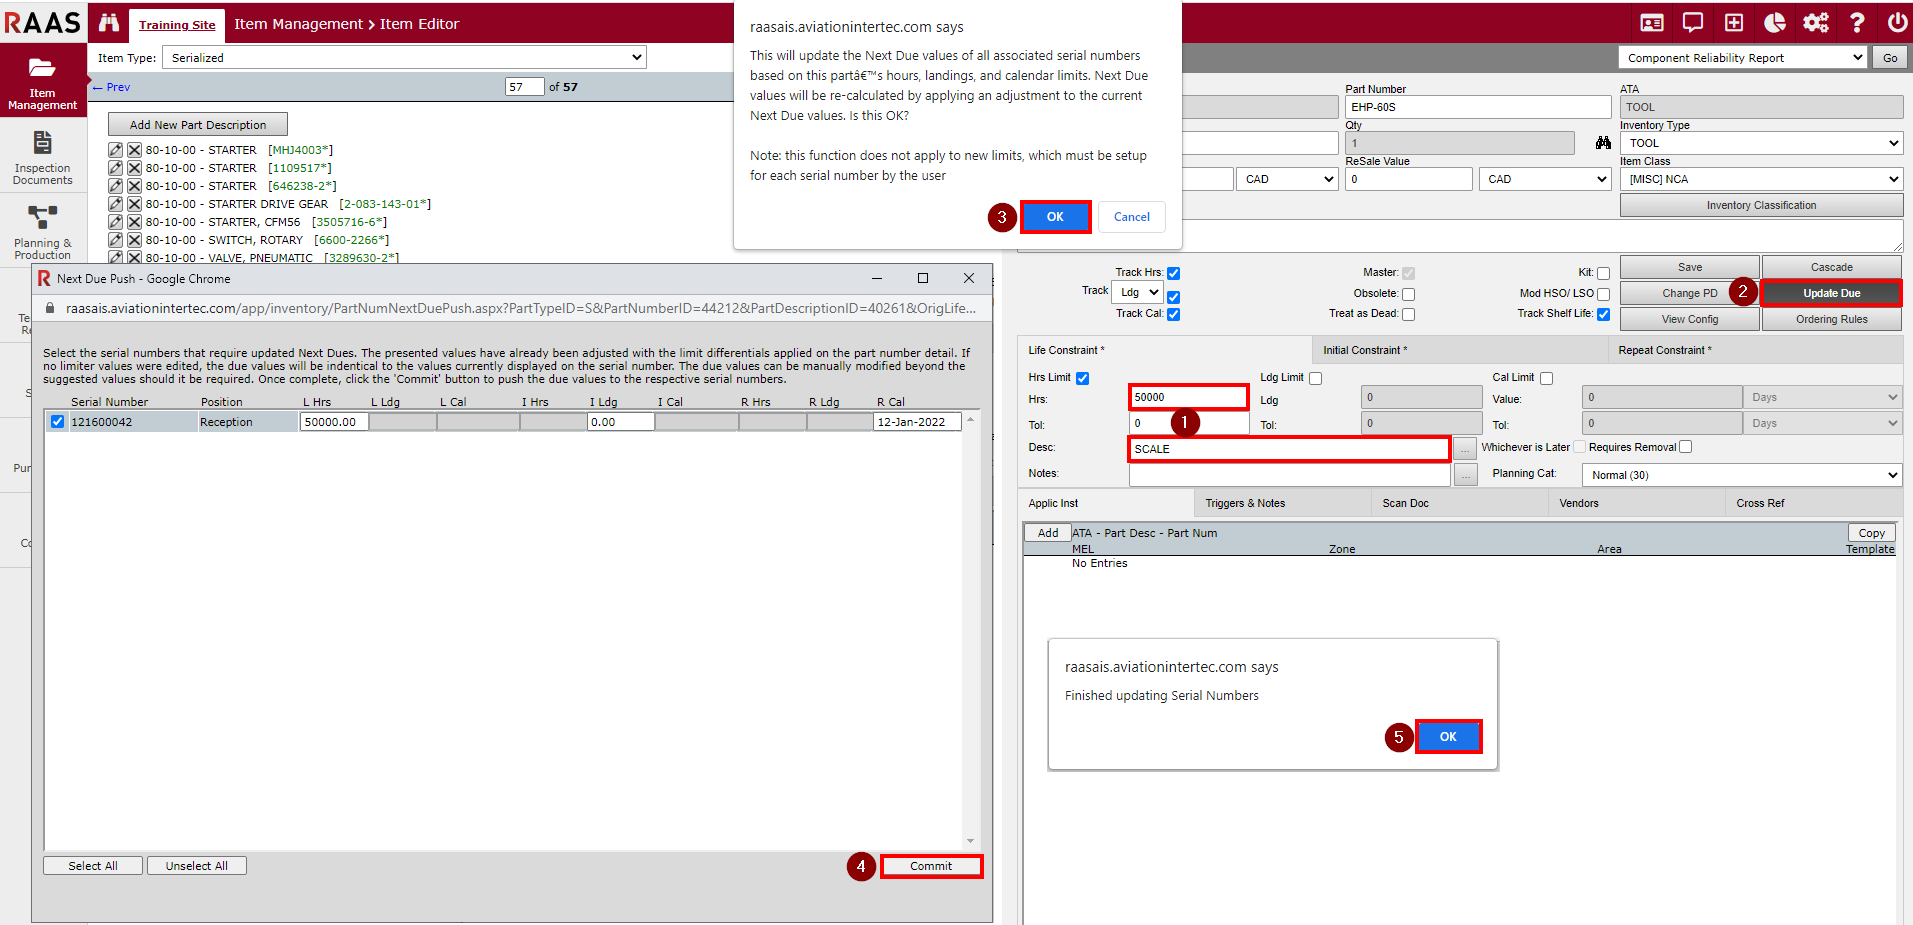
Click Update Due. This will re-calculate and update the remaining and Next Due values for all serial numbers associated with this part number.
-
Click OK to update the Next Due values of all associated serial numbers.
-
Verify the values on the Next Due Push screen and click Commit.
-
Once the Finished updating Serial Numbers message is displayed, click OK.
Save
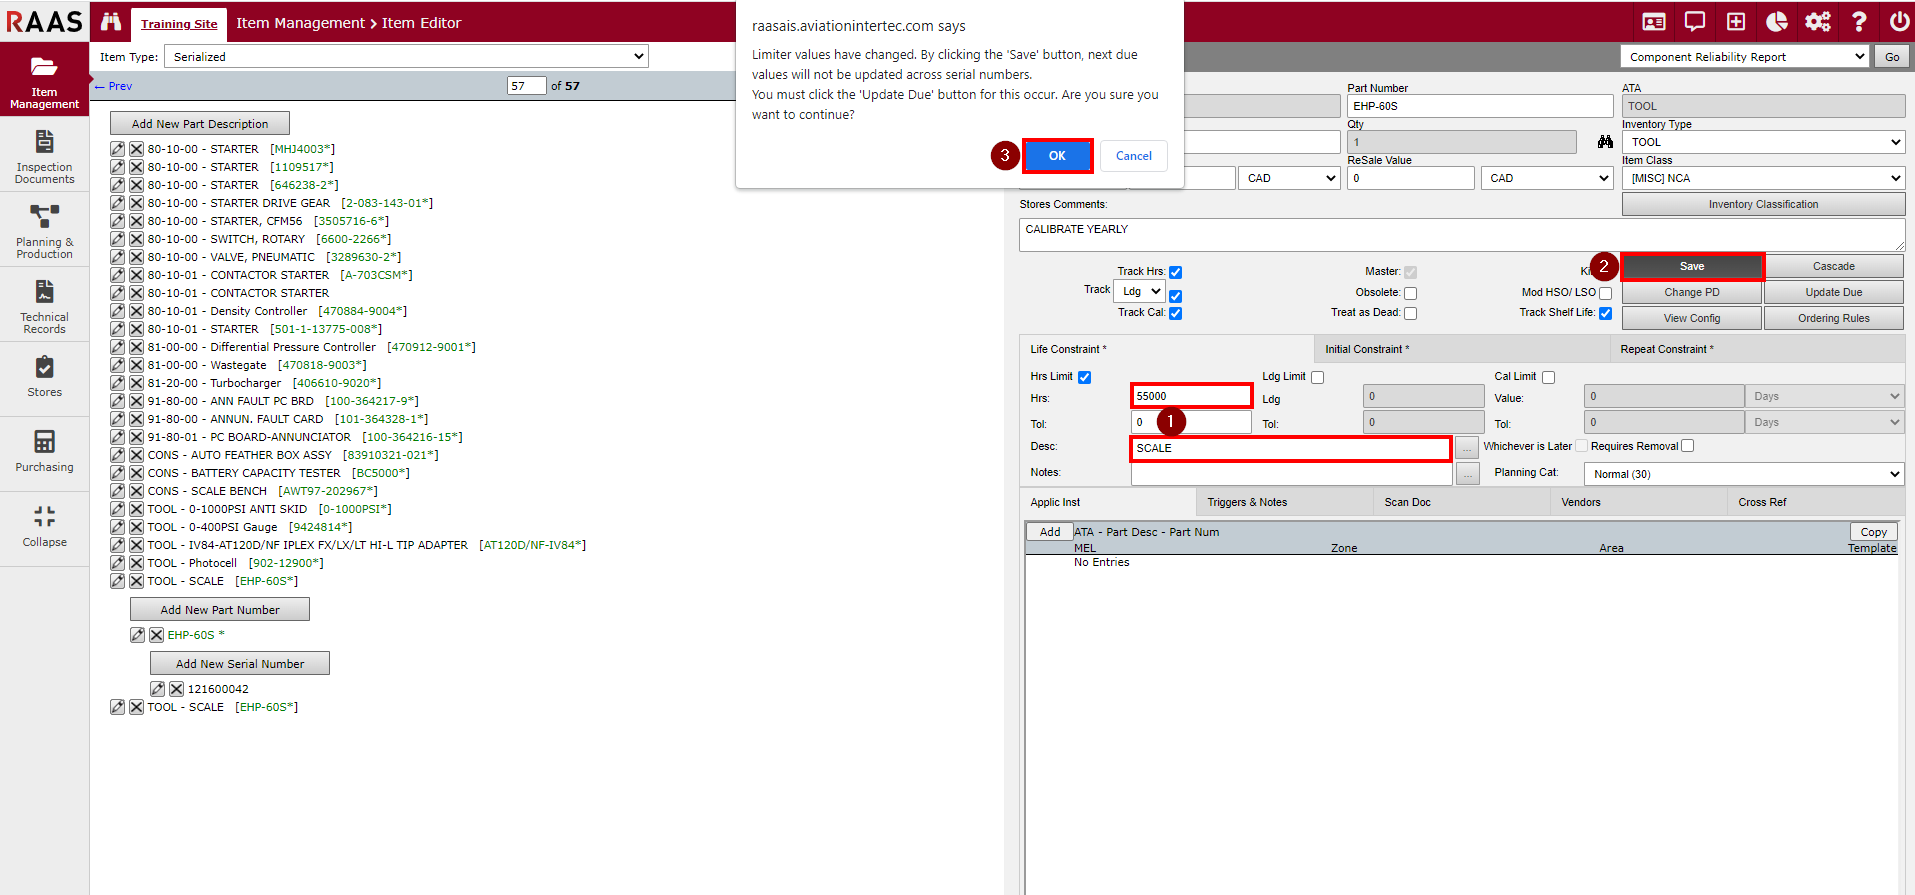
There may be instances where you will not want to update the Next Due value for all associated serial numbers. If this is the case, clicking the Save button will only update the limiter values that have changed. See Figure 3 for instructions on how to manually update each serial number's Next Due value.
-
Use the Navigation instructions to locate the appropriate part number. Entered or edit the desired limiter values and a description for each applicable constraint.
-
Click Save.
-
Click OK to continue saving the limiter values without modifying the Next Due value for all associated Serial Numbers.
-
Enter the Reason for modifying the limiter values and click Next.
Manual Next Due
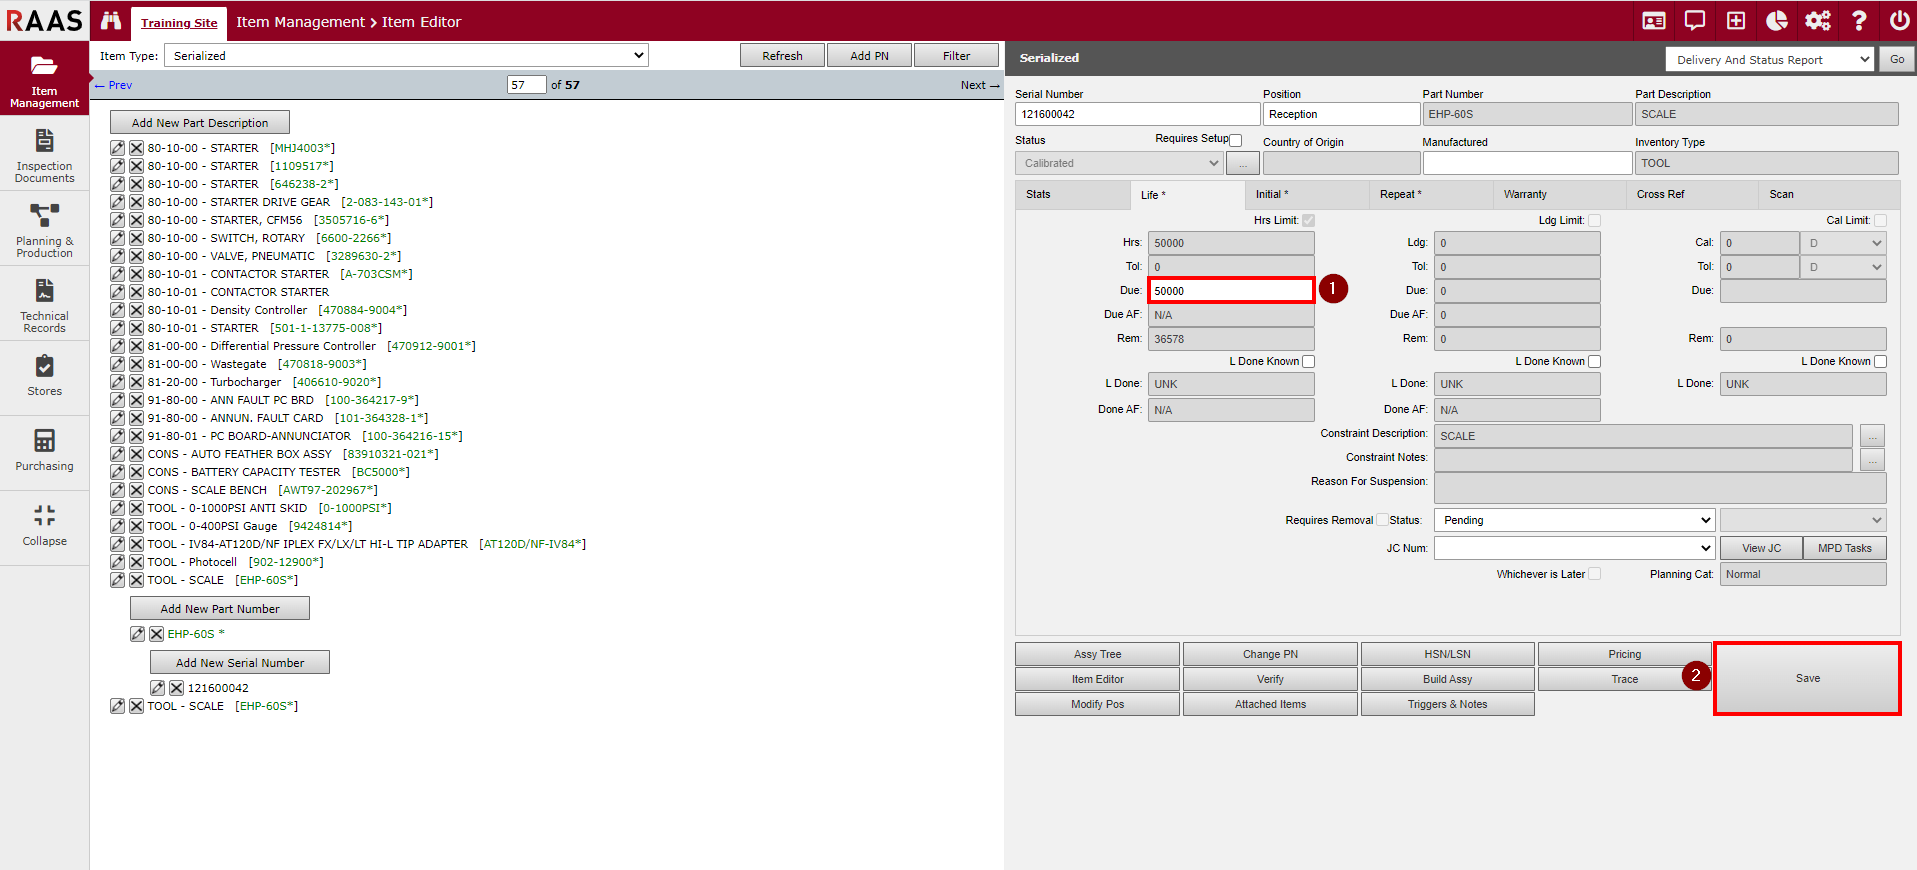
To manually modify the Next Due value, the constraint status must be set to Pending.
Use the Navigation instructions to locate the appropriate part number. Click on the part number to display all associated Serial Numbers. Click on the magnifying glass for the first serial number to display the serial number details window on the right.
-
Adjust the Due field for each applicable constraint and limiter.
-
Click Save.
-
Enter the Reason for modifying the limiter values and click Next.