The Package Editor sub-module in Inspection Documents allows users to collect individual tasks and groups into a package. They do not require a tracking serial number in item management and can be imported directly into the Job Card Listing using the IDM Internal Import function.
CREATING A PACKAGE
-
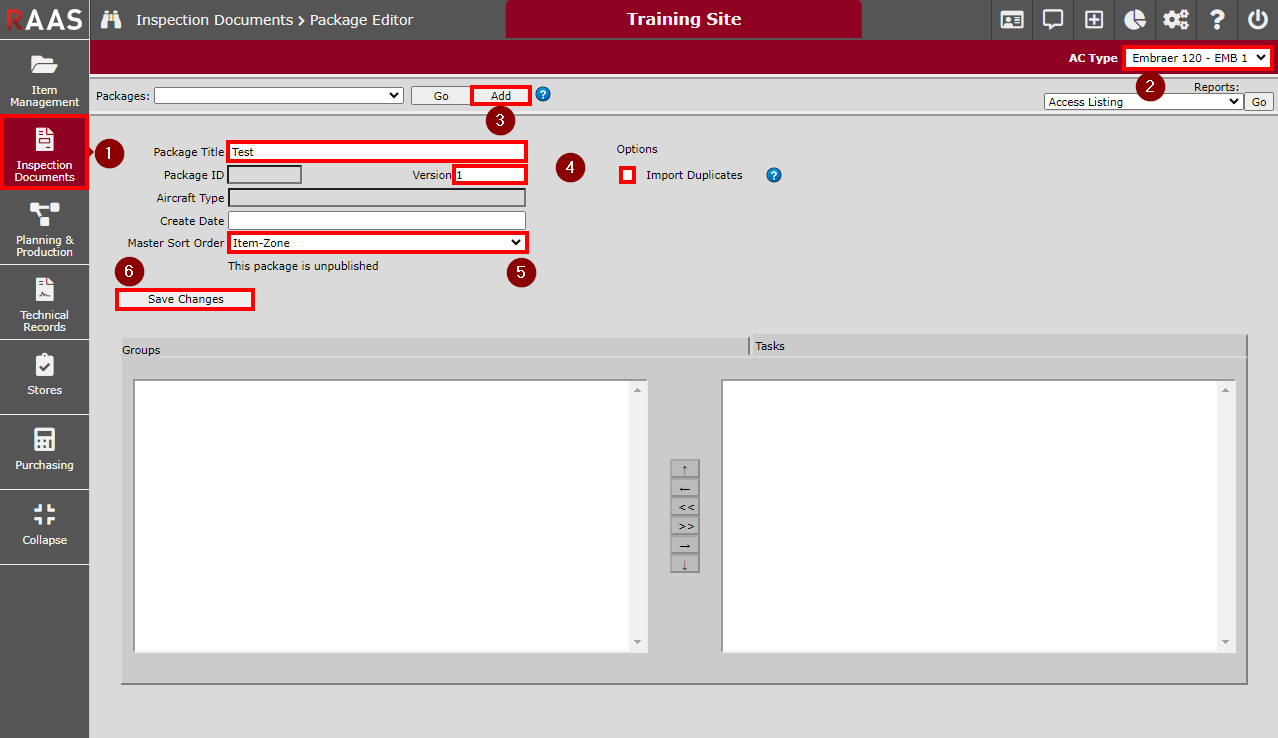
Click on Inspection Documents and select Package Editor.
-
Select the appropriate AC Type (if more than one type exists).
-
Click Add.
-
Enter a Package Title and Version number.
-
Select Import Duplicates if there are multiple groups with the same tasks that need to all be imported.
-
-
Select the initial Master and Secondary Sort Order options.
-
Click Save Changes.
-
The package will now be in edit mode, so the user can follow the instructions below for viewing/editing a package to add groups/tasks to the new package.
Note: Before a package is published, it can be discarded by clicking Discard Changes. This option is only available after the new package has been saved.
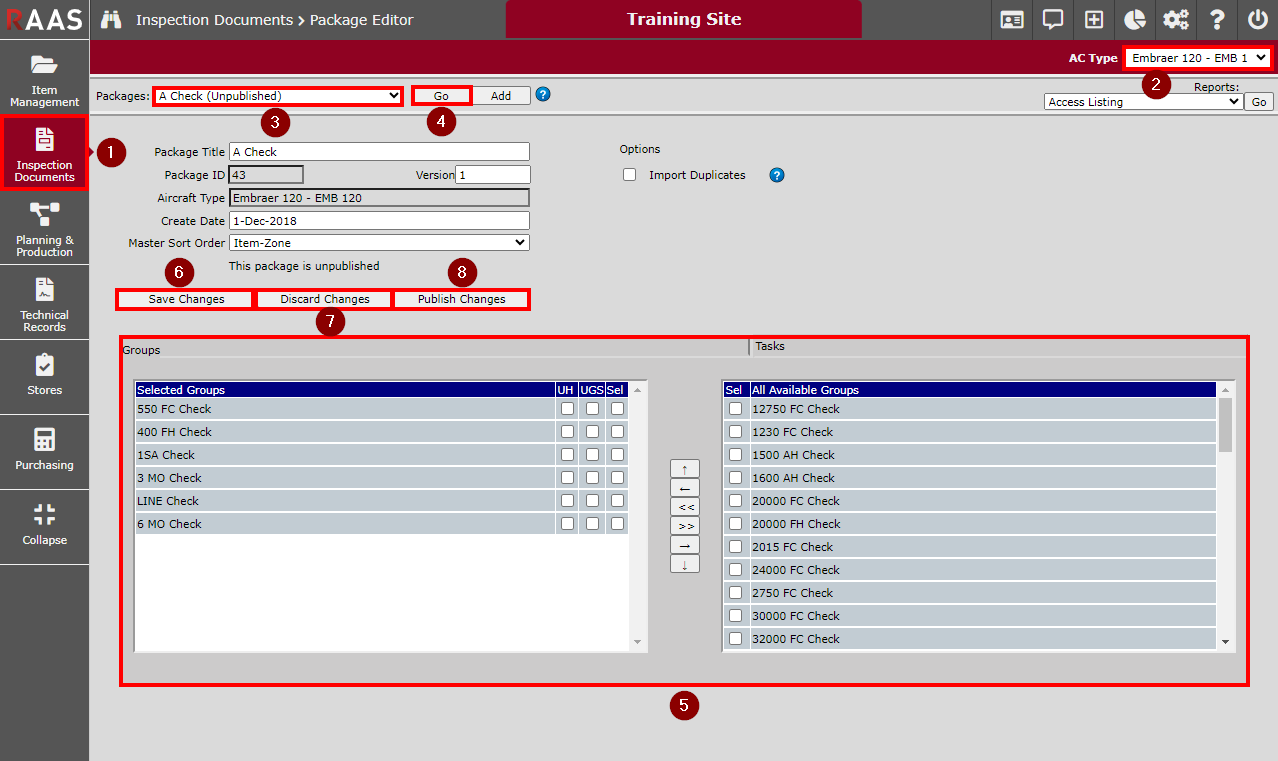
VIEWING/EDITING PACKAGES
-
Click on Inspection Documents and select Package Editor.
-
Select the appropriate AC Type (if more than one type exists).
-
Select the Package to view in the drop-down menu.
-
Click Go to populate the screen with the selected package details.
-
Note that if the package is already published, the user must click the Enter Revision Mode button to be able to edit the package.
-
-
In the section at the bottom, the user can switch between the Groups and Tasks views by clicking on the appropriate tab. The items in the left pane are part of the current package while items in the right pane are not. Users can add/remove/sort items by checking the box(es) in the Sel column and selecting the appropriate arrow button located between the panes.
-
The Up/Down arrows allow the user to sort the tasks/groups in the current package.
-
The single Left/Right arrows allow the user to add/remove tasks/groups to/from the current package.
-
The double Left/Right arrows allow the user to add/remove all tasks/groups listed in the respective pane.
-
In the Tasks view, you can Filter tasks or choose no filters to show all tasks.
-
Note that Tasks are always imported before Selected Group items.
-
There are additional options and considerations for sorting:
-
Use Hierarchy (UH) refers to the order you see the Tasks within the Group in the Group Editor.
-
Use Group Sort (UGS) refers to the sort set for each individual Group in the Group Editor.
-
The Master and Secondary Sort Orders (located as a drop-down menu in the upper section of the package details) are applied to package items that do not have the UH or the UGS boxes checked.
-
If UH and UGS are not checked, all task items for each Selected Group will be sorted based on the Master and Secondary Sort Order options.
-
If only UH is checked, the Selected Group will appear in the order they appear in the Selected Groups listing.
-
If UH and UGS are checked, the Task items will be sorted in the order they were set in the Group Editor.
-
It is recommended that Groups with task items that need to be performed first should be moved to the top of the list with UH and UGS checked. In addition, Groups with tasks needing to be performed last should be moved to the bottom of the list with UH and UGS checked.
-
-
-
If editing a package, the user will want to click Save Changes when satisfied with the changes made.
-
To discard any changes made to the package, the user would click Discard Changes.
-
In order to use the package within RAAS, the user must click Publish Changes.