
RAAS employs a feature called Triggers to allow the user to link related maintenance actions. When you define a Trigger they become active in the TMI/Technical Records module, in that they will be visible to the Technical Records user and will serve as rules and/or reminders as to how to perform various Technical Records functions.
See Maintenance Details for a description of how triggers are used in Technical Records.
An example of a typical triggered item would be a corrosion inspection that accompanies a propeller installation. RAAS allows the user to associate the corrosion inspection job to the propeller installation job such that when the installation is complied with via TMI, the user is reminded to reset the corrosion inspection at the same time. Triggered jobs can be associated with the installation or removal of any part and with the compliance or reset of any constraint tracked by RAAS. Triggers can only be defined at the Part Number level from within Item Management's Item Editor sub-module and are applicable to all serial numbers under said Part Number.
Note: RAAS will automatically generate a trigger when a Part Number has both an Initial constraint and a Repeat constraint configured. When the Initial constraint is complied with, Technical Records staff will have the option to begin tracking the maintenance action using a Repeat constraint.
Navigation
-
Click on Item Management and select Item Editor. Click on the binoculars to open the Quick Find.
-
Using Quick Find, select the desired search type from the drp[down, enter the criteria and click Find.
-
Select the applicable resultant and click the Item Editor button. The Quick Find window will close, the window will refresh and display the selected resultant's details.
Add a Trigger
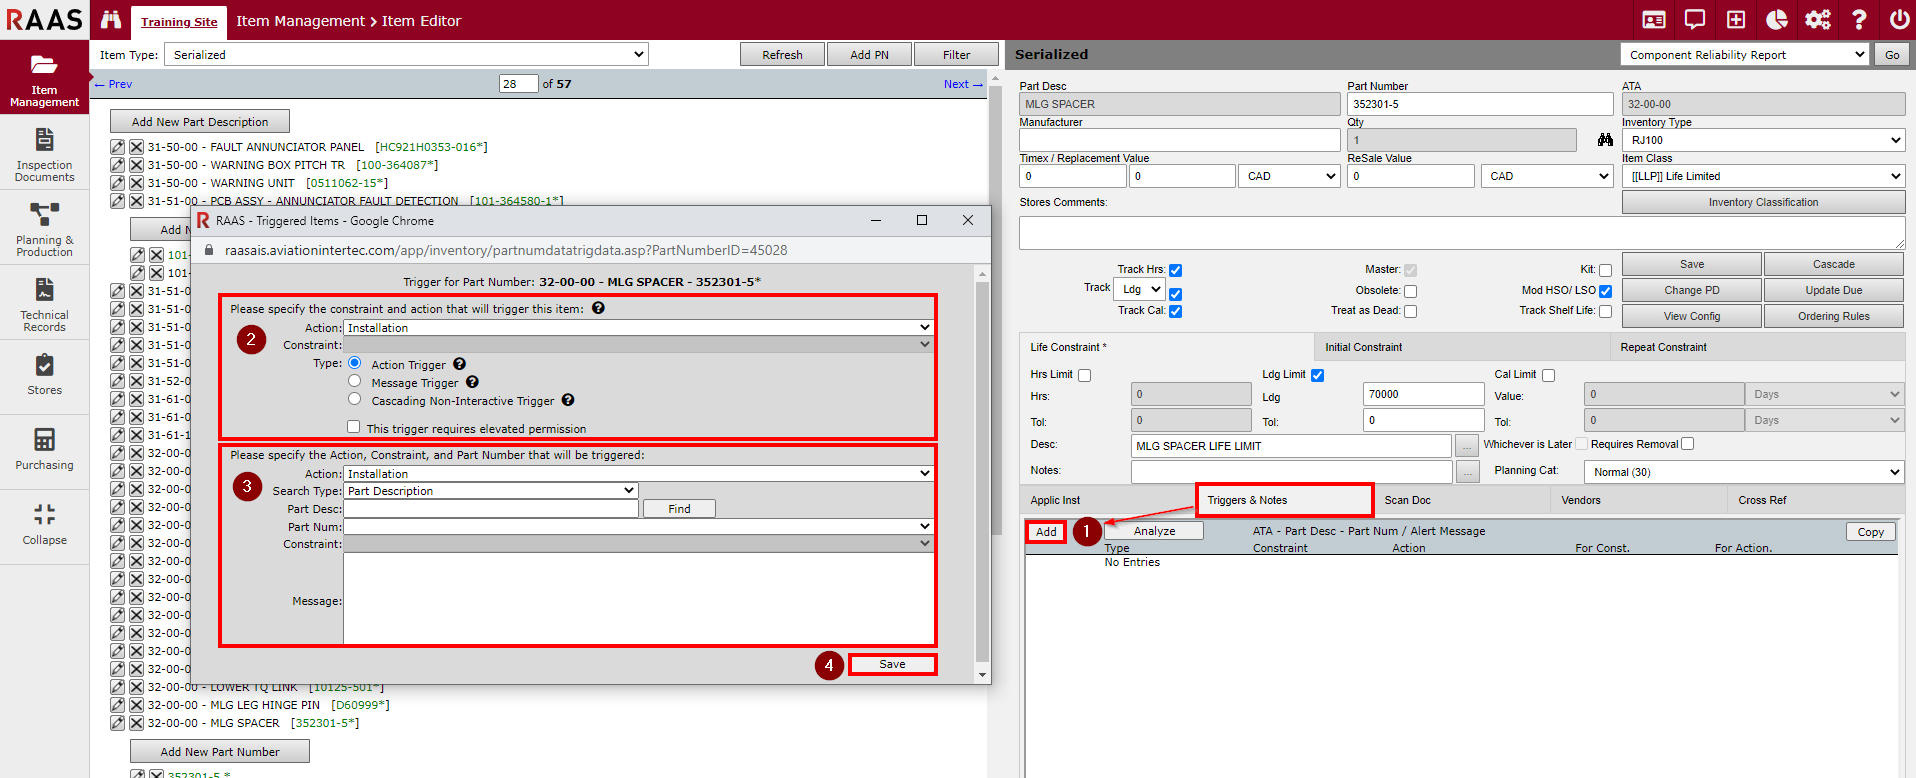
Use the Navigation instructions above to locate the Part Number detail window to which you would like to add a trigger. Once the window refreshes, click on the Triggers & Notes tab as shown in Figure 1.
There are 3 types of Triggers to consider: Action Trigger, Message Trigger, and Cascading Non-Interactive Trigger. Please refer to the in-application help text for more information on these trigger types, as seen in Figure 1.
-
From the Triggers & Notes tab on the Part Number, click the Add button to begin defining a trigger.
-
Specify the Action and applicable Constraint and trigger Type that will cause the trigger to execute, and select whether the trigger requires elevated permissions to fire (applicable to Action and Cascading Non-Interactive Triggers only).
-
Specify the resulting Action, affected Part Number (using the provided search interface), Constraint, and optionally, Message to be displayed to Technical Records staff.
-
Note: The Message trigger type will not provide an option to specify an affected Part Number or Constraint and will only display a message to the Technical Records staff when the trigger is executed.
-
-
Click Save.
The Item Editor and Part Number detail windows will refresh and the new trigger will appear in the Trigger List.
To add more triggers to the same Part Number, repeat steps 1 to 4.
Modifying a Trigger
Use the Navigation instructions above to quickly locate the required Part Number detail window. Once the window refreshes, click on the Triggers & Notes tab as shown in Figure 1.
-
From the Triggers & Notes tab on the Part Number, click the edit icon as shown in Figure 2.
-
Specify the Action and applicable Constraint and trigger Type that will cause the trigger to execute, and select whether the trigger requires elevated permissions to fire (applicable to Action and Cascading Non-Interactive Triggers only).
-
Specify the resulting Action, affected Part Number (using the provided search interface), Constraint, and optionally, Message to be displayed to Technical Records staff.
-
Note: The Message trigger type will not provide an option to specify an affected Part Number or Constraint and will only display a message to the Technical Records staff when the trigger is executed.
-
-
Click Save.
The Item Editor and Part Number detail windows will refresh and the modified trigger will appear in the Trigger List.

The Item Editor and Part Number detail windows will refresh and the modified trigger will appear in the Trigger List.
-
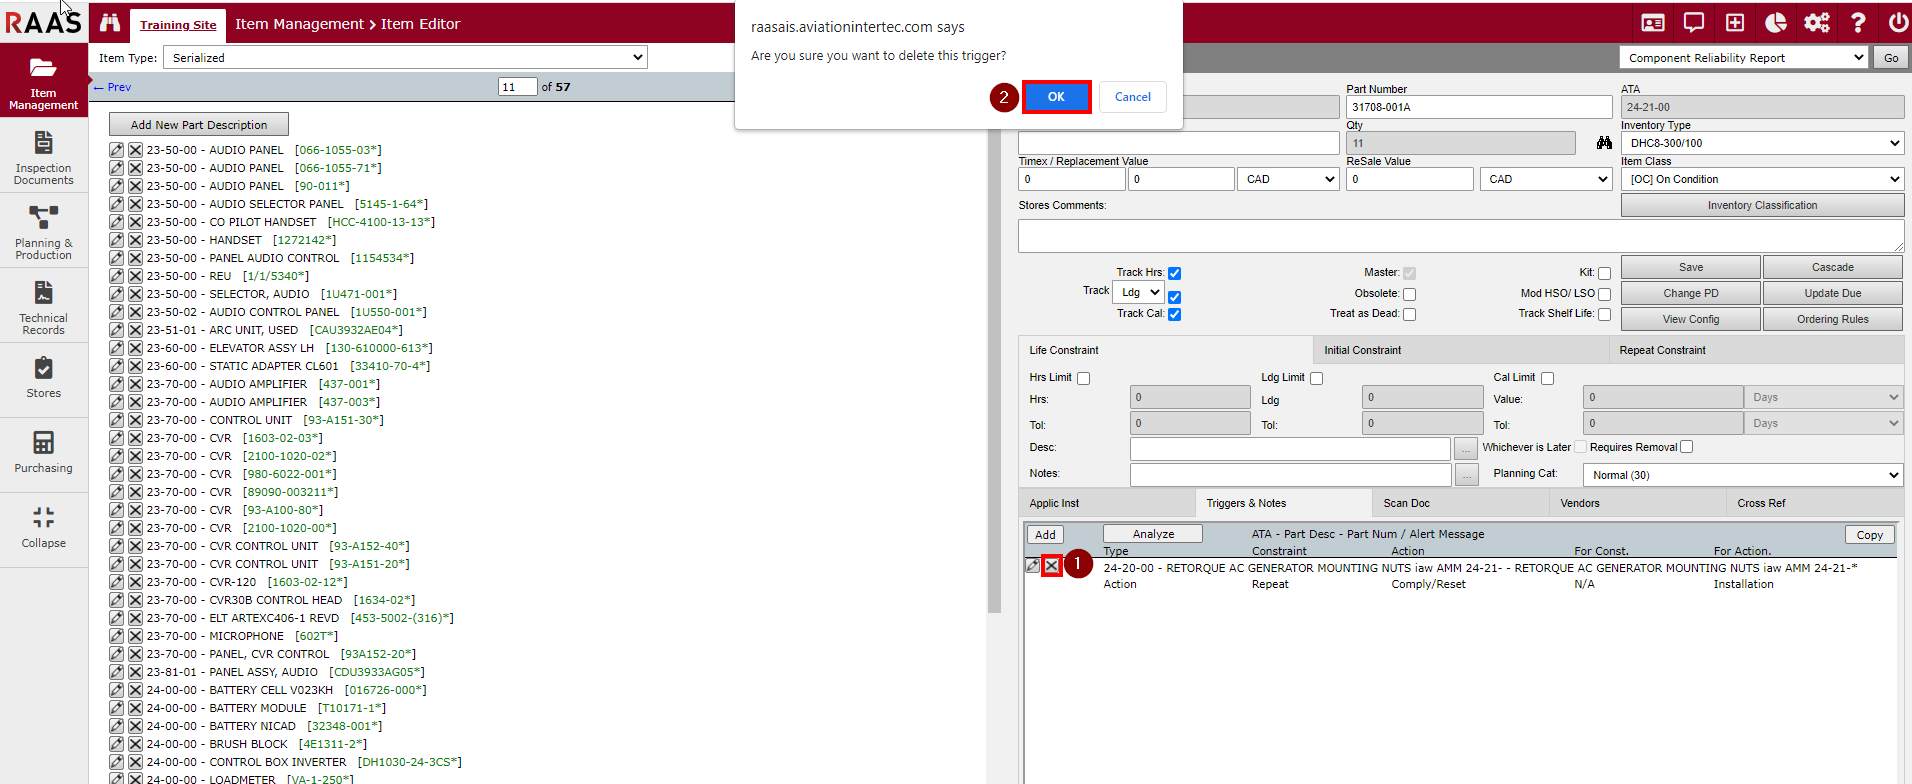
From the Triggers & Notes tab on the Part Number, click on the delete icon as shown in Figure 3.
-
Click Yes when prompted to delete the trigger.
-
The Item Editor and Part Number detail windows will refresh and the deleted trigger will be removed from the Trigger List.
Copying a Trigger
WARNING! Copying a Trigger will overwrite the trigger listing under each alternate Part Number with the triggers defined on the current Part Number. If the copy method is required for alternate Part Numbers with triggers defined, it is recommended that the trigger lists be reviewed for each alternate Part Number prior to copying. Make note of the Part Number and trigger details, which must be re-entered after the copy procedure has been completed.
-
Click the Copy button.
-
Click Yes when prompted that the action will overwrite the trigger listing under each alternate Part Number.
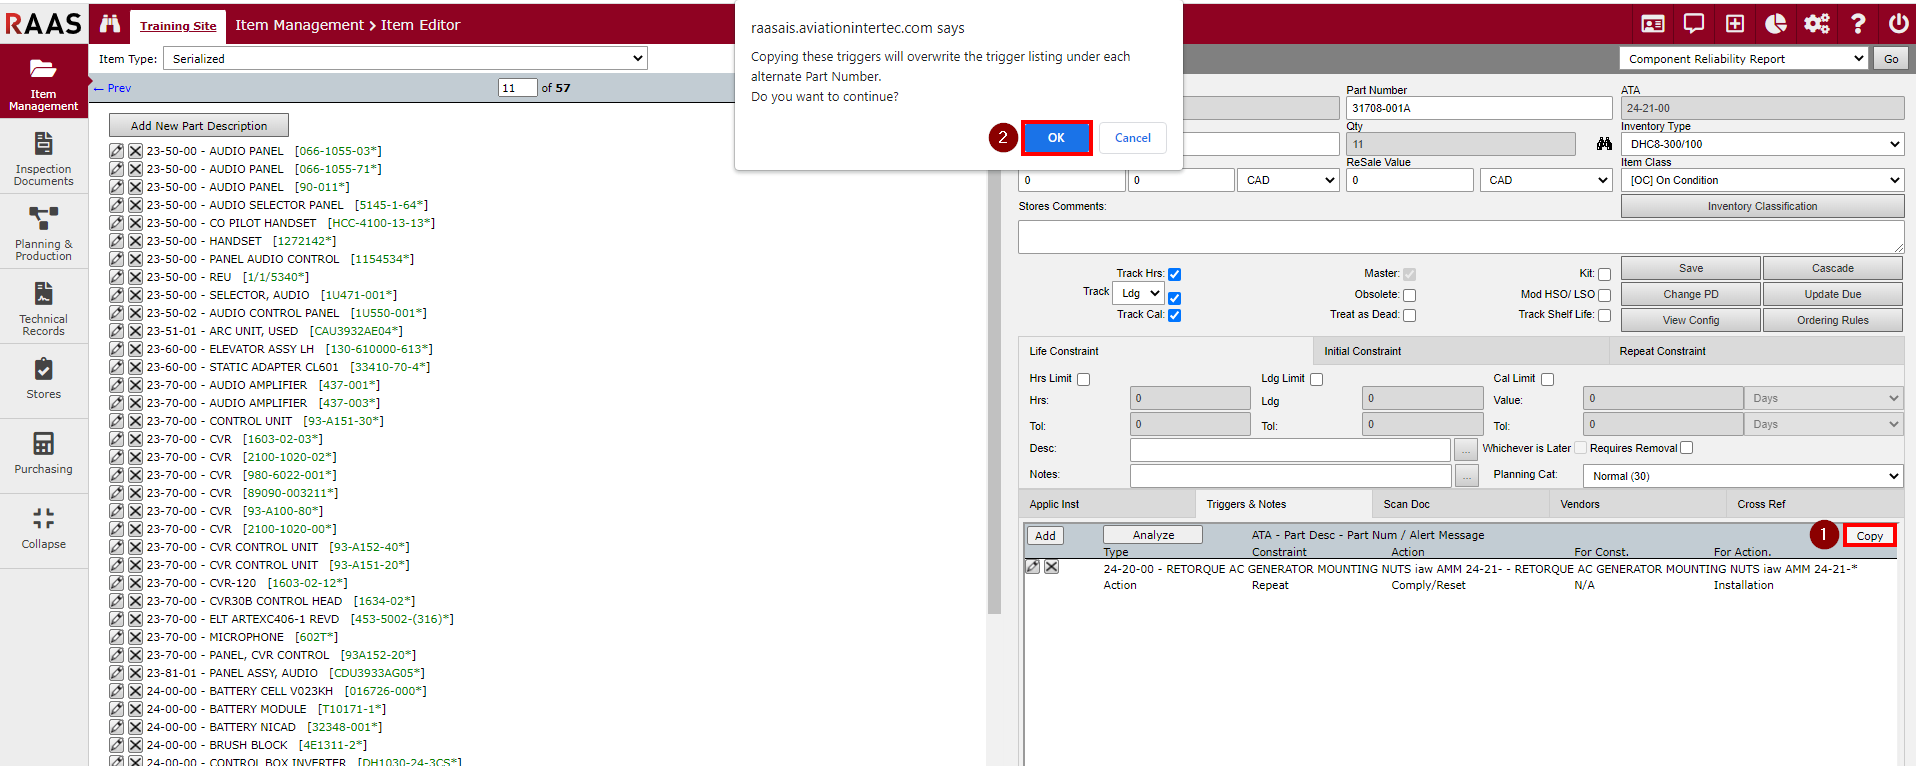
Review all alternate Part Numbers to verify that the trigger has been added to each. If required, re-enter triggers for alternate Part Numbers.