Once individual tasks are uploaded into the Task Editor, the Group Editor is used to combine tasks into applicable groups based on the Inspection Program. A typical task group would be a letter or hours Check, such as an A-Check or a 600 FH Check.
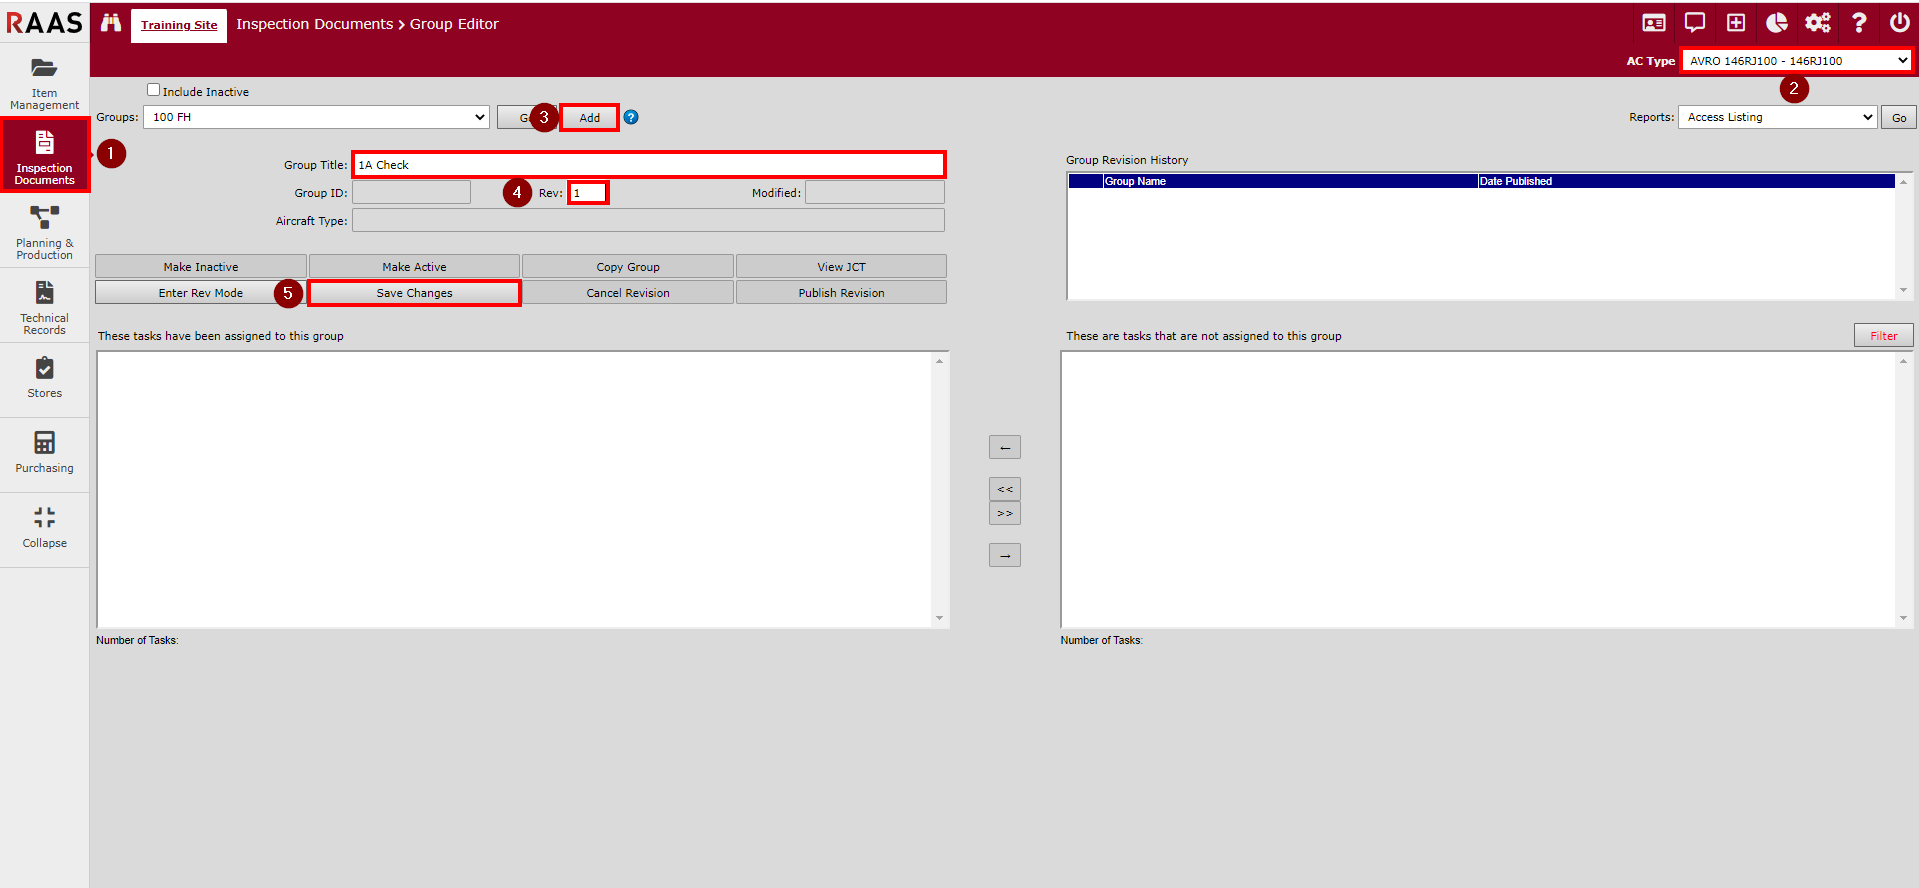
Creating a Group
-
Click on Inspection Documents and select Group Editor.
-
If your fleet consists of multiple aircraft types, select the desired aircraft type from the Aircraft Type dropdown.
-
Click Add.
-
Name the group and enter the group revision number
-
Click Save Changes. The group is now an unpublished group in revision mode.
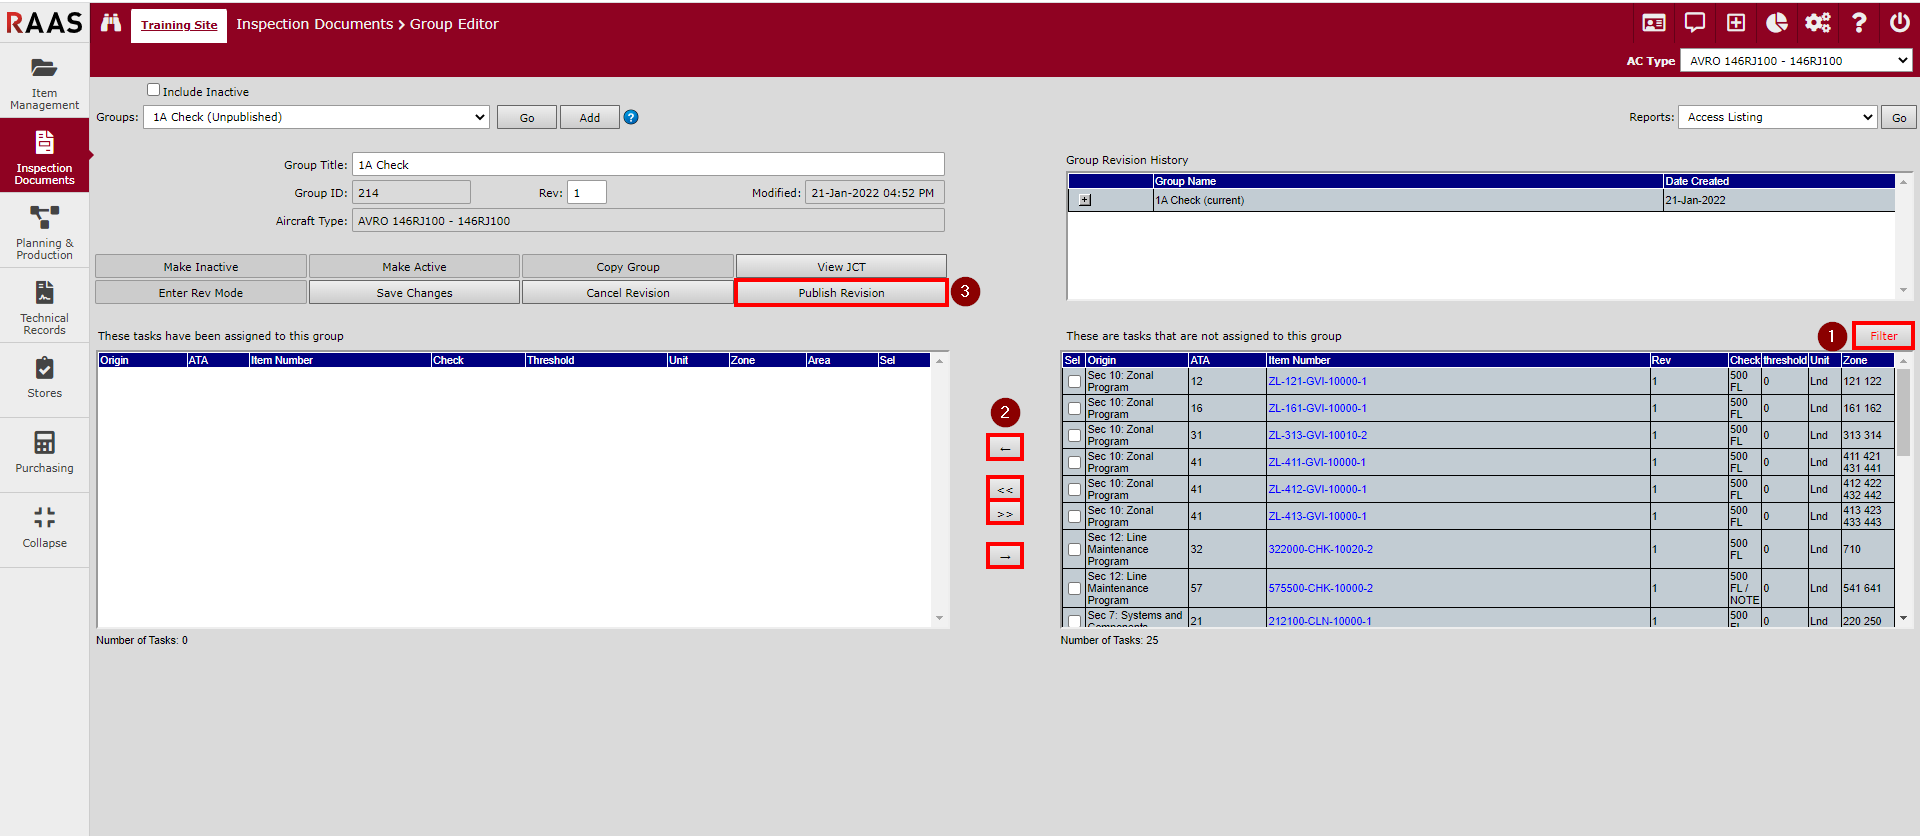
Adding Tasks to a Group
-
To add tasks to the group, filter the right-hand list box labelled These are tasks that are not assigned to this group for the desired tasks.
-
Use the arrow buttons to move all desired tasks into the left-hand list box labelled These tasks have been assigned to this group.
-
The buttons with a single arrow will only move tasks that have their checkbox selected.
-
The buttons with double arrows will move all tasks in the direction shown regardless of whether they are selected.
-
-
In order for this group to be available for use in Planning and Production, it must be published. It can be published by clicking the Publish Revision button in the Group Editor or by using the Publish utility on the Utilities screen.