In order to optimize inventory levels, RAAS allows users to set Minimum and Maximum values for all parts (excluding aircraft). The “Min” value represents a stock level that will trigger reordering, and the “Max” value represents the targeted stock level after the new order is placed. These values can be set individually at the Part Description level in Item Editor or you can set up multiple parts at once through the Min Max Settings in Stores as described below.
Setting Min Max Values
-
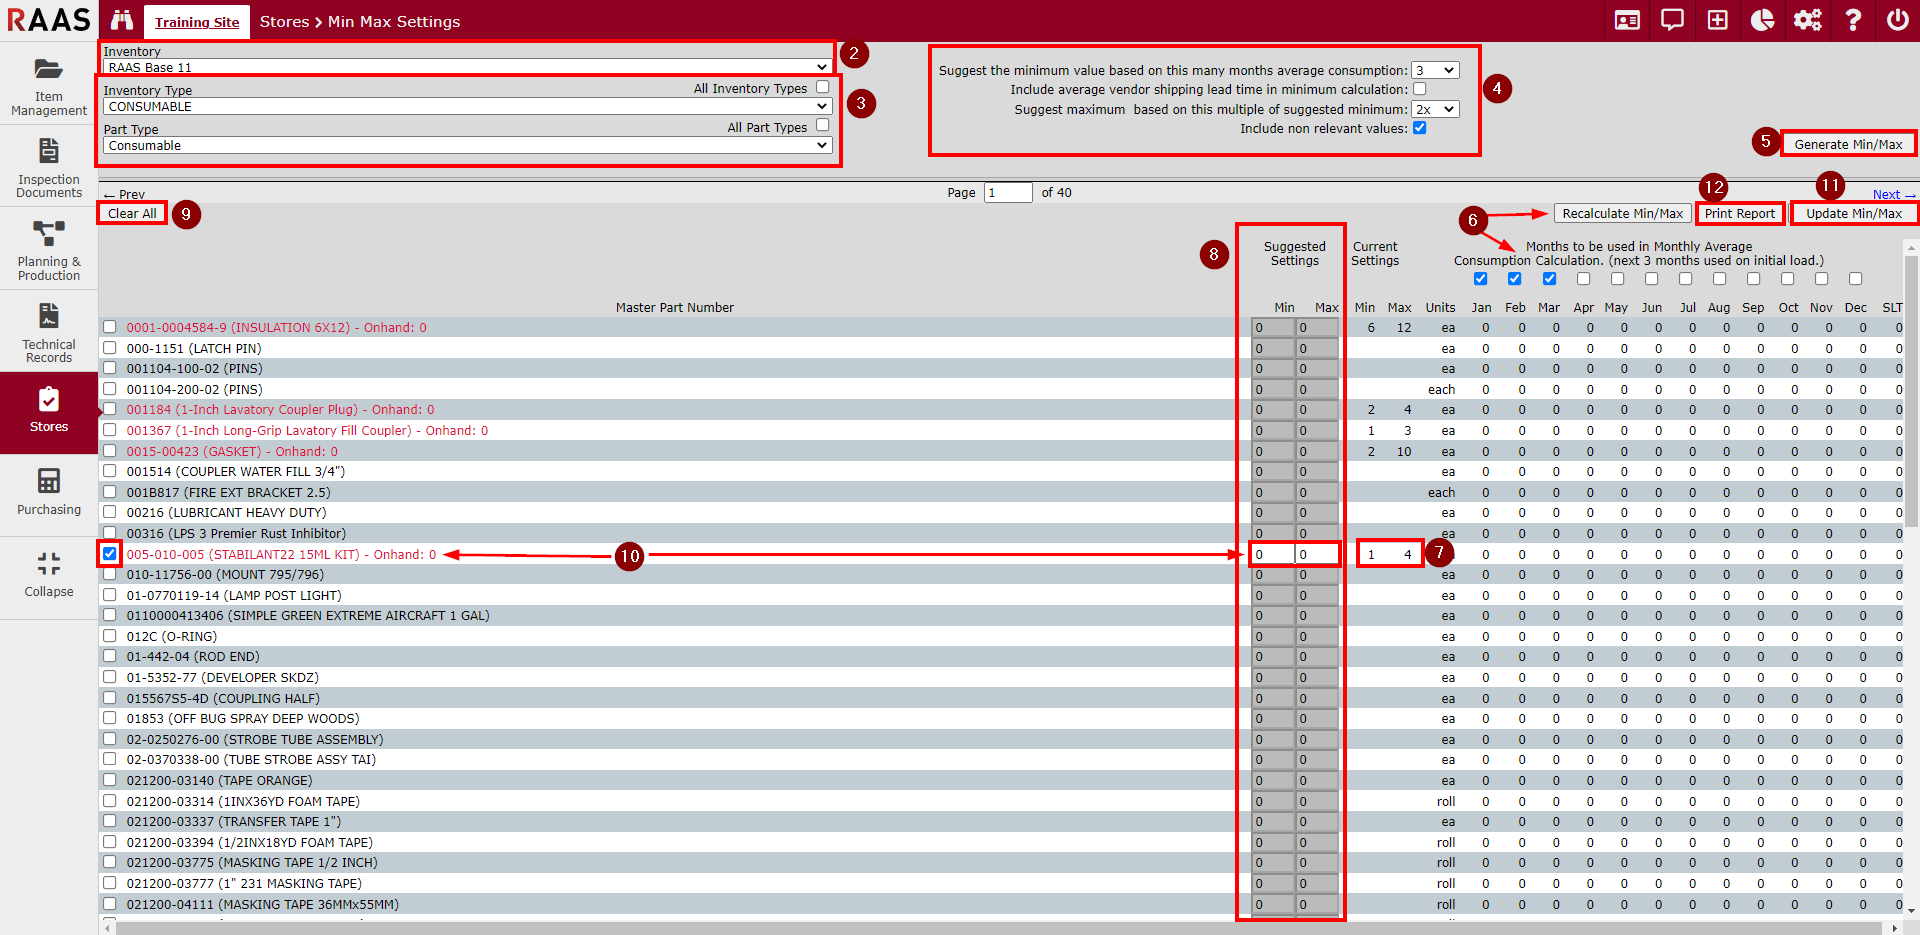
Click Stores and select Min Max Settings.
-
Select the Inventory location that you wish to set Min/Max values for.
-
RAAS will default to select All Inventory Types and All Part Types, however, if you would like to choose only one inventory or part type, deselect the checkboxes and then choose the type from the dropdown menu.
-
Select the number of months that you would like RAAS to use to calculate the average consumption and base the suggested minimum value on. Choose whether you would like to include average vendor shipping lead time in the minimum calculation. Select a multiple of the minimum for RAAS to use to suggest a maximum. Choose whether or not to include non-relevant values. (By including non-relevant values, the generated list will include all parts whether they currently have had any consumption history on them or not during the months specified.)
-
Click Generate Min/Max and a list will appear including only Master Part Numbers.
-
The months used in the Monthly Average Consumption calculation can be changed by selecting the desired months and clicking Recalculate Min/Max.
-
Numbers will appear under Current Settings if the part already has Min/Max values set.
-
Suggested Settings will be populated for any parts with consumption history and those parts will automatically be selected. The values for each part can be manually changed or deselected if you do not want to set Min/Max values for that part.
-
By clicking Clear All, all parts will be deselected.
-
To change the Min/Max value for a part that is not already selected, click the checkbox to the left of the Master Part Number and then enter the new Min and Max values in the appropriate boxes.
-
Once all values are entered, click Update Min/Max. The new values will then appear under Current Settings.
-
You can also print a report showing the Min/Max Settings can be saved as a PDF. The report will highlight any parts that have Min/Max values set that are not suggested in red.