
Parts can be issued in the following RAAS screens:
-
Stores – Part Requests Listing
-
Stores – Part Issues
-
Stores – Pick Lists
-
Stores – Expense Center Transactions
-
Job Card Detail Issued Parts tab – accessed in Planning & Production or in Stores – Job Card Listing
-
Purchasing – Orders
This section will cover items one and two.
Stores - Part Requests Listing
If your company uses the RAAS Part Requests System, then the Part Requests Listing is the best screen on which to perform the task of issuing parts.
To find part requests either use the Find function – Find button at the top of the screen – or find the part request(s) on the listing. To make it easier to find part requests on the listing use the various filters above the listing and the Sort By options below the listing.
To issue parts on the Part Requests Listing:
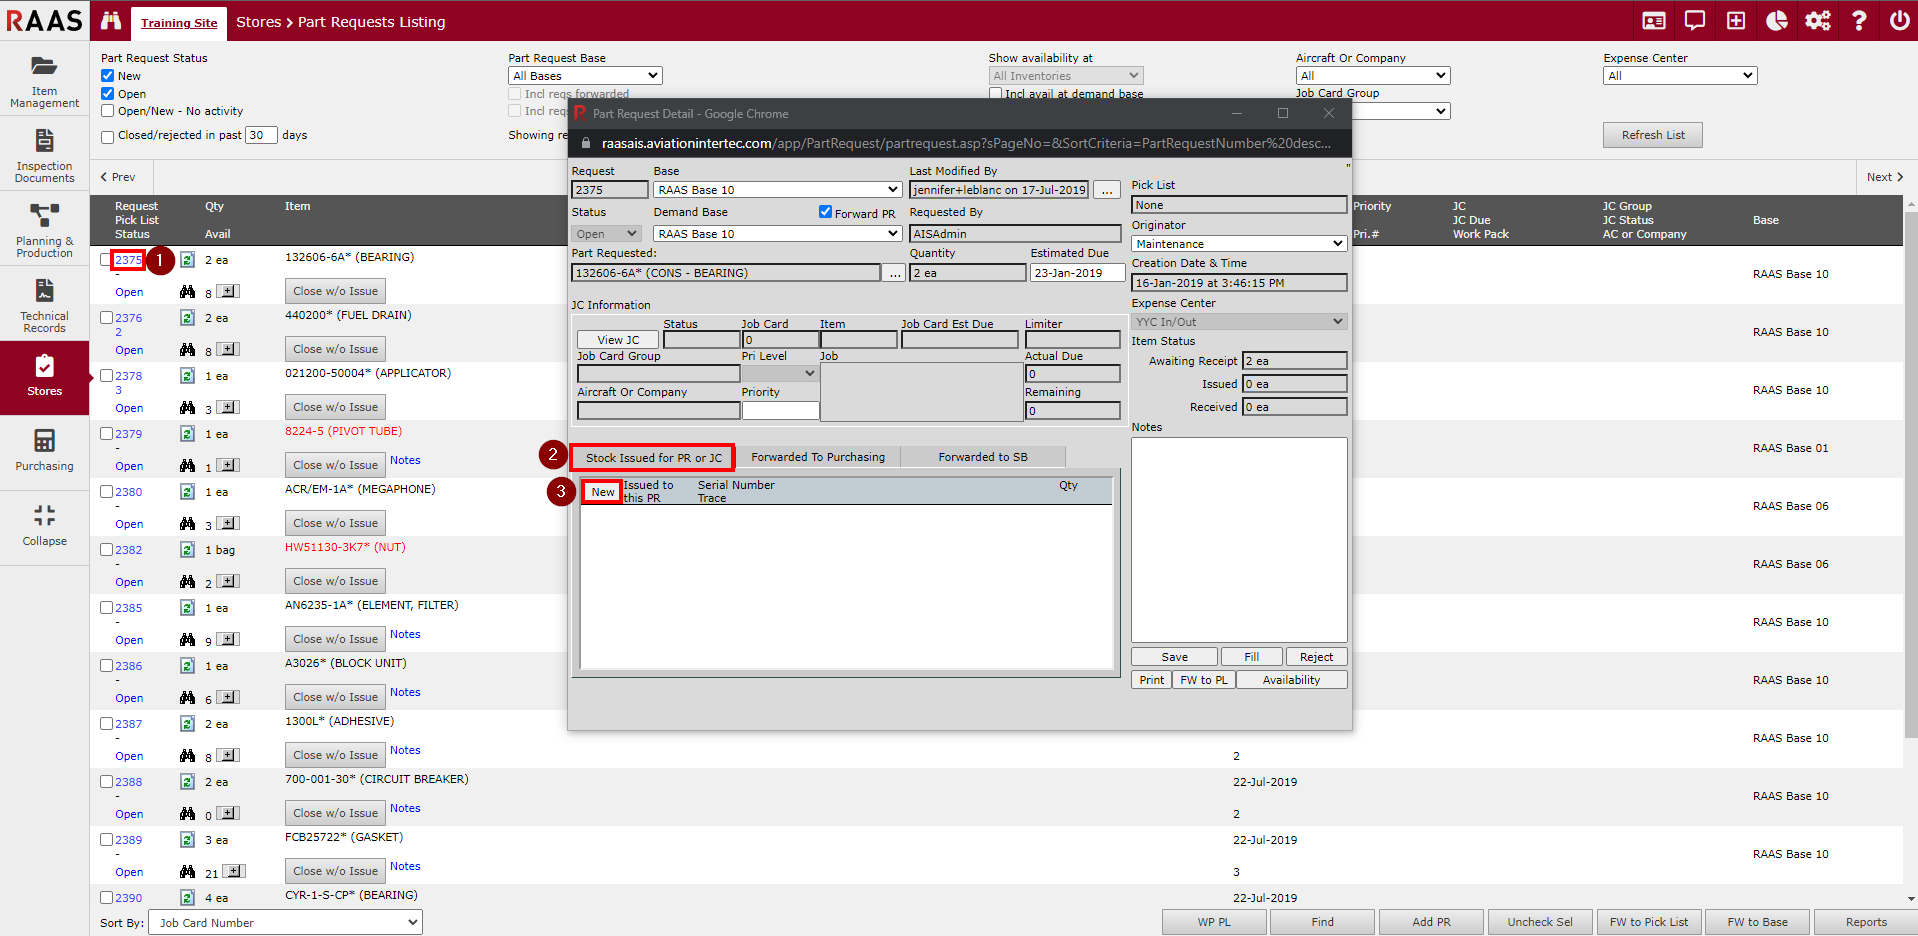
Method A: Issuing from the Part Request Detail screen
-
Click the blue text of the part request number.
-
Click the Stock Issued for PR or JC tab.
-
Click the New button.
-
Select the desired Trace from the applicable inventory/serial number. Note: Traces must be issued one at a time.
-
Enter the Qty to issue.
-
Enter Date and Time of Issue (Click the checkbox to use the current date and time).
-
Enter Reason (optional).
-
Click Issue.
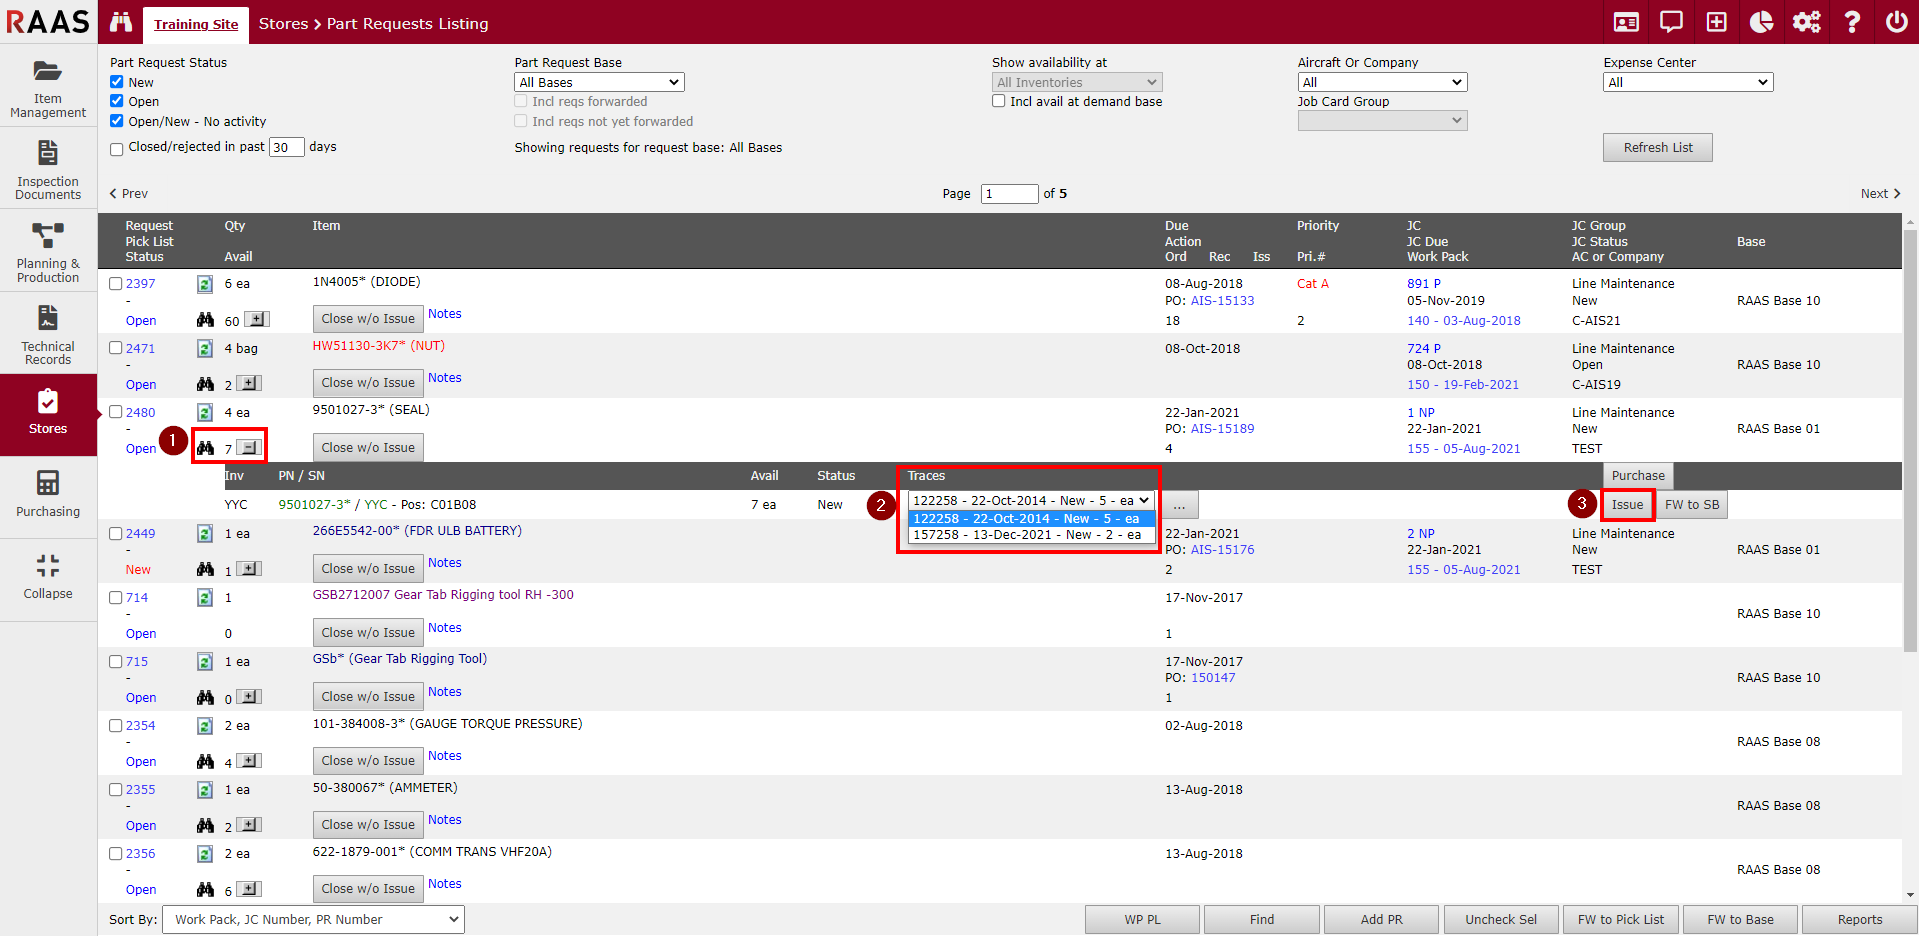
Method B: Issuing from the Part Requests Listing
-
Click the + button adjacent to the Avail Quantity.
-
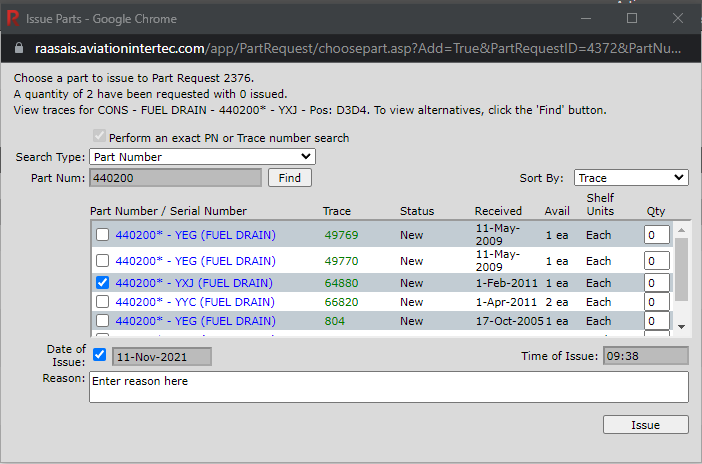
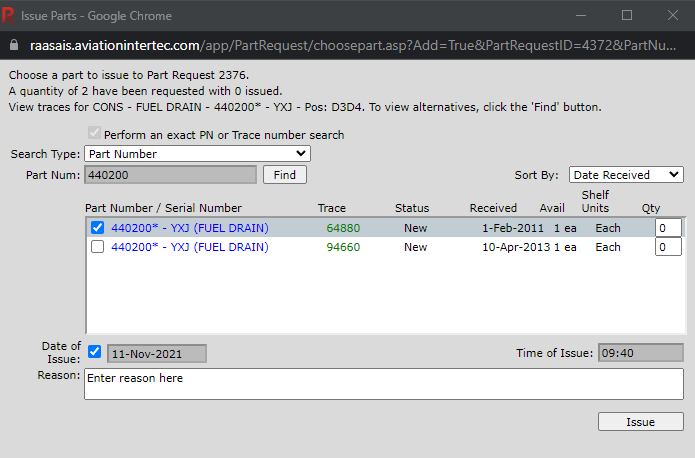
If issuing a consumable, select the desired Trace from the Traces drop-down for the applicable Inventory.
-
Click the Issue button. An Issue Parts window will appear.
-
Enter the Qty to issue.
-
Enter Date and Time of Issue (Click the checkbox to use the current date and time).
-
Enter Reason (optional).
-
Click Issue.
Notes
-
Colour-coding on the Part Requests Listing is as follows:
-
Purple or gray: non-tracked - parts cannot be issued to part requests for non-tracked items
-
Red: non-master/alternate part number
-
-
Colour-coding in the available parts list (+ button):
-
Green: master part numbers
-
Blue: alternate part numbers
-
-
A message may be presented if the oldest Trace was not selected. This is a warning and the user will be allowed to continue.
-
A message may be presented if the stock has reached or is below the minimum. It is up to the user whether or not they would like to create a request to order.
-
If the quantity issued has met or exceeded the quantity requested a message will be presented asking the user if they want to close the part request. It is recommended to do so.`
-
A Trace cannot be issued if its expiry date has passed.
-
Obsolete parts (part number detail screen) cannot be selected to be issued.
-
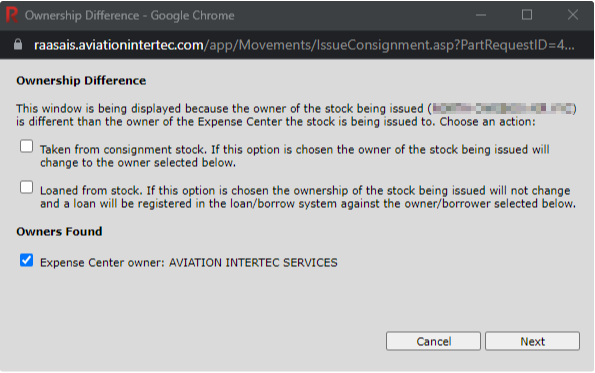
If the ownership of the Trace being issued is different than the customer of the expense center to which the Trace is being issued, the Ownership Difference window will appear and the user must indicate whether the part is being “Taken from consignment stock” (one company is selling the part to another) or the part is being “Loaned from stock” (one company is borrowing the part from another).
Stores - Part Issues
The Part Issues screen is best used when there is no part request for a part being issued or when a sign-out station equipped with a barcode reader is used for stock takes.
To issue parts on the Part Issues screen, typically the “include available parts only” filter is the only filter used.
-
Select a search type to find the part to be issued.
-
Enter a search value or scan a part label if using a barcode reader.
-
Click Find.
-
Select the correct part from the Results drop-down – there could be several results. Note: A part number with a superscript asterisk is a master part number.
-
Select the Trace to be issued and if issuing a consumable part enter the quantity to be issued. Note: Traces must be issued one at a time.
-
Following Trace selection, there are three options –
Issue To Expense Center, Issue To Job Card, and Issue to Part Request.
The order of preference is:
i. Part Request
ii. Job Card
iii. Expense Center
If there is a part request, issue to and fill/close the part request; If there is no part request but there is a job card, issue to the job card; if there is no part request or job card, issue to the appropriate expense center.

A barcode reader can be used for issuing to a job card or an expense center.
Expense center barcodes can be printed or downloaded from Settings – Expense Center.
-
If the movement date and time have to be changed, uncheck the Movement Date checkbox and enter the date and time as required.
-
Enter Movement Reason (optional).
-
Click Next.
Notes
-
A message may be presented if the oldest Trace was not selected. This is a warning and the user will be allowed to continue.
-
A message may be presented if the stock has reached or is below the minimum. It is up to the user whether or not they would like to create a request to order.
-
A Trace cannot be issued if its expiry date has passed.
-
Obsolete parts (part number detail screen) cannot be selected to be issued.
-
If the ownership of the Trace being issued is different than the customer of the expense center to which the Trace is being issued, the Ownership Difference window will appear and the user must indicate whether the part is being “Taken from consignment stock” (one company is selling the part to another) or the part is being “Loaned from stock” (one company is borrowing the part from another).