A Shipping Bill is used to move parts between bases in RAAS or to return parts to vendors, typically core returns.
Creating a Shipping Bill to transfer parts from one base to another
-
Click on Stores and select Shipping Bills.
-
Navigate to the Quick Add button and click Create Shipping Bill to open the Shipping Bill Items screen.
-
Ensure that the Internal Shipping (Destination) box is checked and select the Internal Destination and Origin from the dropdown menus. Enter any other pertinent information in the Shipping Bill Items header.
-
Click Save.
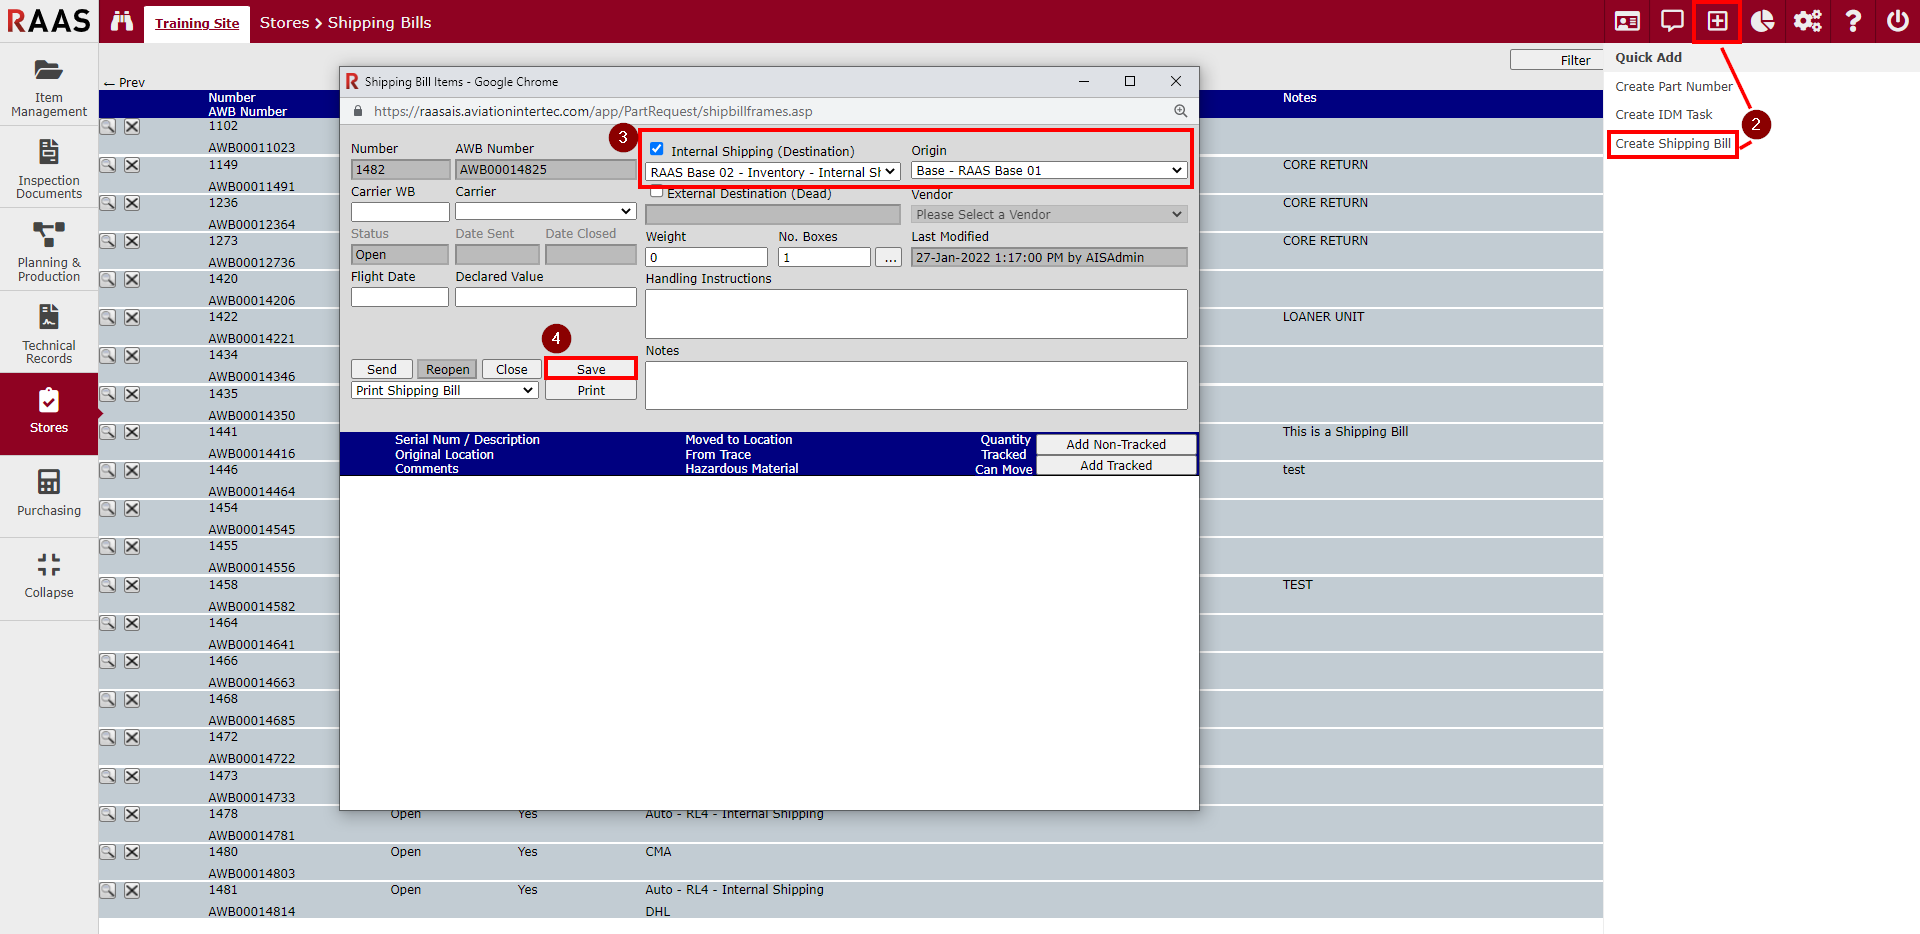
Figure 1: Creating a Shipping Bill Steps 1-4
-
Once the Shipping Bill is saved the Status will be Open, and you can then add items to the Shipping Bill. A Tracked item is a part that is set up in RAAS. A Non-Tracked item can be anything that is not tracked in RAAS. To add a tracked item, click Add Tracked.
-
On the Shipping Bill Movement screen, select the Search Type and then enter the Part Number, Serial Number, Trace, or Barcode Number that you want to search for and click Find. This is an exact match search.
-
Select the part that you want to transfer and enter the quantity to be transferred and click Select Item. The quantity cannot be greater than the available quantity.
-
If the part being transferred is a Consumable, select the In Transit Bin and Destination Bin. If they do not already exist, click Add to create them.
-
Enter any other pertinent information such as the Destination Position, Trace number, Account Code, Harmonization Code, Transfer Reason, and whether it is associated to a Part Request, Job Card or Expense Center.
-
Click Add Item.
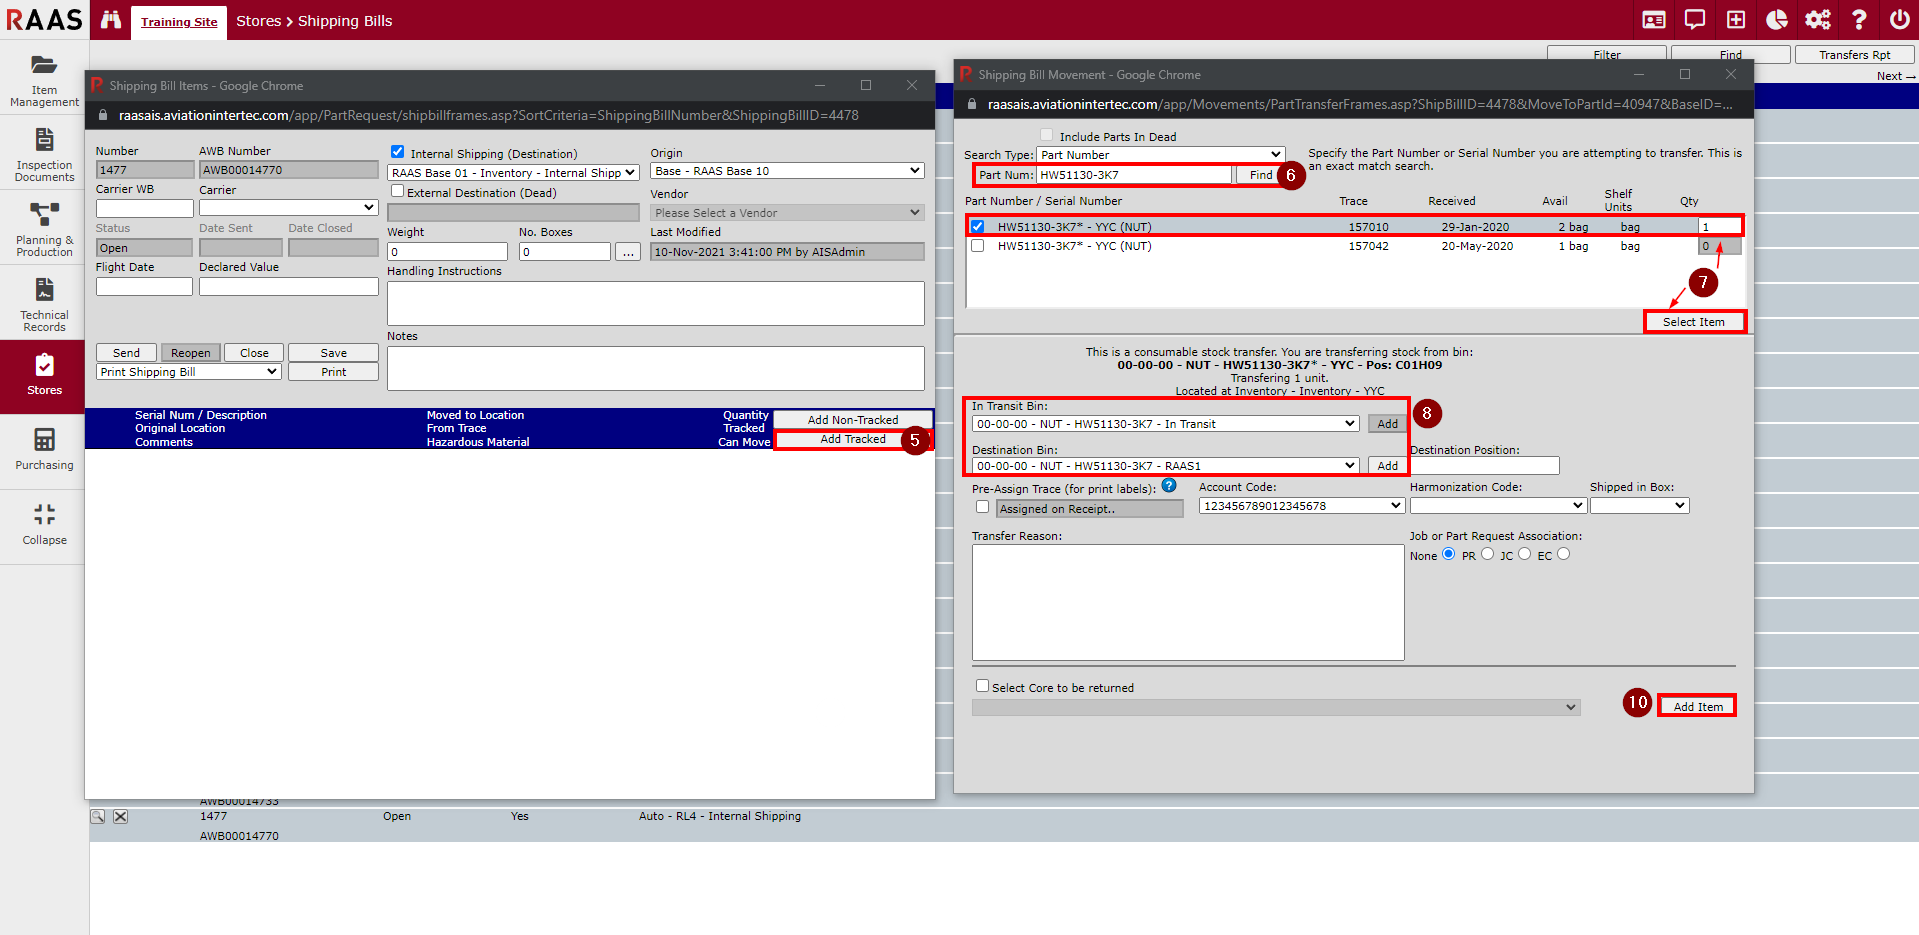
Figure 2: Creating a Shipping Bill Steps 5-10 -
If there are any other tracked items to be added to the Shipping Bill, follow steps 4-9 above until they are all added.
-
To add a non-tracked item, click Add Non-Tracked from the Shipping Bill Items screen.
-
On the Shipping Bill Item Detail screen that comes up, enter any known information for the non-tracked item and click Save.
-
Once all items are added to the Shipping Bill, it can be sent by clicking Send. The items will be moved to Internal Shipping and the quantity will be moved from the Origin base’s SN to In Transit. The status of the Shipping Bill will also be changed to In Transit. To ensure that the In Transit Shipping Bills are showing on the Shipping Bills screen, ensure that Show Shipping Bills in Transit is selected in the Shipping Bill Filters.
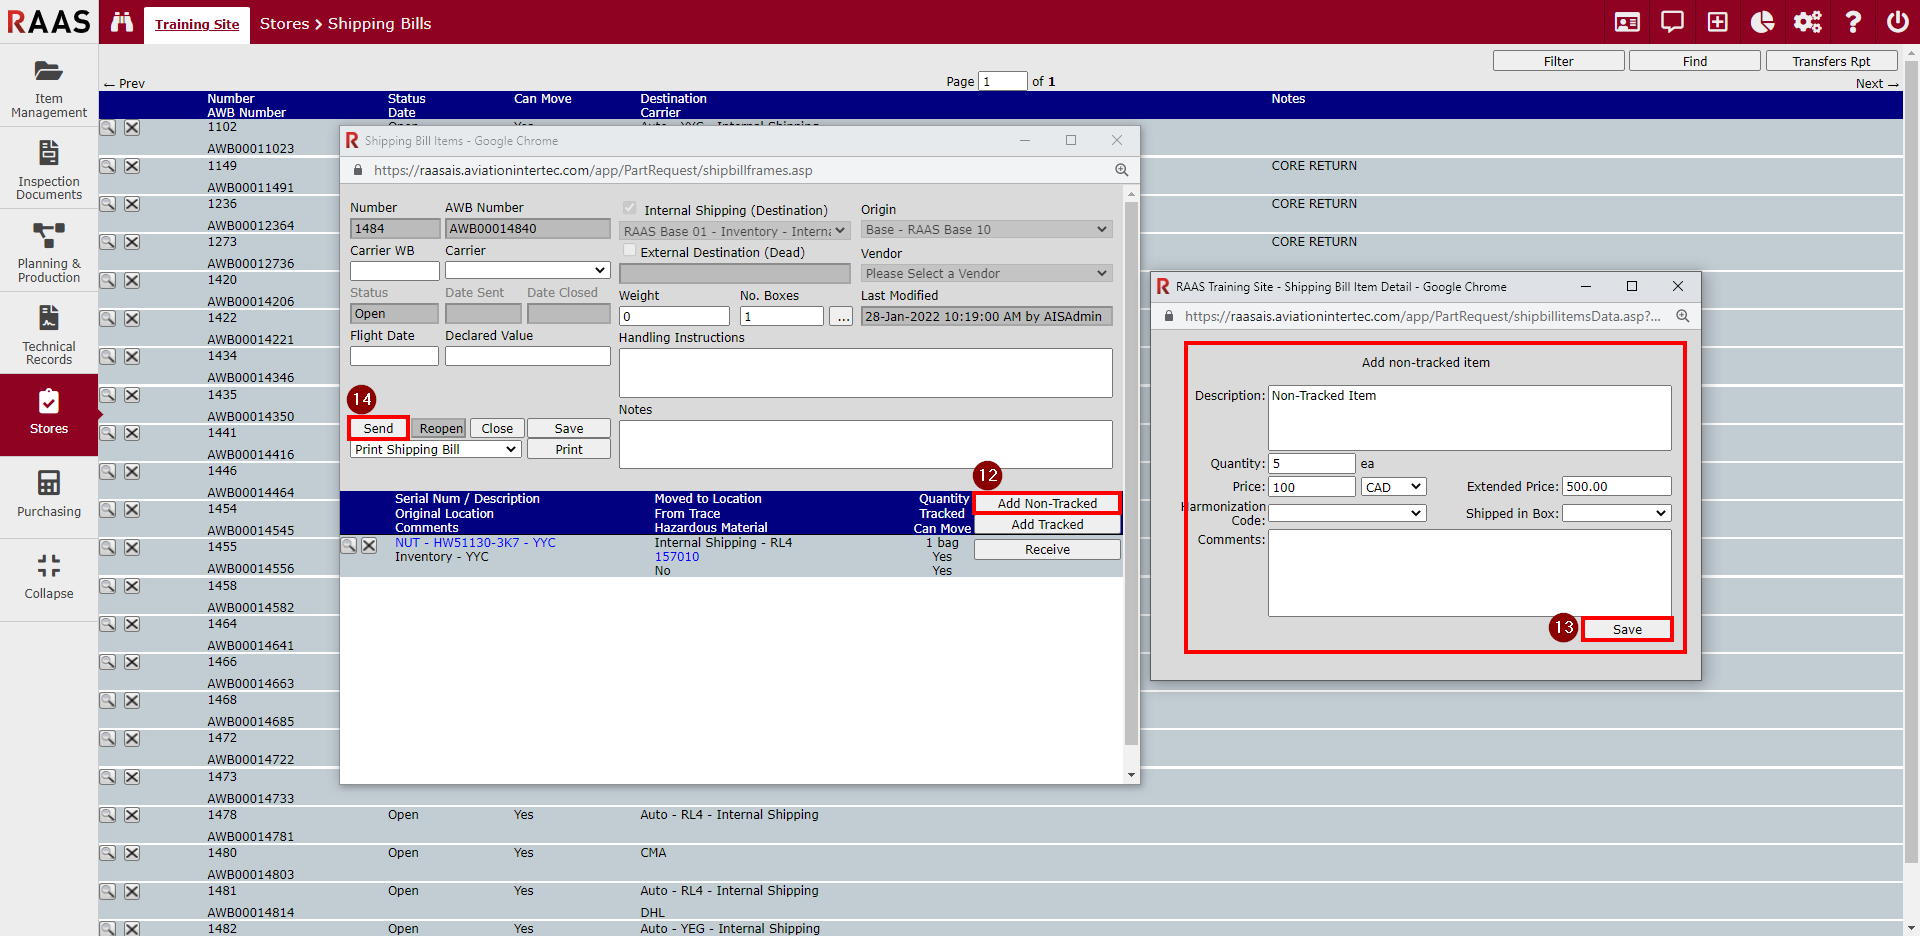
Figure 3: Creating a Shipping Bill Steps 12-14
-
Click Receive for each item in the Shipping Bill Items window to receive them at the new base. On the Shipping Bill Item Receipt window, select the Transfer To Bin, Status, Move Date and Position, and upload any necessary scanned documents. Modify the Trace if necessary. Click Next. Once all items have been received on the Shipping Bill, click OK on the pop-up message to close the Shipping Bill.
Note: If a mistake was made and a part was sent in error, it is best to receive it at the incorrect base and then send it back.
Creating a Shipping Bill for a Core Return
-
Click on Stores and select Shipping Bills.
-
Navigate to the Quick Add button and click Create Shipping Bill to open the Shipping Bill Items screen
-
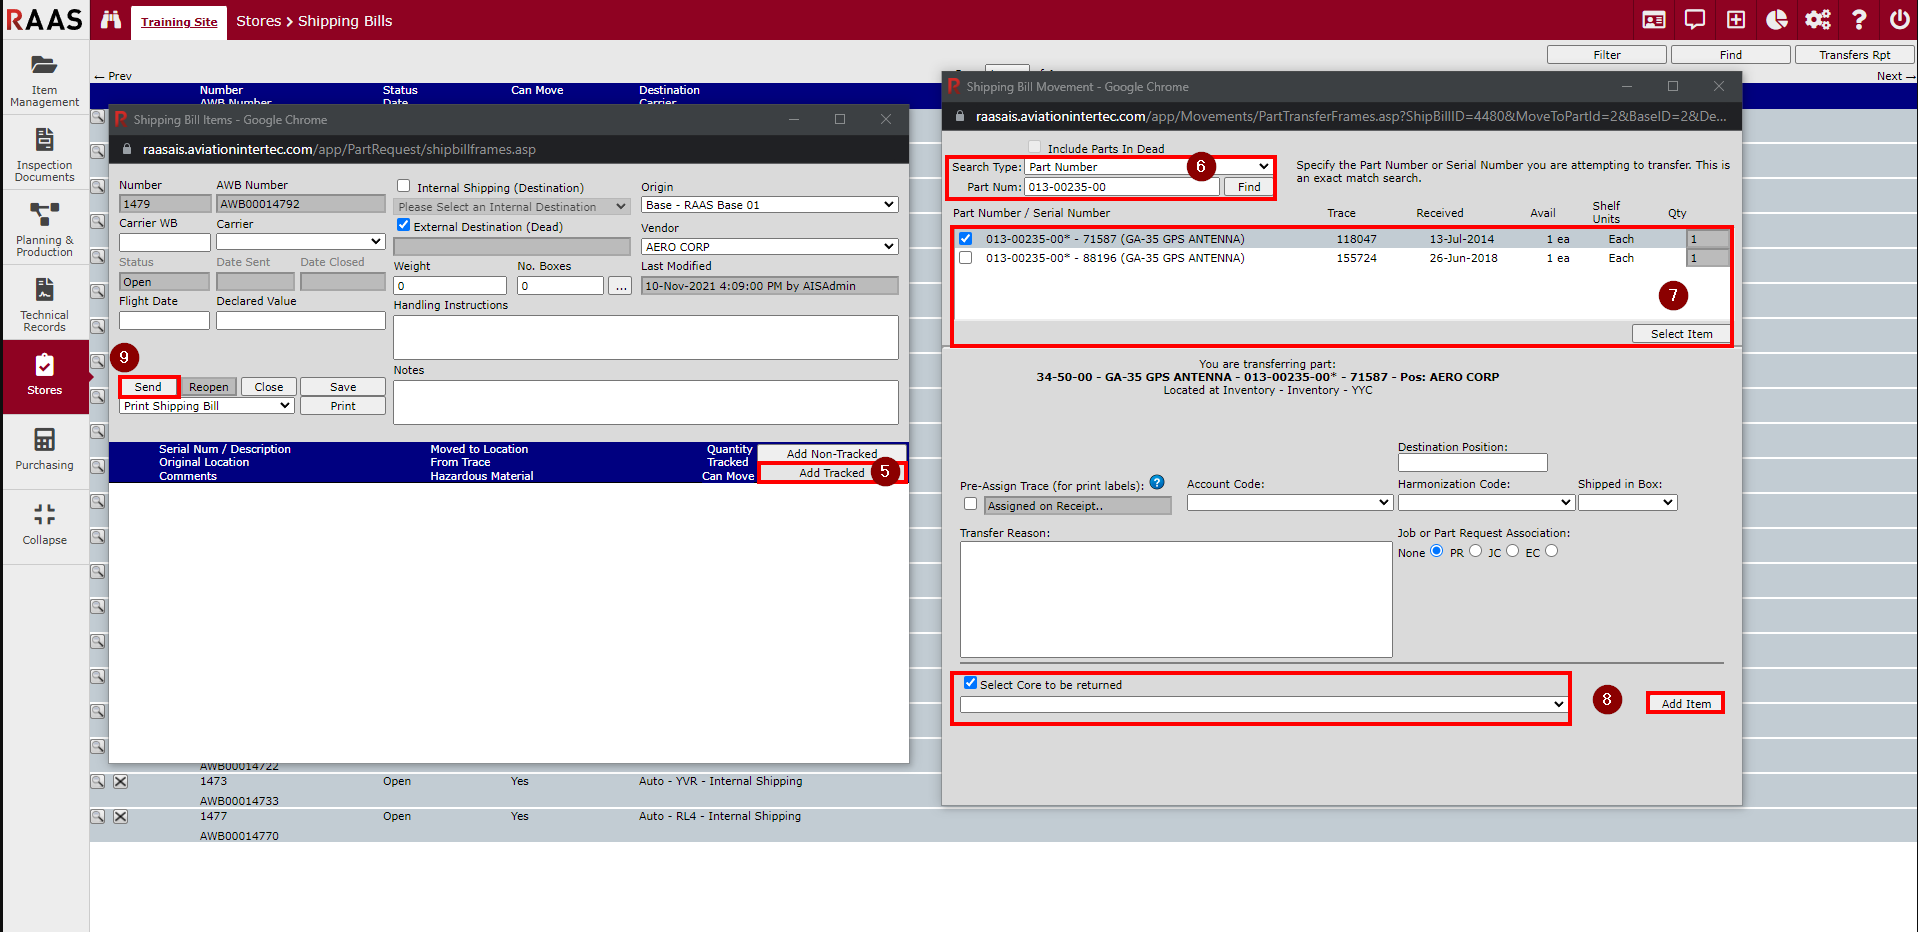
Select the External Destination (Dead) box and select the Vendor that the part is being shipped to from the dropdown menu. Enter any other pertinent information in the Shipping Bill Items header.
-
Click Save.
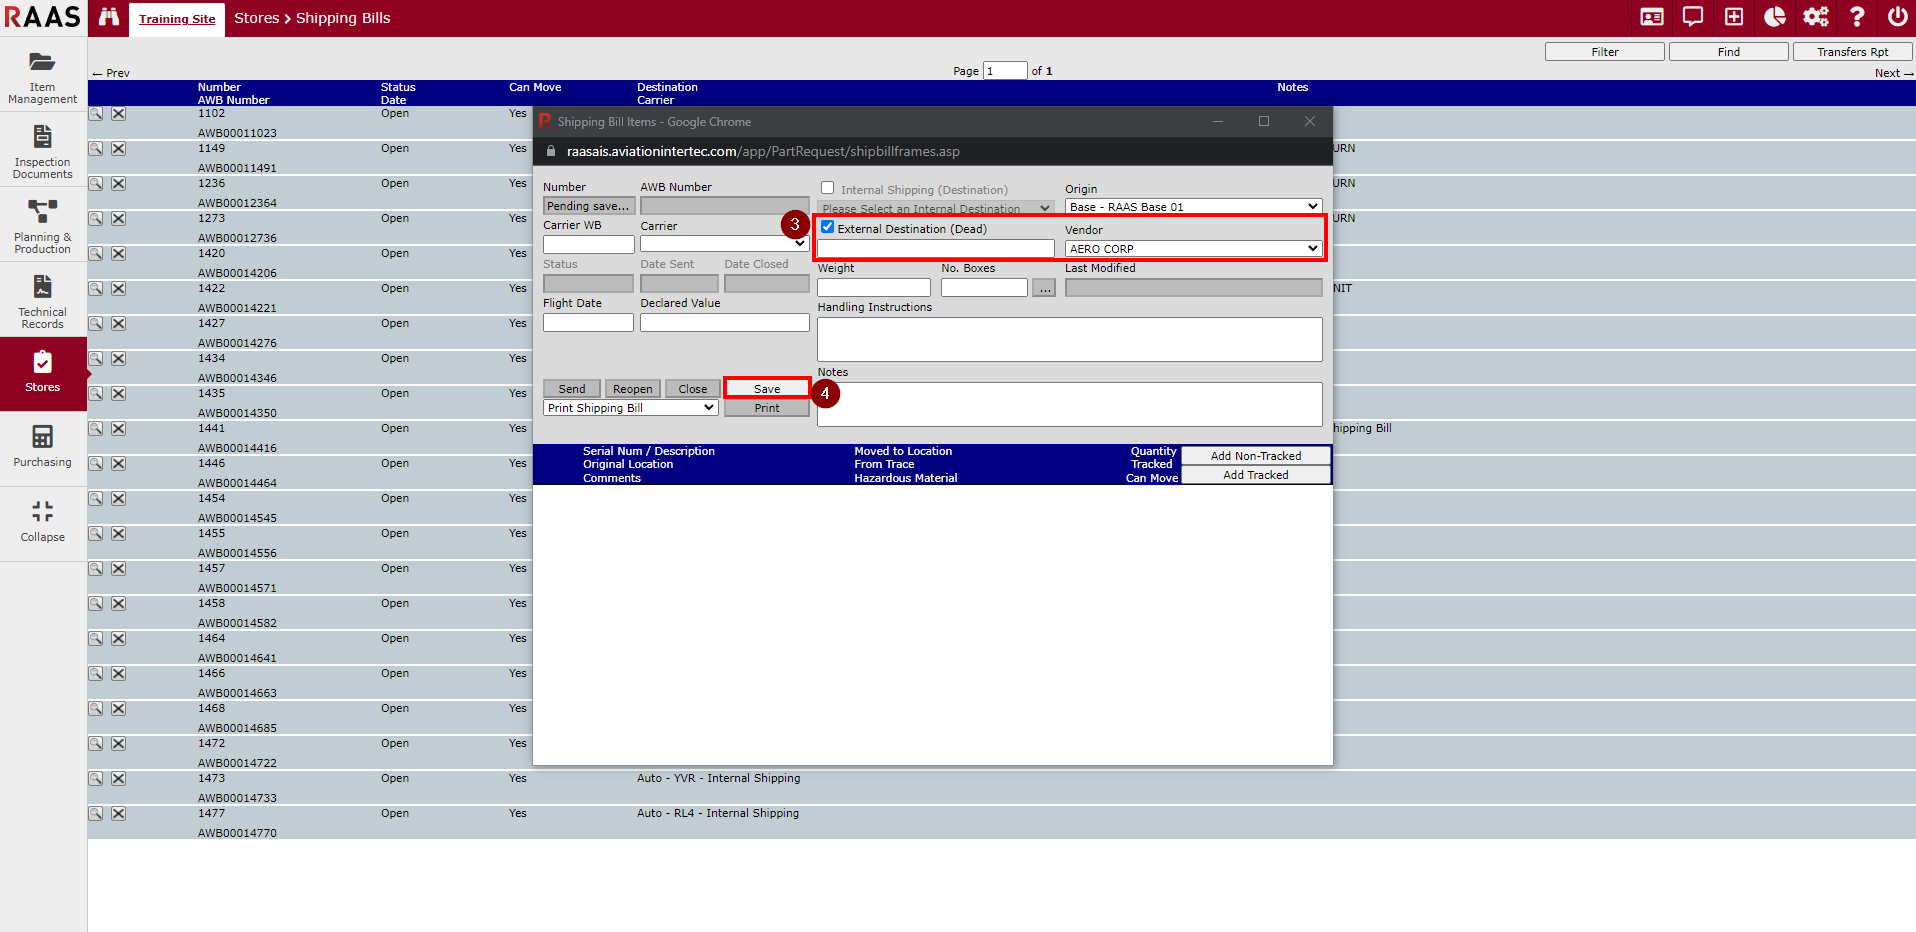
Figure 4: Creating a Shipping Bill for a Core Return Steps 3-4 -
Once the Shipping Bill is saved the Status will be Open, and you can then add items to the Shipping Bill. Click Add Tracked.
-
On the Shipping Bill Movement screen, select the Search Type and then enter the Part Number, Serial Number, Trace, or Barcode Number that you want to search for and click Find. This is an exact match search.
-
Select the part that you want to send and click Select Item.
-
Check the Select Core to be returned box at the bottom of the screen and select the correct part from the dropdown. Enter any other pertinent information and click Add Item.
Note: If the part is being sent to the vendor in advance of receiving a part on an Exchange Order (Inbound), this step can be skipped. -
Once all items are added to the Shipping Bill, it can be sent by clicking Send, and the items will be moved to Dead. The status of the Shipping Bill will be changed to Closed. If the item was matched to a Core to be returned, the item on the Exchange Order (Inbound) will be reconciled. If the part was sent to a vendor in advance of receiving a part on an Exchange Order (Inbound), the Exchange Order (Inbound) can later be reconciled from Consignment & Loans once the part is received from the vendor by reconciling it against the sent Shipping Bill.