
Maintenance planning and production in RAAS is coordinated through a Job Card system where each maintenance job is given a card number and that job card number is used to track the accomplishment of the job both before and after-the-fact. Routine/Planned maintenance job cards are created automatically when selected from a Maintenance Forecast while non-Routine or non-Planned job cards are created manually via the Job Card Listing.
A Job Card or Task Card is a printed document that contains a large amount of information pertaining to the maintenance job. Some of the more important information is the accomplishment instructions, trade and man-hours requirements, access panel list, graphic attachments, reference material and parts/materials list.
Navigation
|
Find a Job Card
|
|
|
Maintenance Forecast
Issuing Planned Job Cards from Maintenance Forecast.
-
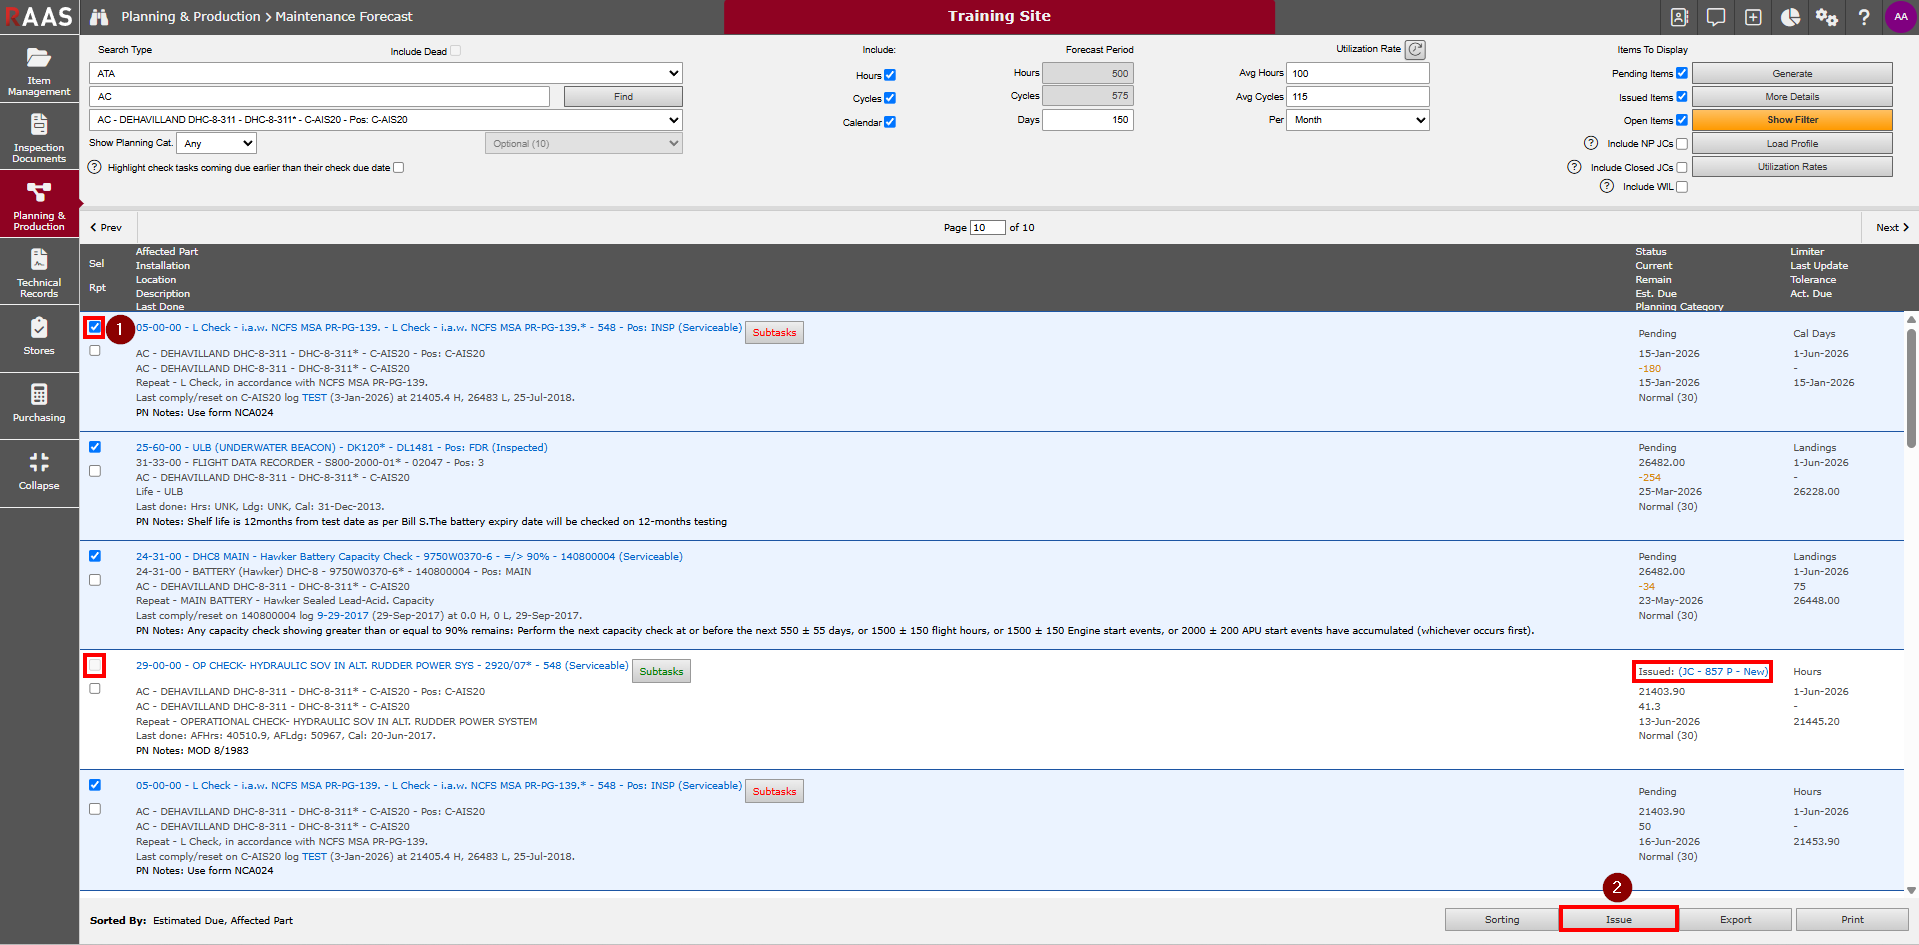
Select the top box of the items that require Planned Job Cards created.
-
If a Job Card was previously created and the filter for Display “Issued or Open Items” is selected, the Forecast will refer to the previously created JC #, its current Status and the top box will be greyed out. The JC detail can be viewed here by clicking on the JC # hyperlink.
-
-
Click Issue.
-
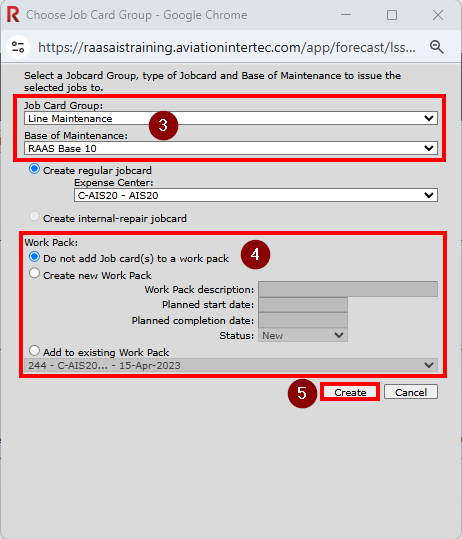
Review and select the Job Card Group, Base of Maintenance, and Expense Center (required for non-internal job cards).
-
Select the preferred Work Pack option if required.
-
Click Create.
The Planned Job Cards will now exist in the Aircraft Job Card Listing (and the Aircraft Work Pack if selected).
Note:
All Job Cards created in the Maintenance Forecast are Planned (P) Job Cards. Once Maintenance Forecast listing refreshes, the job status will change from Pending to Issued with the New JC number (e.g. JC - #### P - New).
Job Card Listing
Creating Aircraft Job Cards
Manually creating Job Cards in the Job Card Listing will create a Non-Planned (NP) Job Card, unless the Planned flag is selected.
-
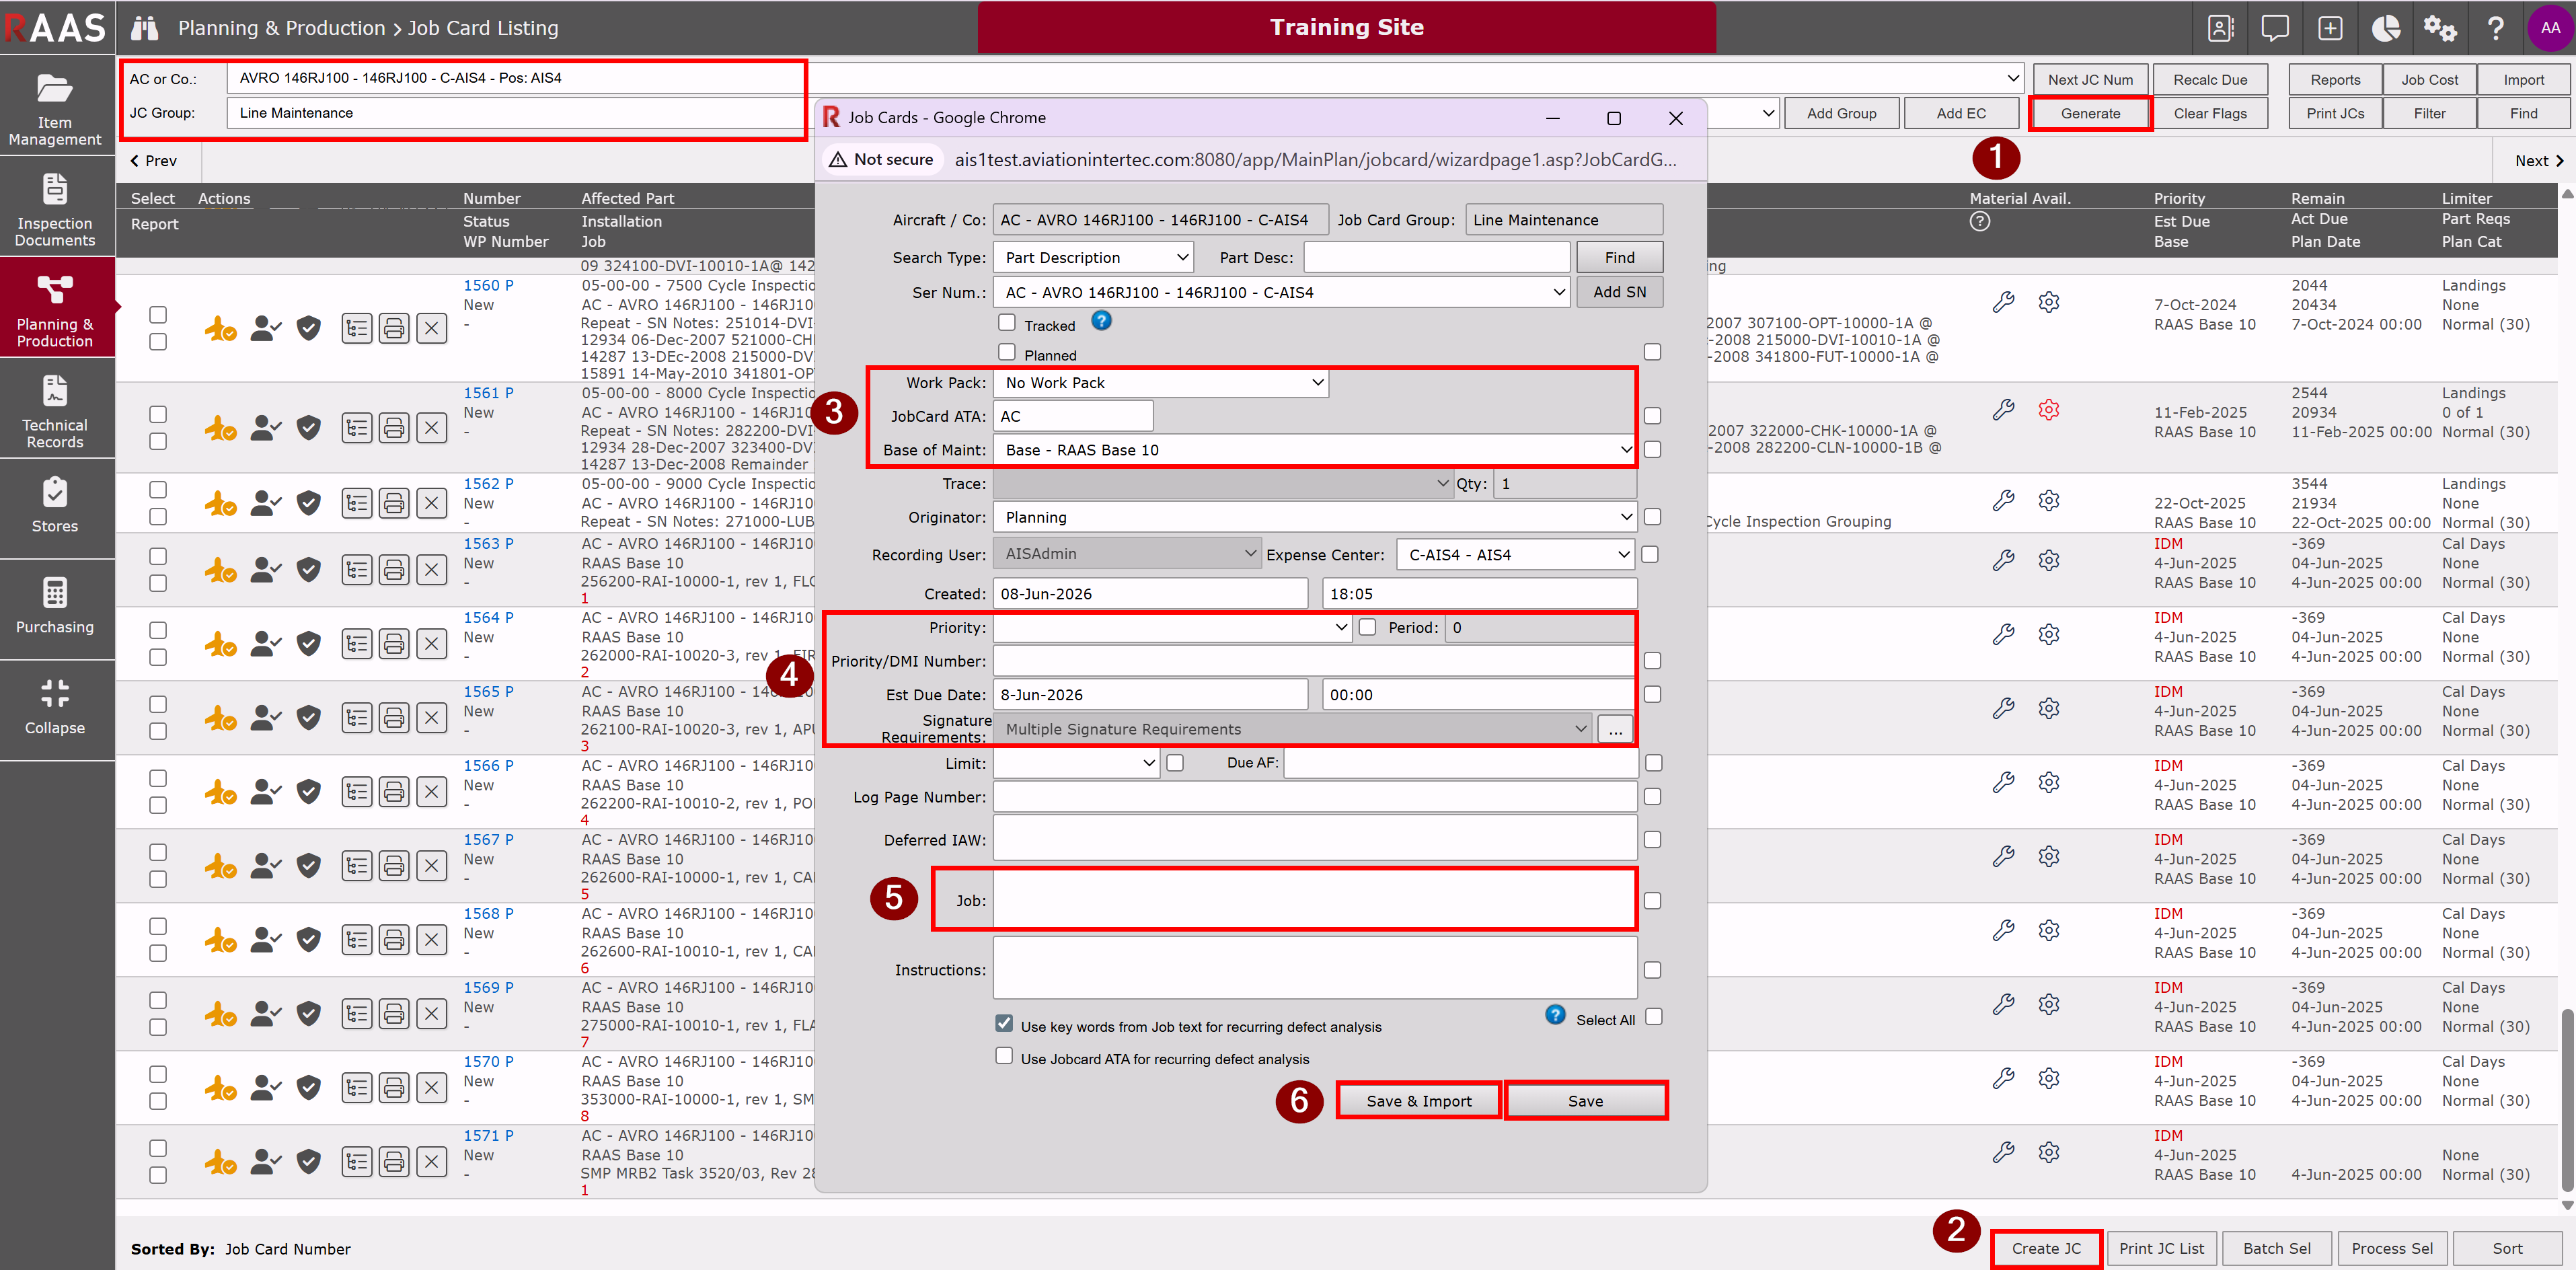
Use the navigation instructions to Generate the Job Card Listing for which aircraft you will create a new job card.
Note: You cannot add a job card when the selection is All Line Maintenance. -
Click the Create JC button located at the bottom of the Job Card Listing window.
-
Work Pack: users can add the new Job Card to a Work Pack by selecting the existing WP in the drop-down.
Job Card ATA: enter in the applicable ATA Code for the new Job Card.
Base of Maint: the Base of Maint will pre-populate for aircraft JCs dependant on which Base the aircraft is located in RAAS. -
Priority: This can be left blank, or a Priority selected to update the Est Due Date of the Job Card. Enter Priority/DMI Number if applicable.
Est Due Date: Can be manually entered or will be automatically calculated if a Priority was selected.
Signature Requirements: Will default to Company default Signature Requirements, but can be manually changed. This will control the Signature Requirement(s) selected during Line Level Rectification. -
Job: Enter the Job Description to be completed.
-
Save & Import: Allows Users to Import an existing Job Card Template (JCT) and Save to create the New Job Card. Note: Importing a JCT will override some information on the Job Card.
Save: Saves the entered information and creates the New Job Card.
Creating Company Job Cards
-
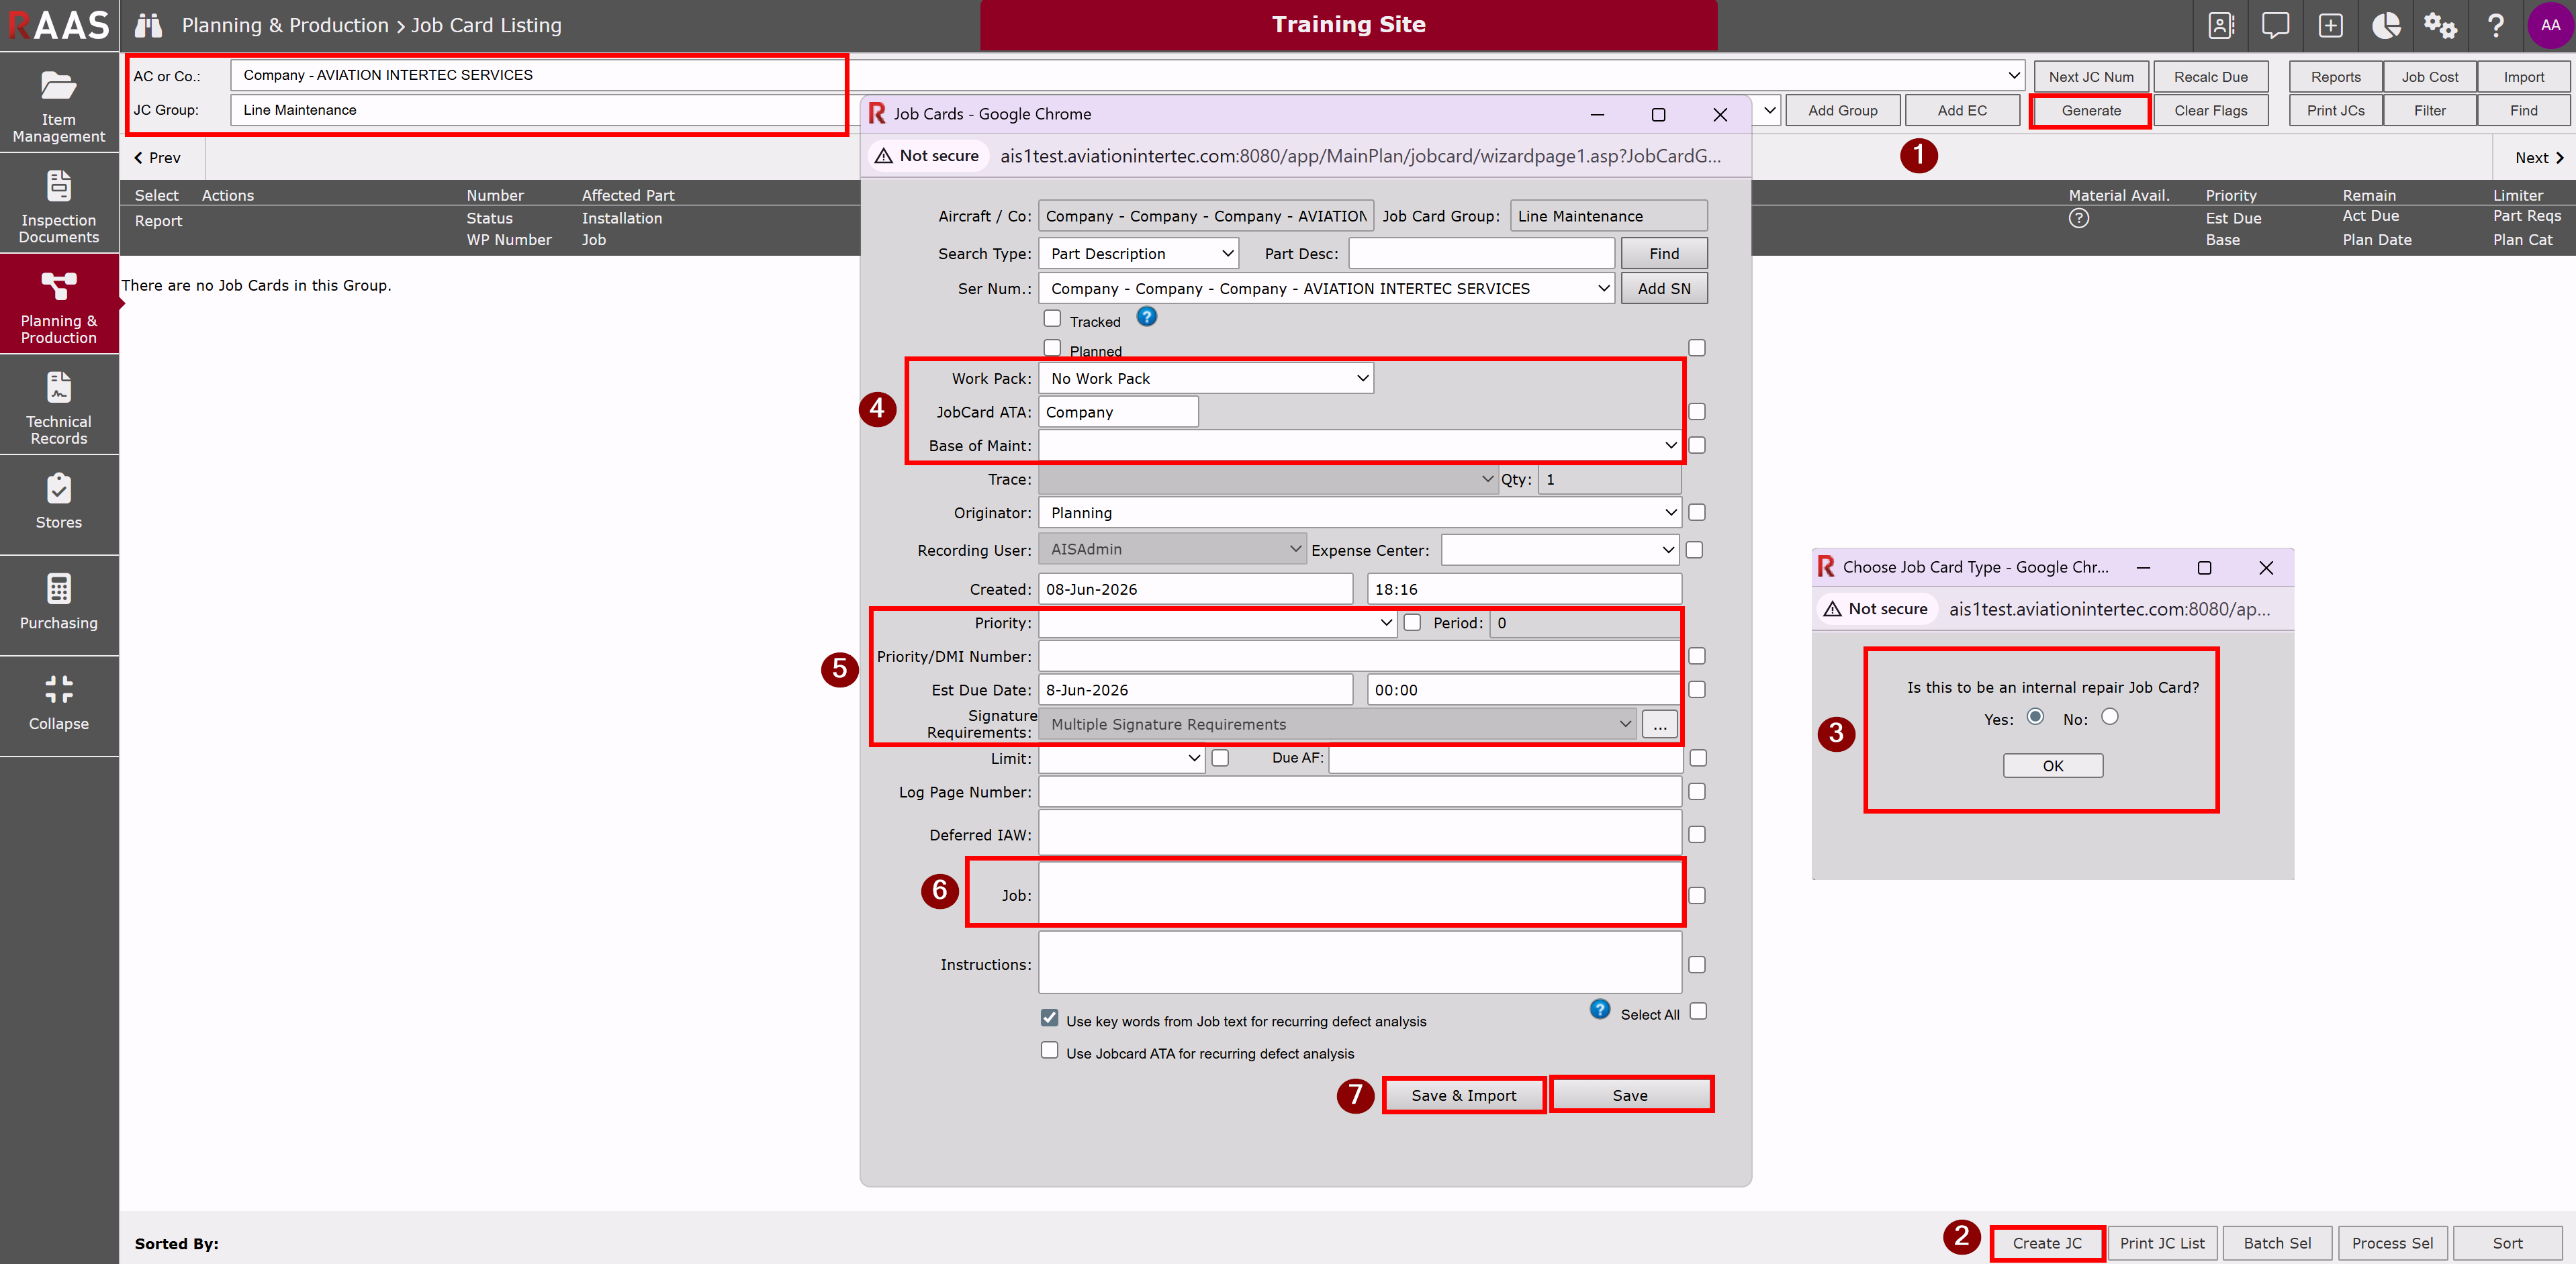
Use the navigation instructions to Generate the Job Card Listing for the Company you will create a new job card.
Note: You cannot add a job card when the selection is All Line Maintenance. -
Click the Create JC button located at the bottom of the Job Card Listing window.
-
If this is an Internal Repair Job Card click Yes, click OK and see Internal Repair Job Cards for further instruction.
If this is not an Internal Repair Job Card click No, click OK and continue to Step 3. -
Work Pack: users can add the new Job Card to a Work Pack by selecting the existing WP in the drop-down.
Job Card ATA: enter in the applicable ATA Code for the new Job Card.
Base of Maint: the Base of Maint will pre-populate for aircraft JCs dependant on which Base the aircraft is located in RAAS. -
Priority: This can be left blank, or a Priority selected to update the Est Due Date of the Job Card. Enter Priority/DMI Number if applicable.
Est Due Date: Can be manually entered or will be automatically calculated if a Priority was selected.
Signature Requirements: Will default to Company default Signature Requirements, but can be manually changed. This will control the Signature Requirement(s) selected during Line Level Rectification. -
Job: Enter the Job Description to be completed.
-
Save & Import: Allows Users to Import an existing Job Card Template (JCT) and Save to create the New Job Card. Note: Importing a JCT will override some information on the Job Card.
Save: Saves the entered information and creates the New Job Card.
NOTES: The Job field text CANNOT exceed 1200 characters. The Deferred IAW field CANNOT exceed 500 characters.