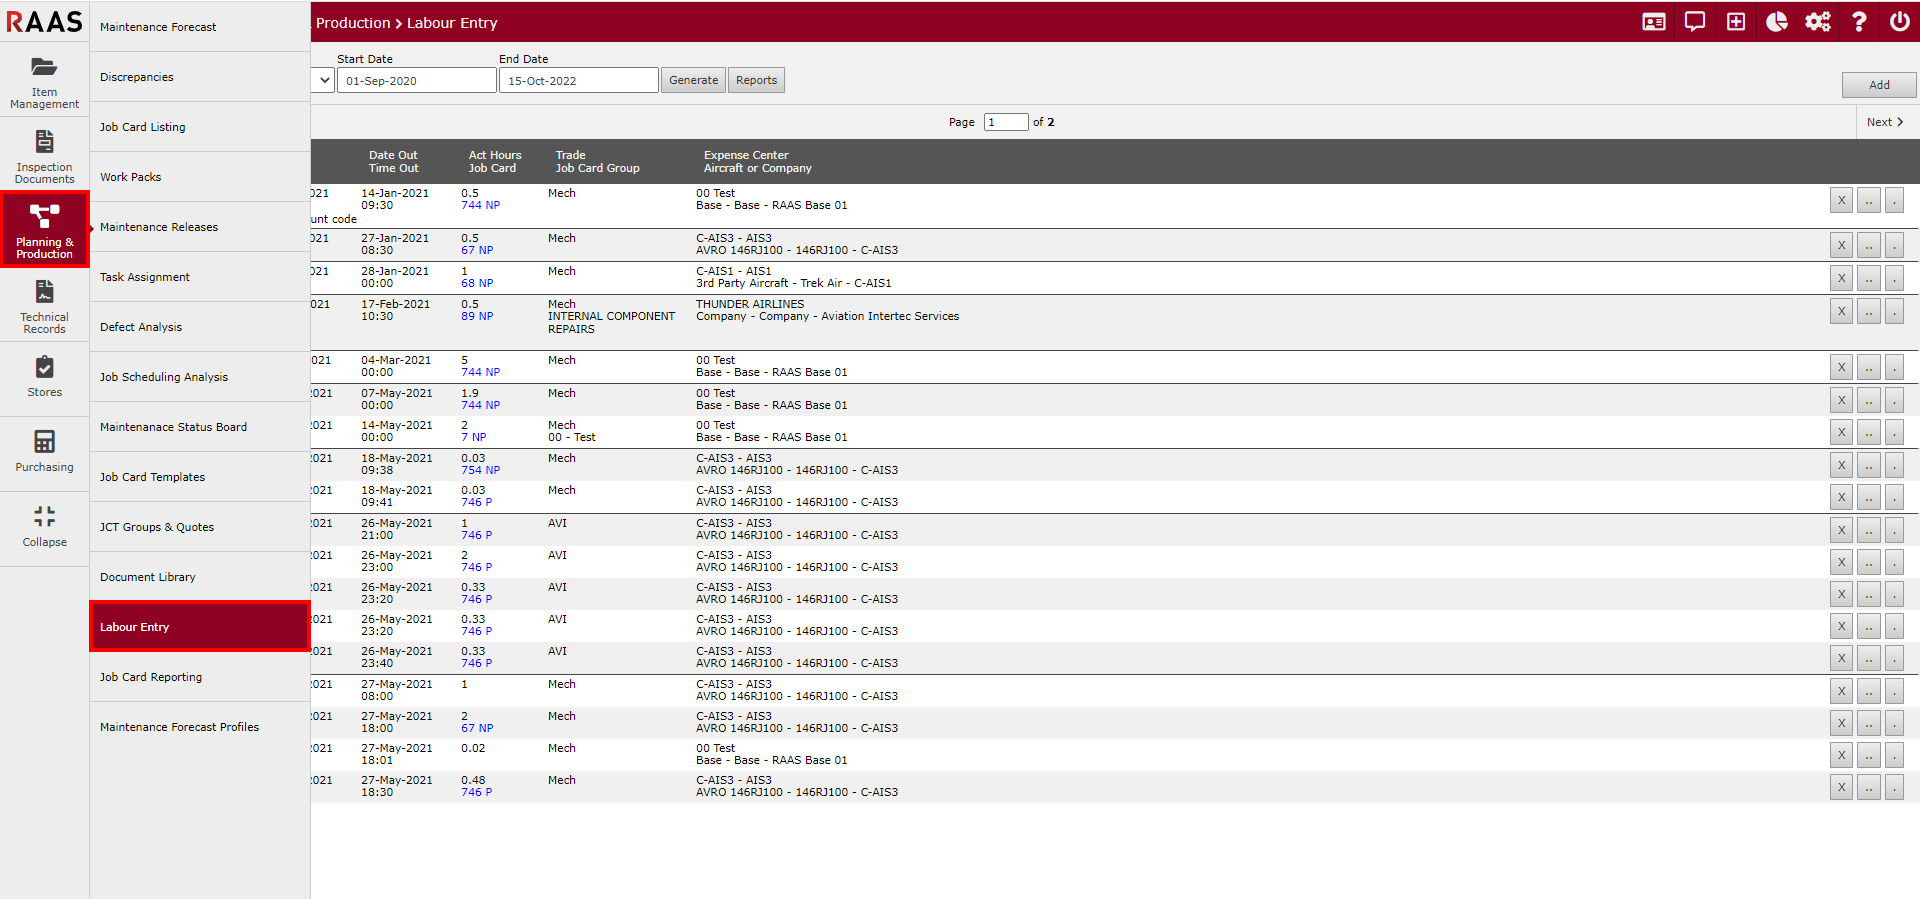
The Labour Entry sub-module is where employee labour times are logged either toward an Expense Center or a Job Card. Labour hours can also be added directly to a Job Card from the Job Card Listing with the appropriate Company Settings.
Adding an Entry
-
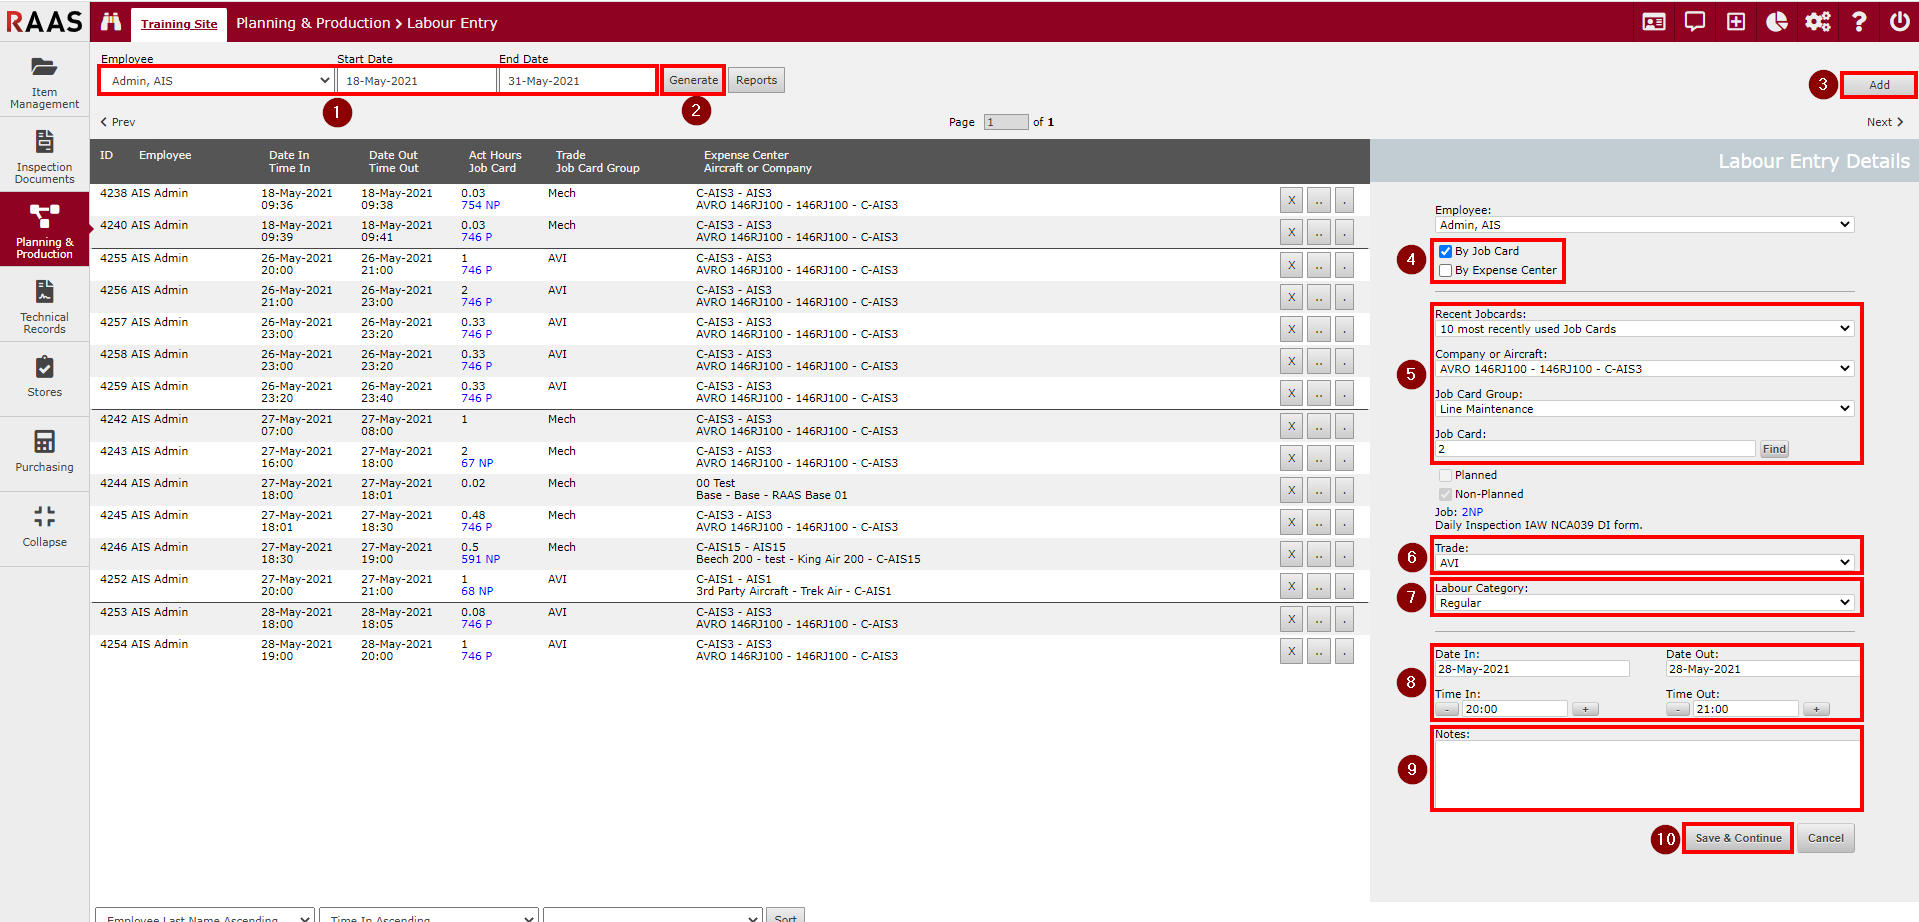
Select an Employee from the dropdown and enter a Start and End Date for the period the labour entries will be in.
-
Click Generate.
-
Click Add to open the labour Entry window.
-
Select either By Job Card or By Expense Center.
-
For By Job Card, enter in a Job Card Number, select the applicable Company or Aircraft and the corresponding Job Card Group.
Note: If the job card does not exist or has been entered incorrectly, the Job Card Description field will say, "No Job Card meeting the criteria found". Otherwise, the description of the Job Card will be displayed in the Job Card Description field.For By Expense Center, type in the name of the expense center and select the applicable one from the dropdown.
-
Select a Trade from the dropdown. Trade types are defined in Options under Trades Lists.
-
Select the applicable Labour Category. Labour categories are also defined in Options under Labour Categories.
-
Enter the date in and out and the time in and out for the entry. Please note that times entered will default to 24hr time format.
-
Add notes if necessary.
-
Click Save & Continue.
Generating Entries
-
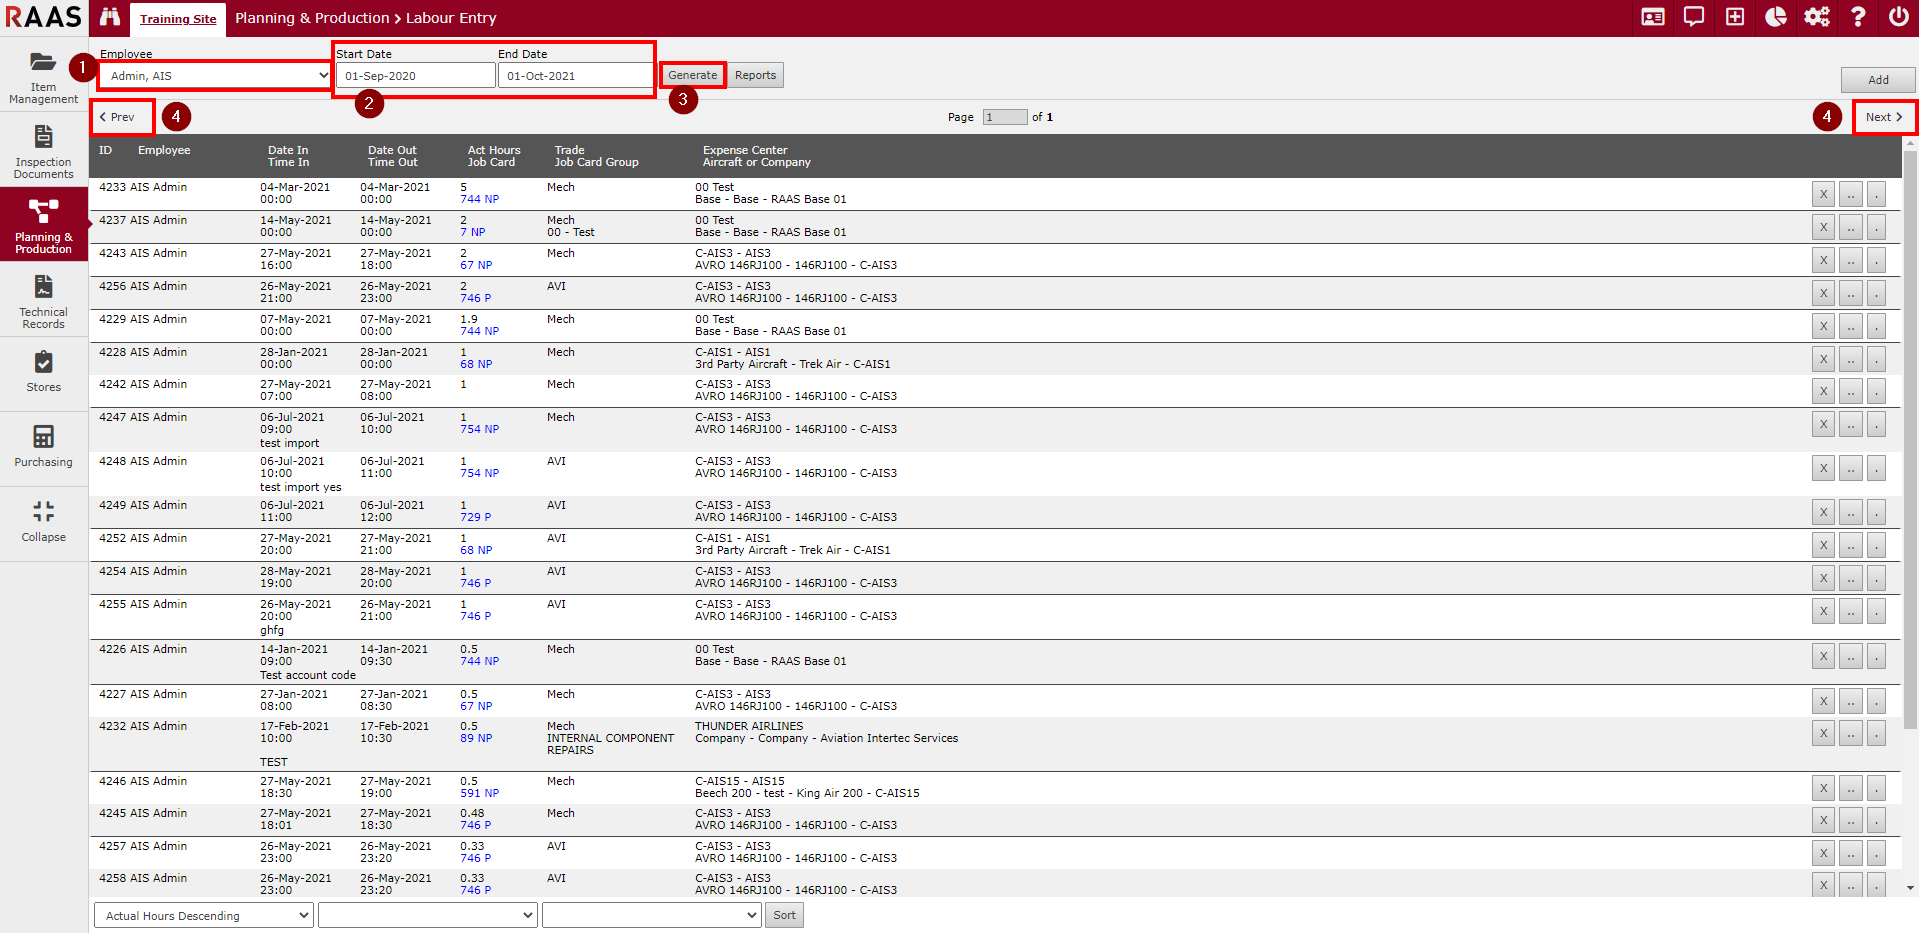
Select an employee from the dropdown.
-
Enter the Start and End Date for the time period the entries are in.
-
Click Generate.
-
Use the Prev and Next arrows to view multiple pages of labour entries.
Adding Labour Hours to Job Cards
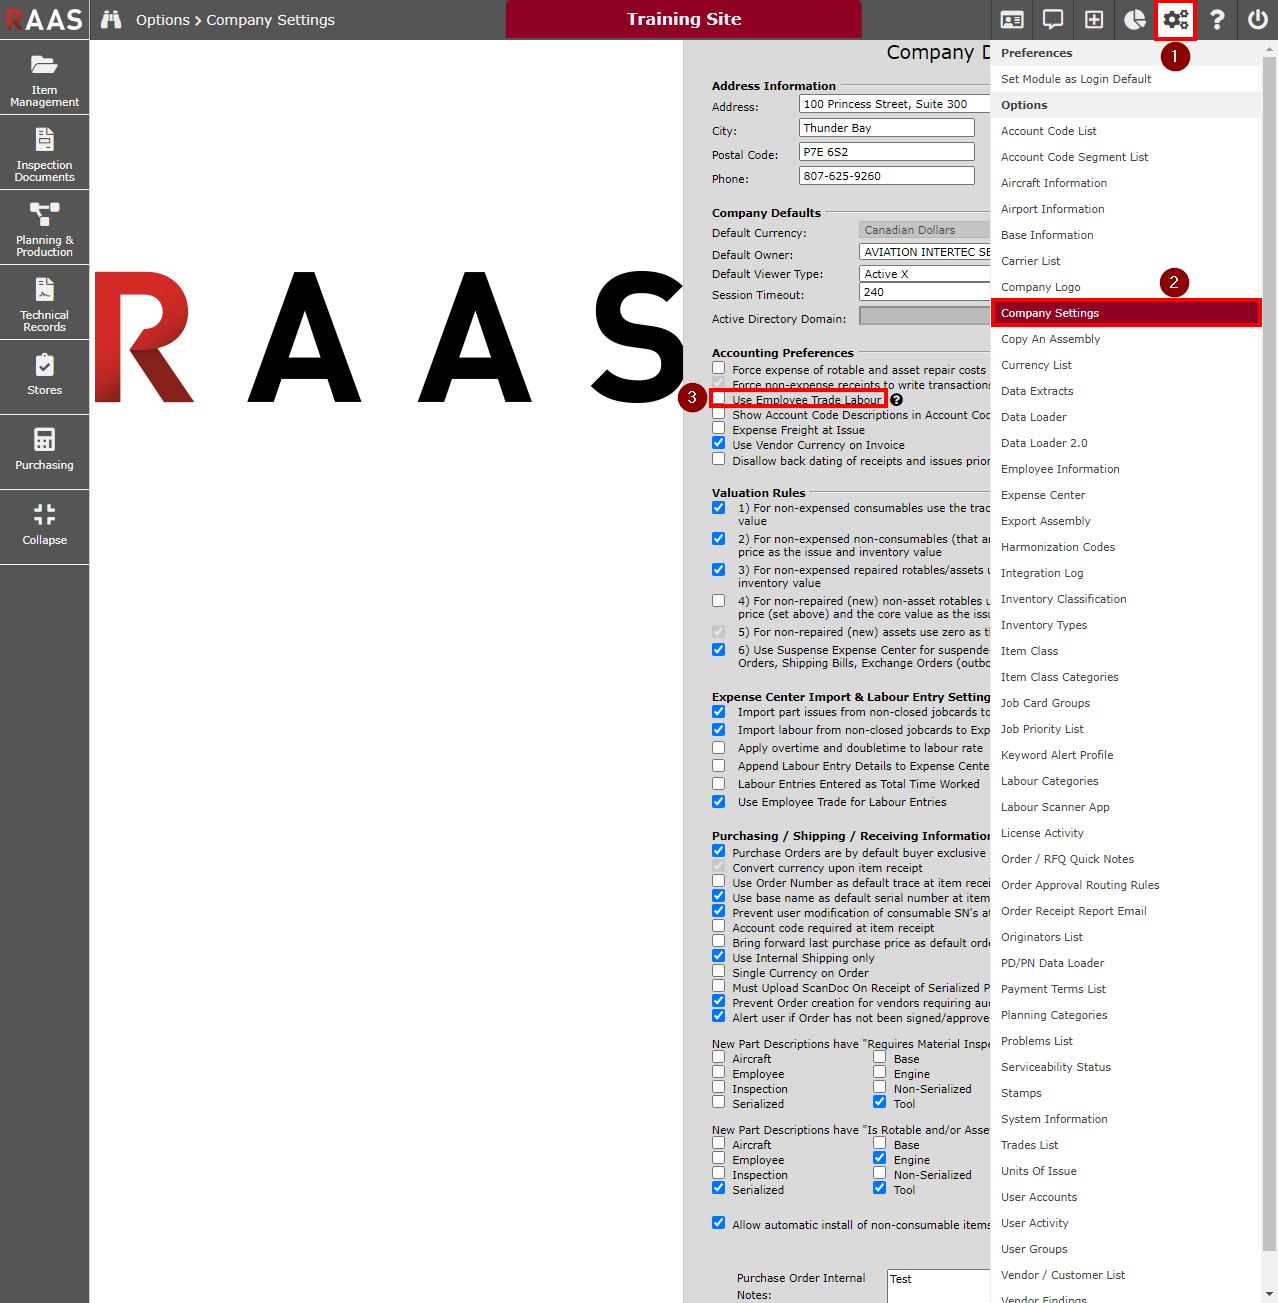
Required Company Settings
-
Click on the Settings cogwheel in the upper-right area of RAAS.
-
Click on Company Settings.
-
Under Accounting Preferences, make sure the Use Employee Trade Labour checkbox is unchecked.
-
When this setting is active (checked), labour can be entered per employee in the Labour Entry sub-module.
-
When this setting is inactive (unchecked), labour can be entered per Job Card from the Trade / Access / Ref tab on the Job Card Details screen.
-
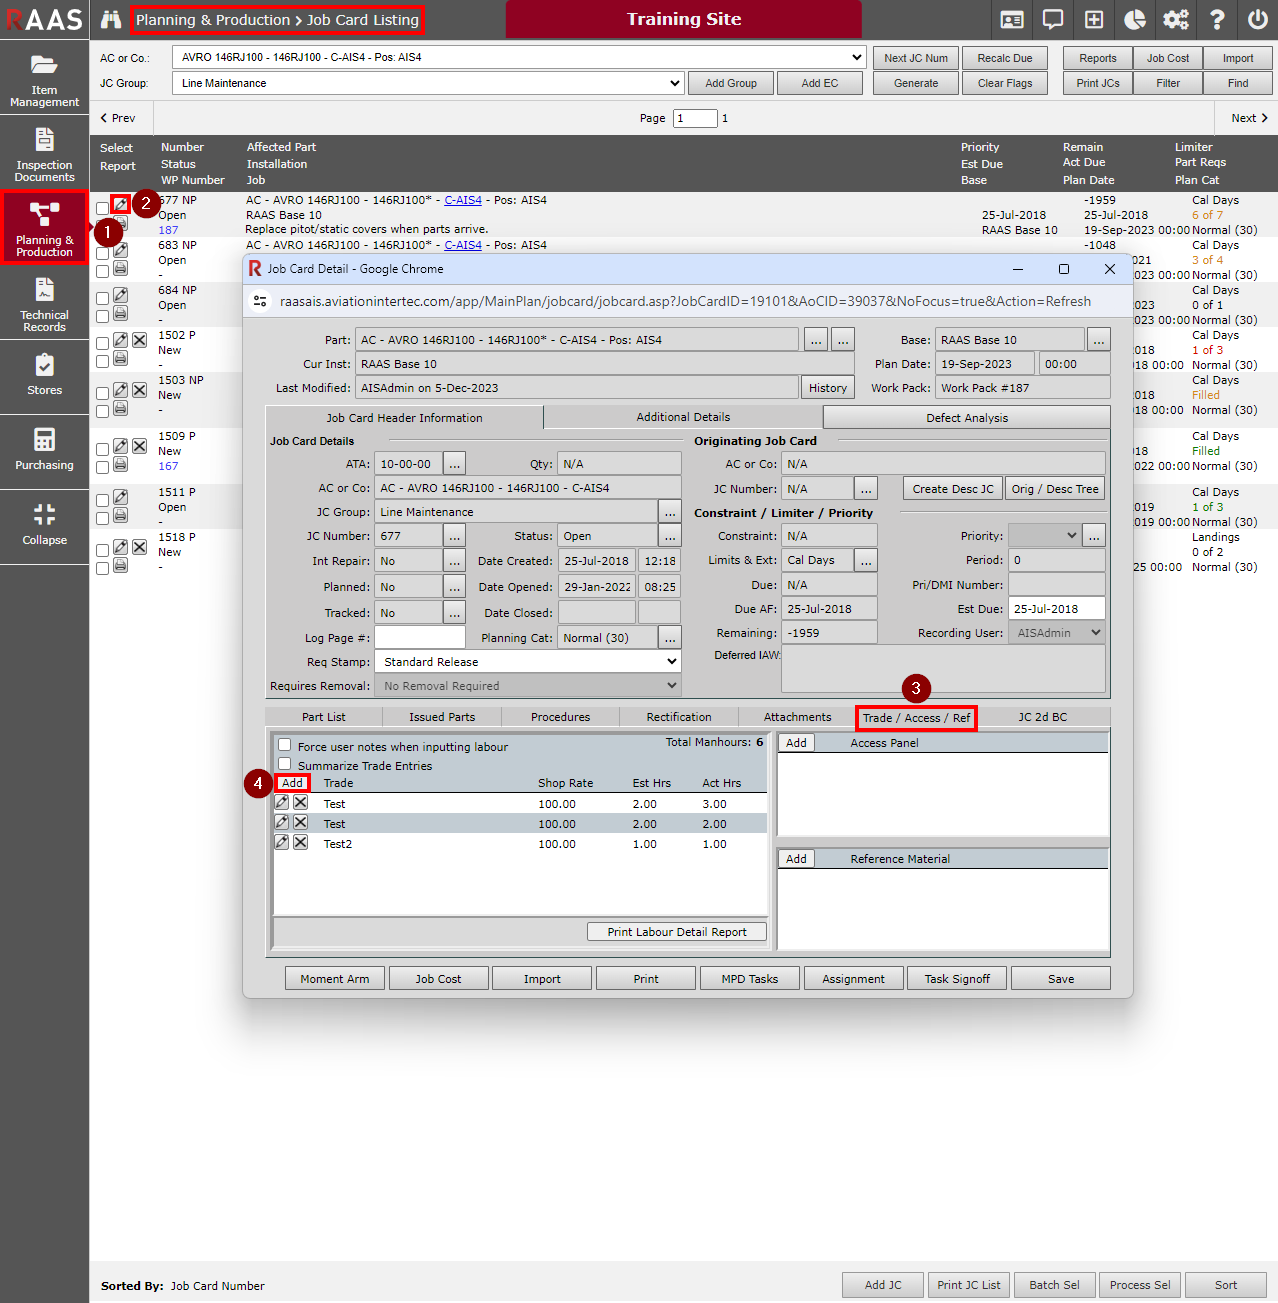
Adding Labour Hours to a Job Card
-
Navigate to the Job Card Listing sub-module (Planning & Production > Job Card Listing).
-
Find the appropriate Job Card and click the edit (pencil) button to bring up the Job Card Details screen.
-
Click on the Trade / Access / Ref tab.
-
Click on the Add button to open the Trade Item window where the Trade, Estimated Man Hours, Actual Man Hrs, and a Date can be entered and saved.