
Once a serialized part is no longer in Issued For Maint. or the transaction has been batched and invoiced, its issue cannot be reversed; it must have a credit applied to the transaction.
Reversing Expense Center Items
Consumable issues can always be reversed. If an issue was made for a part directly from an Expense Center, and not from a job card and/or part request, and was not simply an expense entry, then the issue can be un-issued or reversed. If an item has been batched and invoiced, you can un-invoice and un-batch and then reverse the transaction.
-
Click on Stores and select Expense Center Transactions.
-
Generate Expense Center Transactions by clicking Aircraft, Inventory or Other/Misc and selecting one of the Expense Centers from the tree.
-
If the part to be unissued is batched, it will have to be un-batched. See UN-BATCHING EXPENSE CENTER ITEMS.
-
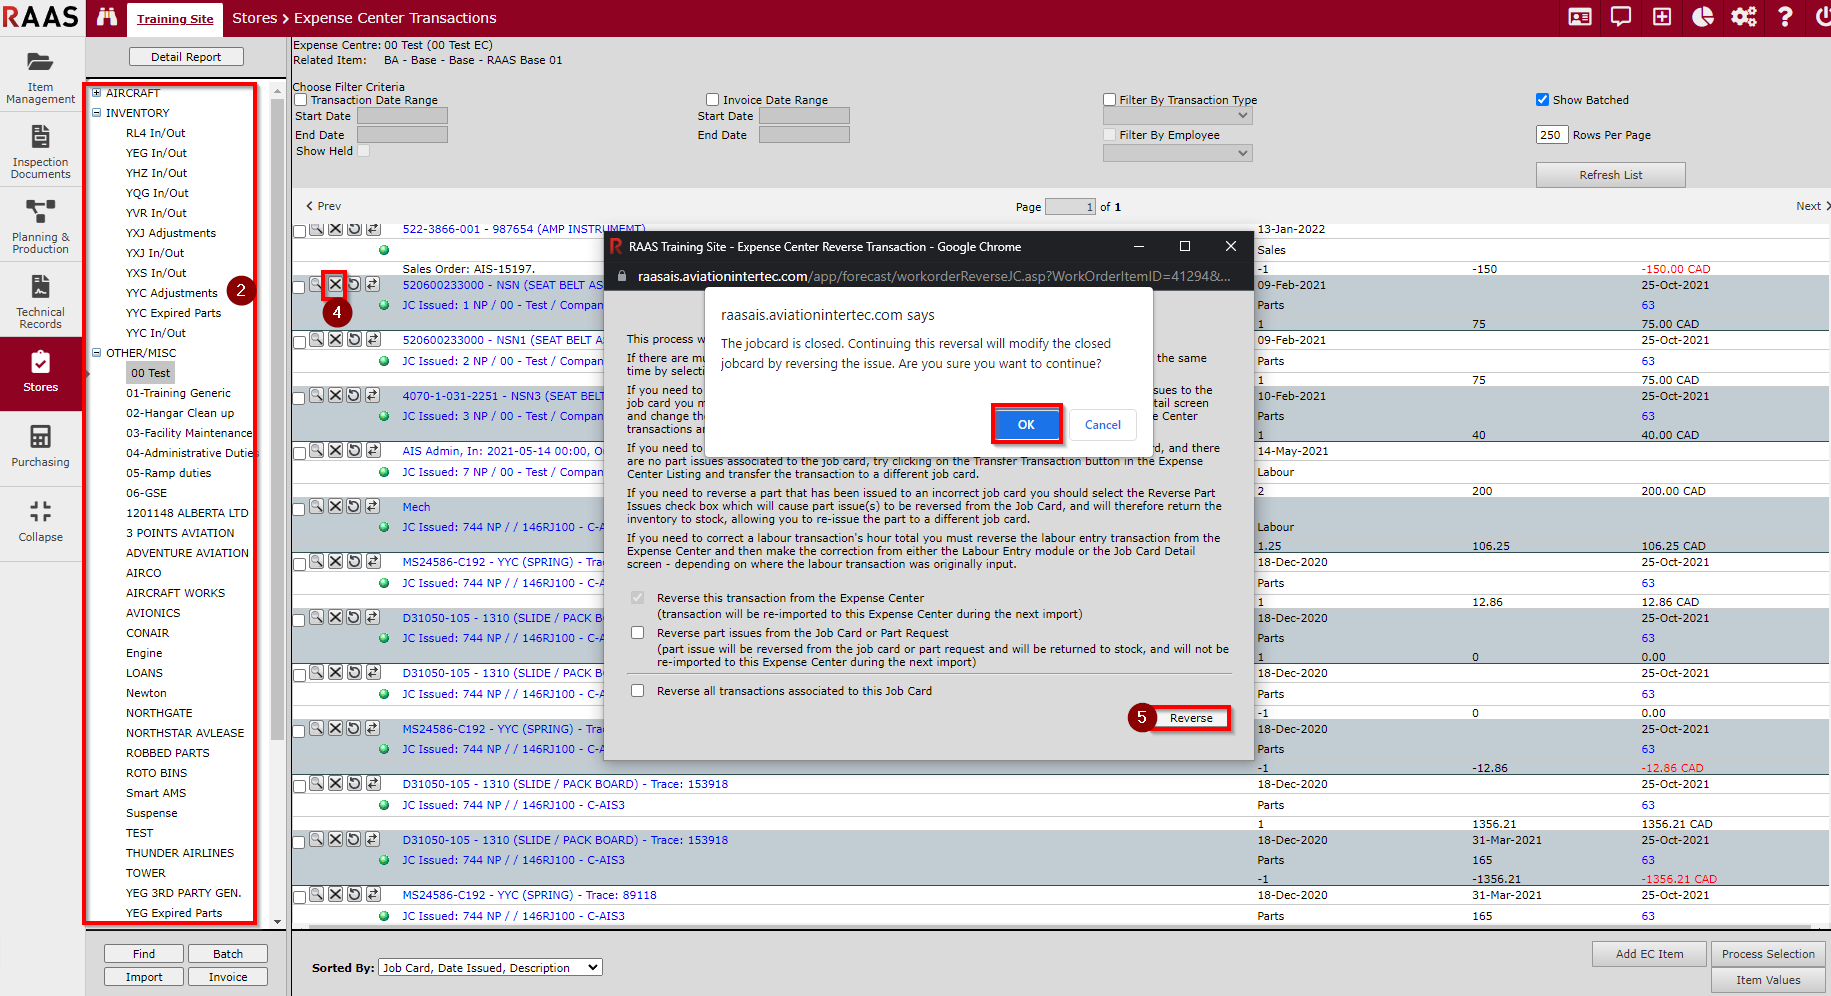
Click the “x” to reverse the issuance of this part.
-
Choose a reason for reversing the transaction and click Reverse.
-
If the job card is closed, a message will pop up asking if you want to continue. Click OK.
-
-
The entry will no longer be in the expense center. If the entry was for a part expenditure, and the part is a component, it will be moved from Issued For Maintenance back into Inventory. If the part is consumable, its inventory quantity will be incremented.
Crediting Expense Center Items
A part must be credited when it has been batched and invoiced and/or is no longer located in Issued for Maintenance.
-
Click on Stores and select Expense Center Transactions.
-
Generate Expense Center Transactions by clicking Aircraft, Inventory or Other/Misc and selecting one of the Expense Centers from the tree.
-
Locate the transaction to apply the credit. There are two ways to apply a credit to this transaction. Either, directly from the list of Expense Center Transactions by clicking the (recycling arrow button), or by opening the transaction detail window by clicking the (magnifying glass) and clicking Credit.
-
Enter the credit transaction date and the reason for the credit.
-
Click the Next button.
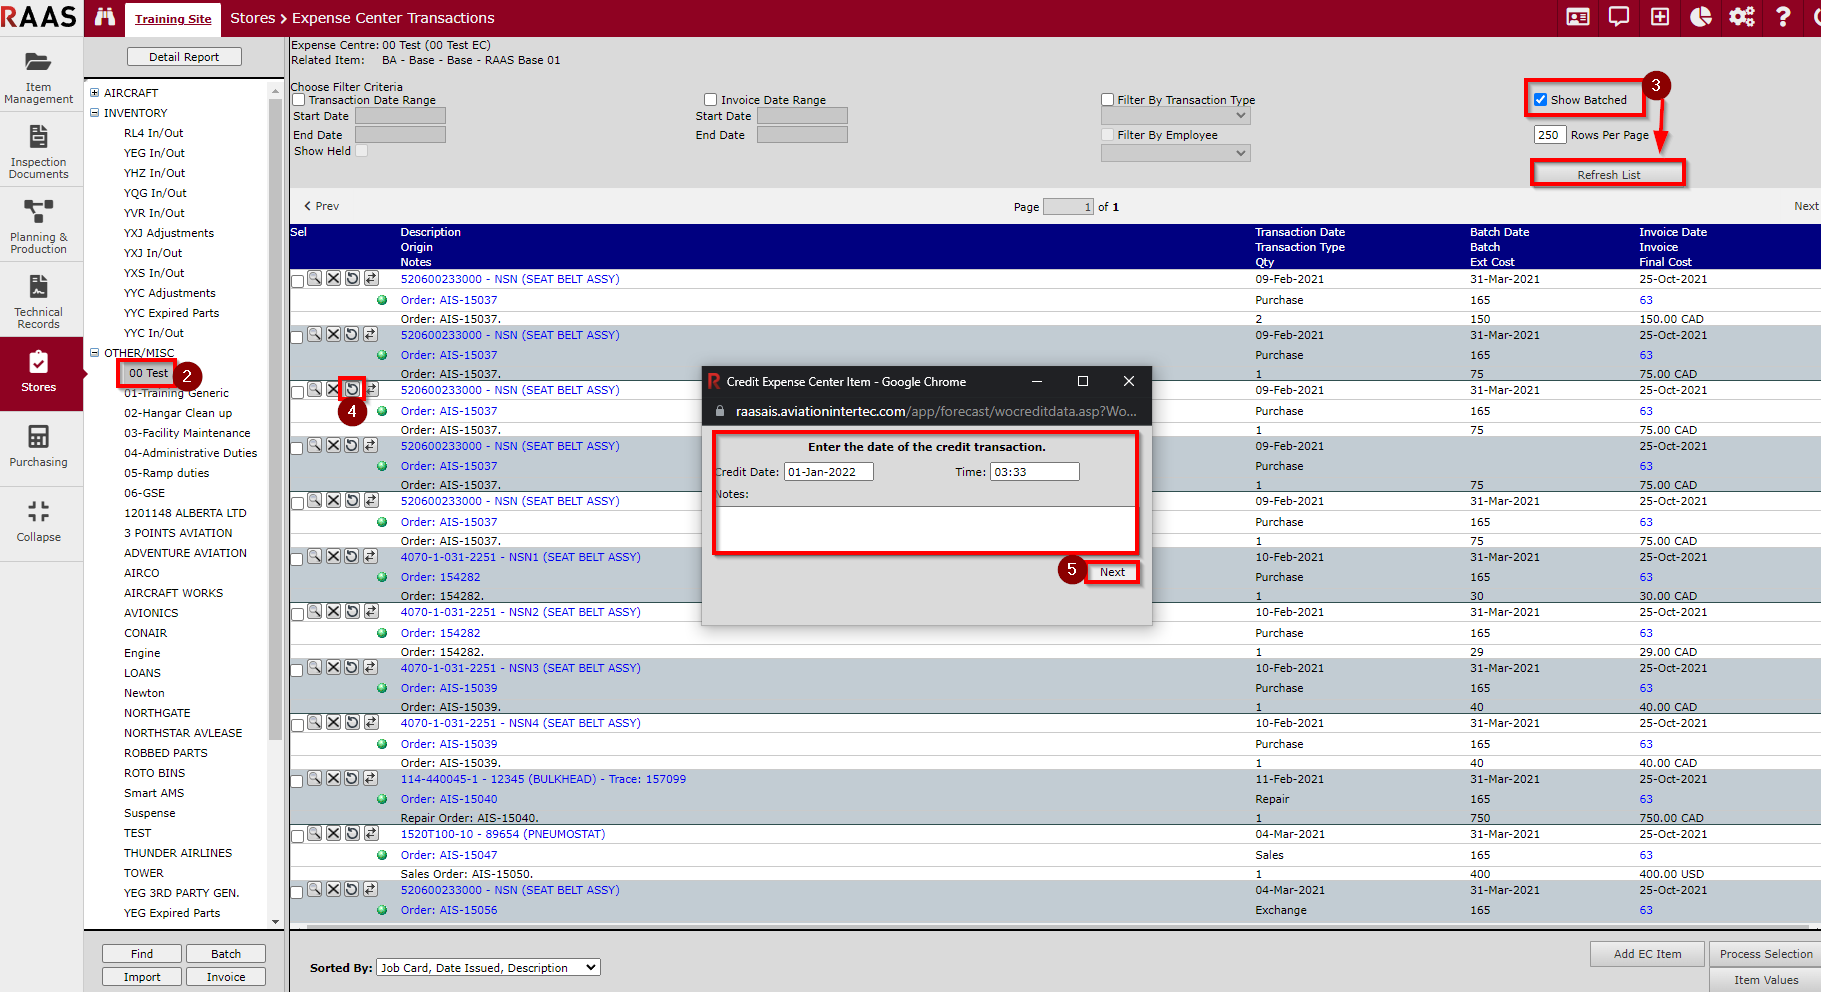
The Expense Center will now display both the original entry and a credit entry identifiable by the red dollar amount.
Note: Crediting a Parts transaction does not return the part(s) to stock. Adjustments must be made for Consumable Traces and Serialized parts must be moved to Inventory.