Tools can be requested in the same way parts are requested, in which case, the requests would appear on the Part Requests Listing in the Stores module. We do not, however, want to issue tools as we would parts. Instead, when a tool is requested, it would be allocated on the Tool Allocation Listing in the Stores module. For information on tracking Calibrated Tools, see the Calibrated Tool Tracking Help Page.
The Tool Allocation Listing can be filtered and sorted in a number of ways.
To return a tool without allocating it again, find the tool on the listing then click the button with left and right arrows to the left of the tool.
If the tool is to be allocated again to a different employee or for a different job card, use the allocation process as described below. The tool does not have to be returned before allocating it again.
The “View Report” option at the bottom of the listing is a printout of what is currently displayed on the listing.
The “Tool Utilization” option at the bottom of the listing is used to report on the allocation history of a particular tool.
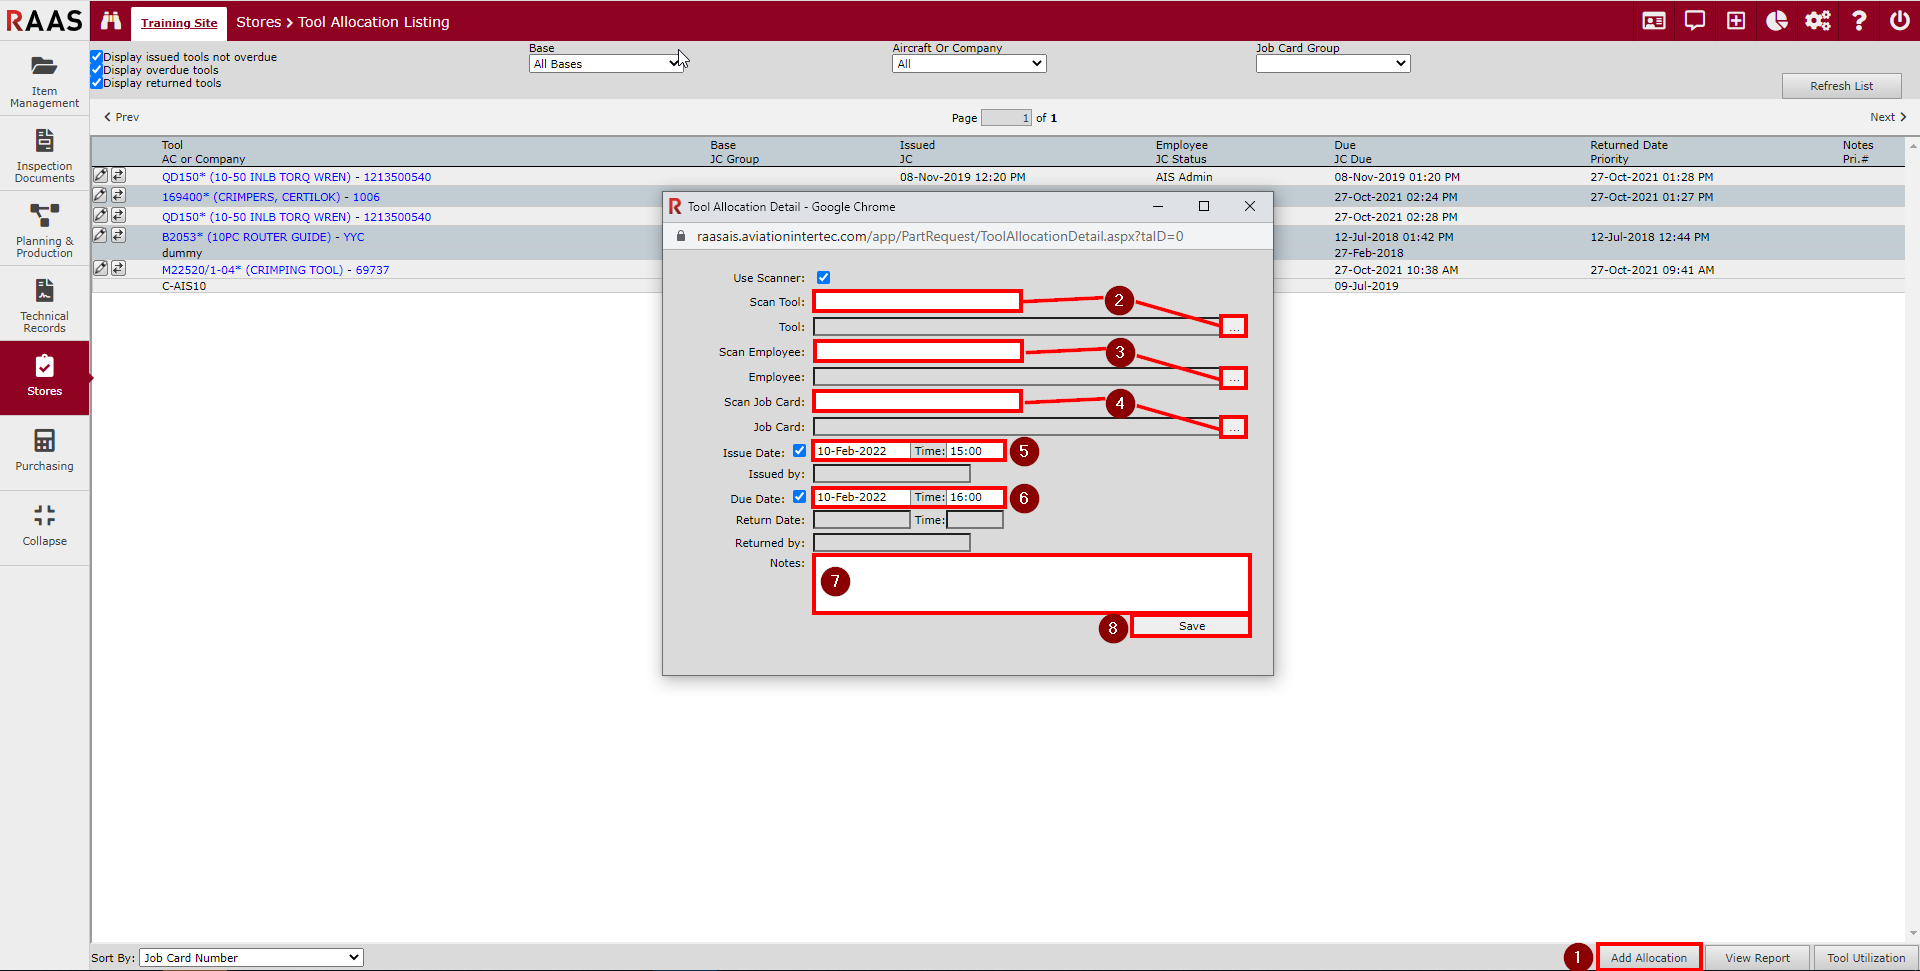
Allocating a Tool
-
Click the “Add Allocation” button at the bottom of the listing.
-
Select the tool to be allocated by clicking the Use Scanner checkbox and scanning the tool’s 1D barcode, or manually select a tool by clicking the ellipse button to the right of the Tool field.
-
Select the employee taking the tool by scanning the employee’s 2D barcode on their employee badge, or by clicking the ellipse button to the right of the Employee field.
-
Select Job Card (optional).
-
Indicate the issue date and time.
-
Indicate the due date and time.
-
Enter notes (optional).
-
Click Save.