
Sales Orders are used in RAAS when parts are sold to another company.
Creating a Sales Order
-
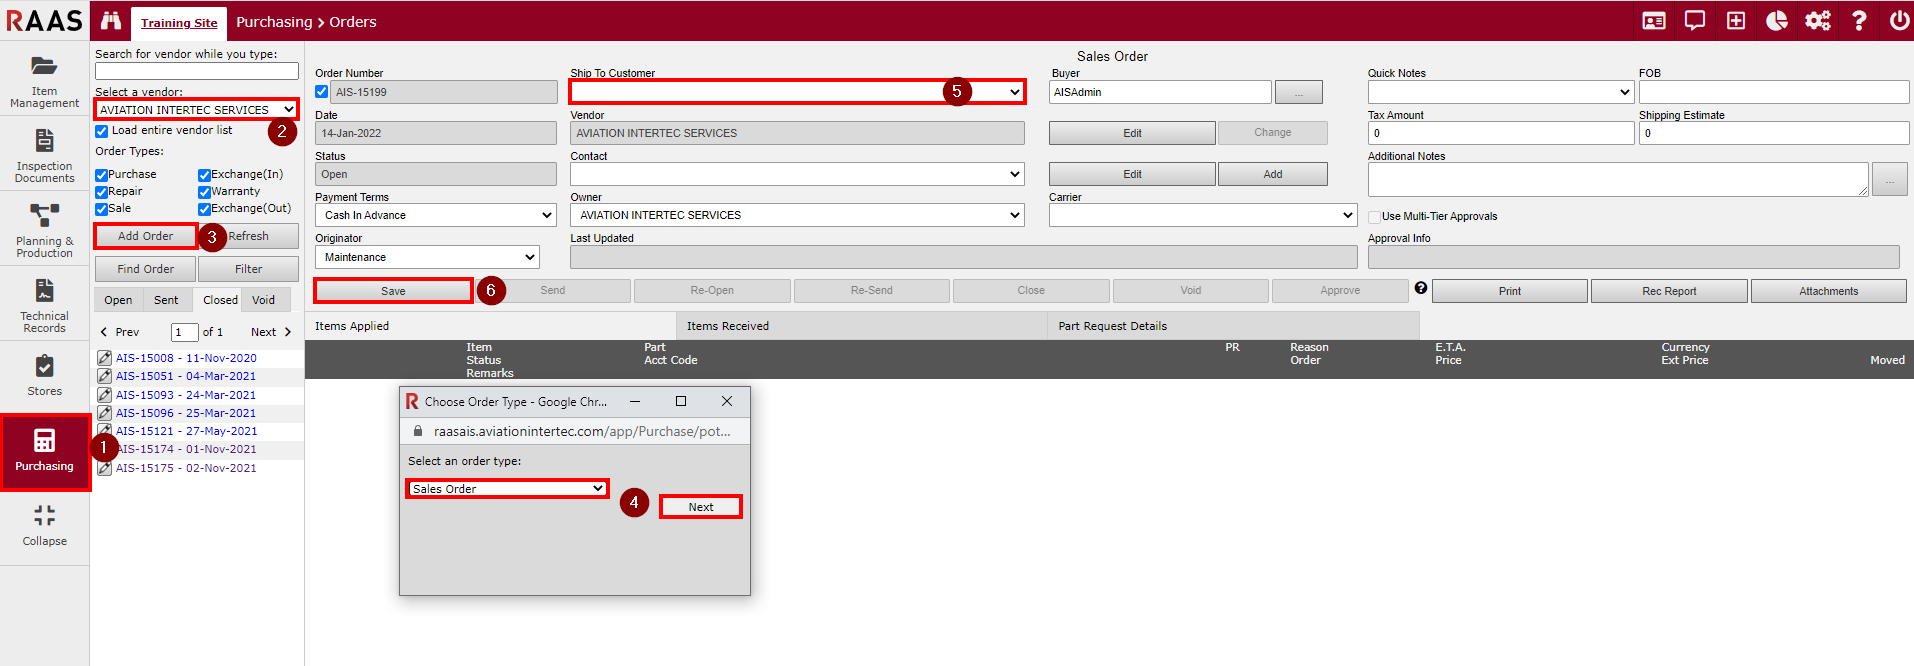
Click Purchasing and select Orders.
-
Select the Vendor from which the item(s) will be purchased and click the Refresh button. For Sales Orders, the Vendor is the owner of the part being sold.
-
Click the Add Order button.
-
Select Sales Order from the Order Type dropdown and click Next.
-
Select a Ship To Customer and enter any other details such as Contact and Payment Terms.
-
Click Save.
Note: Customers will only be listed in the Ship To Customer dropdown menu if the Customer box is selected on the Vendor / Customer Information screen in Options.
Note: If auto-numbering is used, RAAS will automatically assign an Order Number, but you can deselect the check box beside the Order Number to manually assign a number. See Company Settings.
Adding Items to a Sales Order
Before an item can be added to a Sales Order for a Customer, there must be an Expense Center set up for that Ship to Customer. If an Expense Center does not already exist, one will have to be added in Settings - Expense Center prior to completing the steps below to add items to the Sales Order.
-
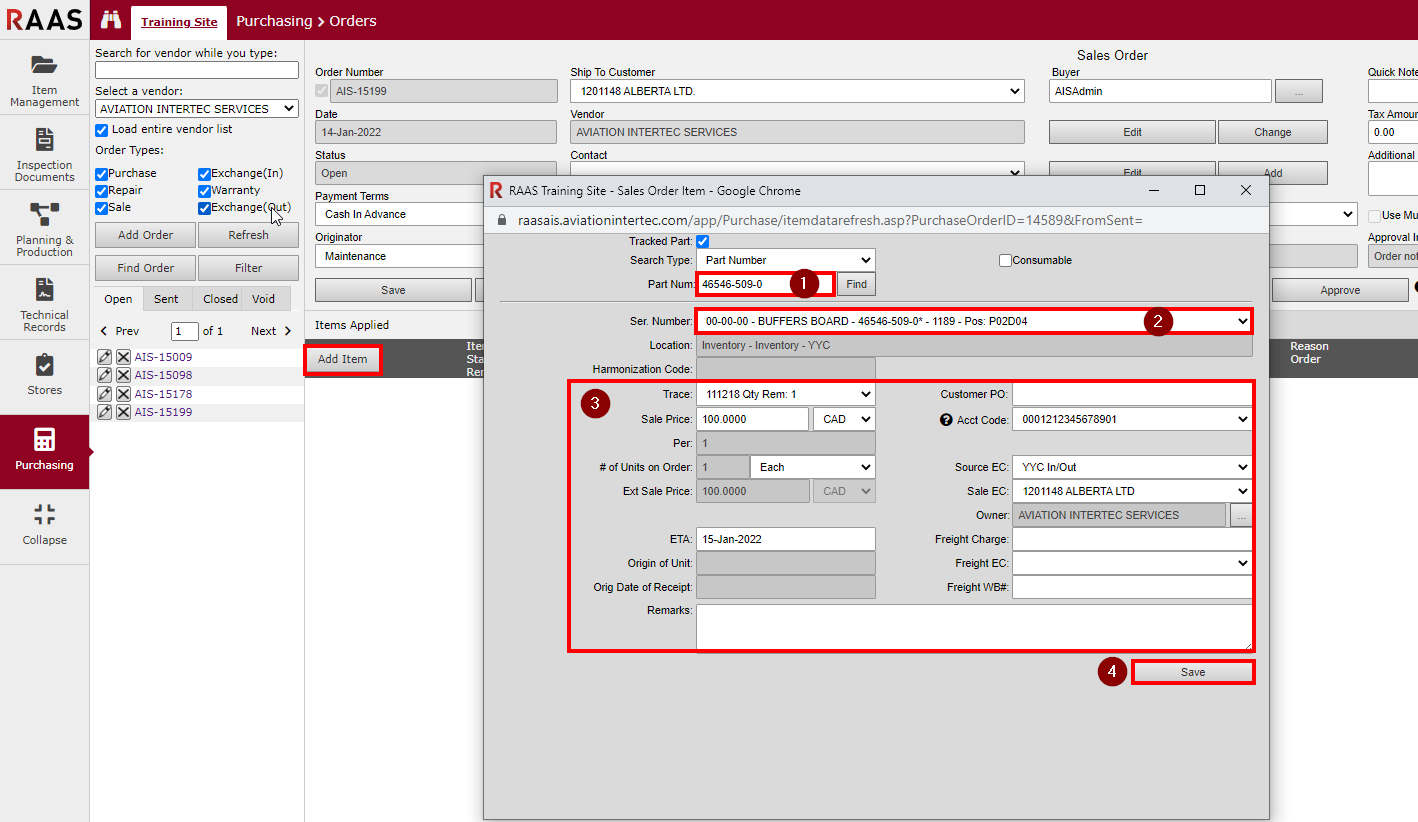
On the Items Applied tab, click the Add Item button to open the Sales Order Item screen.
-
If the part being sold is tracked in RAAS, ensure that the Tracked Part checkbox is selected and search for the Part Number of the item to be added. Ensure the correct part is selected from the Ser. Number dropdown menu. The Source EC and Sale EC will be automatically populated based on the original location of the part and the customer selected.
If the Part Number is not tracked in RAAS, deselect the Tracked Part checkbox and enter the Full Part Desc. You will need to manually select the Part Movement EC and the Charge Price to (EC).
-
Enter the remaining details of the Sales Order Item. An Acct Code may be required depending on the Company Settings. For Tracked Parts, no other fields are mandatory, but the Sales Price may be entered as well as Freight details and Remarks. For Non-Tracked Parts, ensure the # of Units on Order is correct, and select a Unit of Order.
If a Customer PO is entered, it can later be searched using the Find Order button to locate the order. -
Click the Save button.
Sending a Sales Order
Once all items have been added to the Sales Order, take a moment to verify that the pricing is correct and that ETA information has been specified for all items.
-
Click the Send button.
-
Click OK to continue.
-
Enter a Send Date or click the checkbox to enter the current date and click Next.
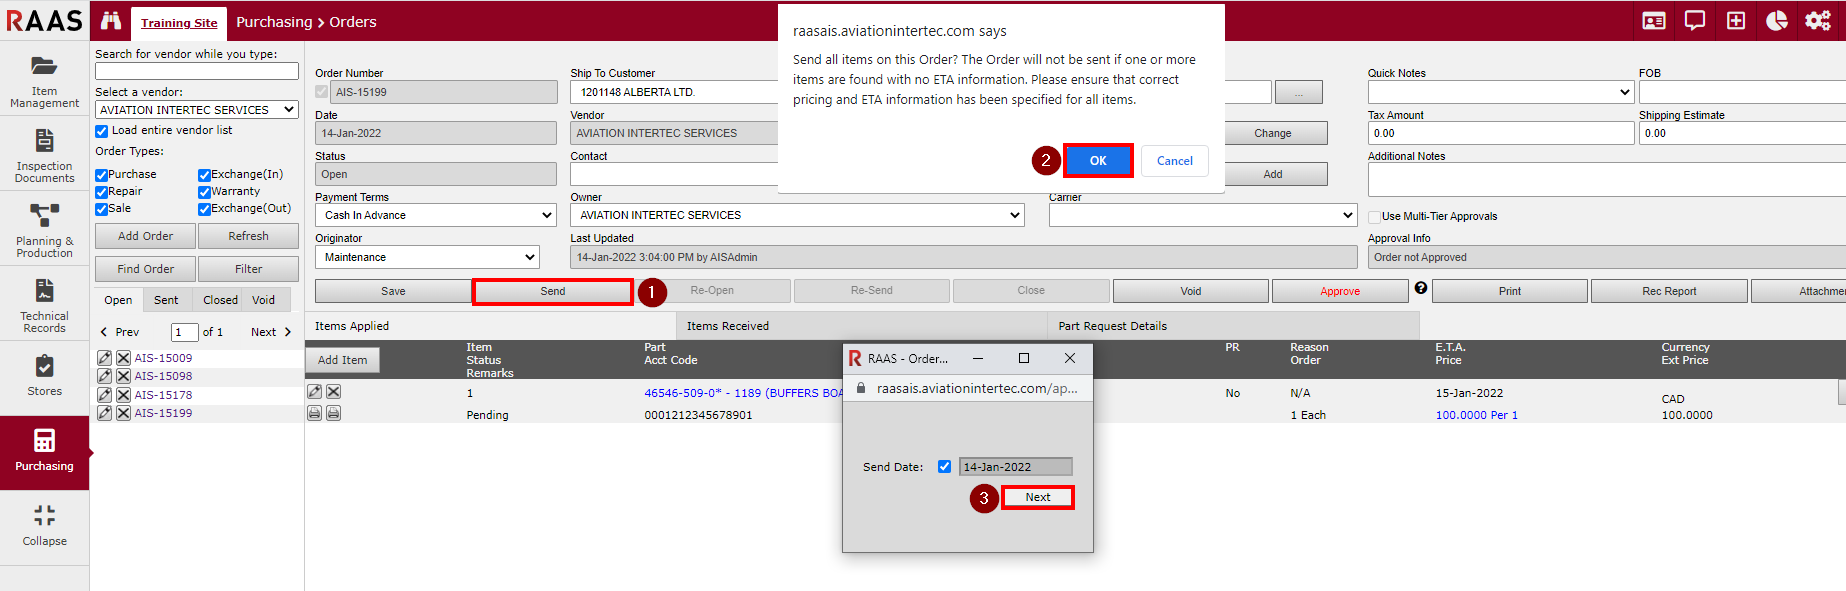
When the Sales Order is sent, a message will appear asking if you want to close this Sales Order. Click OK to continue and close the order. If you click Cancel, the Order Status will be changed to Sent. Any tracked parts on the order will be moved to Dead.