
The Job Card Detail screen allows users to view and/or make modifications to Job Cards after they have been created.
Note: The ability to edit a Job Card is based on user permissions set in User Groups. Most Job Card editing can only be done when the Job Card Status is New.
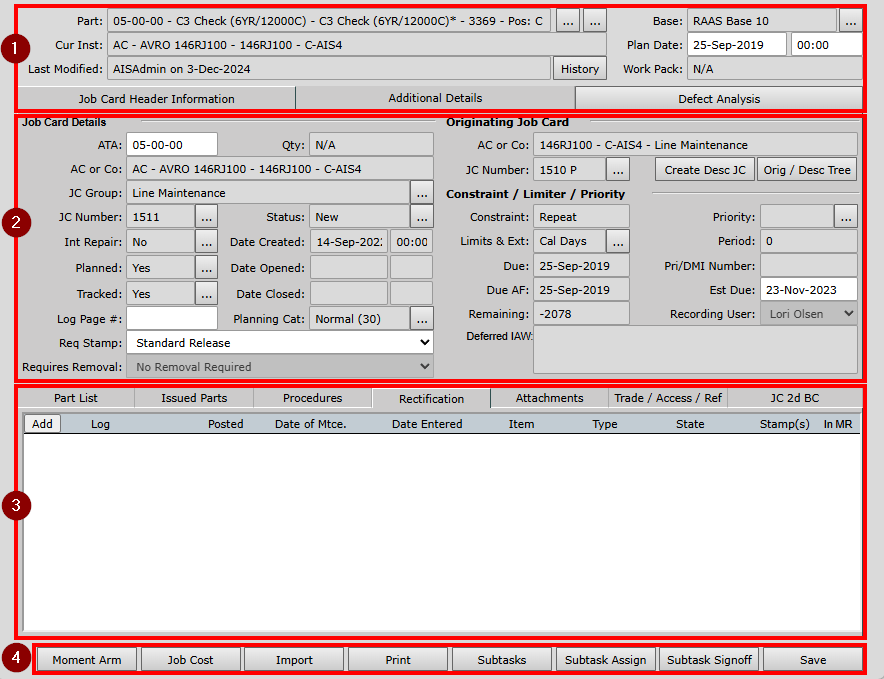
Section 1:

-
The 1st ellipsis […] allows the user to view the Serial Number Details screen for the Affected Part.
-
The 2nd ellipsis […] allows the user to change the Affected Part of the Job Card.
-
History allows the user to view the historical modifications made to the Job Card.
-
Base ellipsis […] allows the user to change the Base of Maintenance of the Job Card.
-
Plan Date/Time can be changed based on Job completion requirements.
-
Work Pack refers to the Work Pack number if the Job Card was added to a Work Pack.
Section 2:
Job Card Header Information Tab
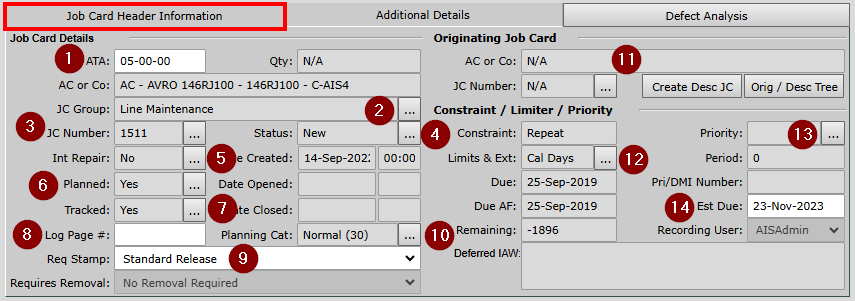
Job Card Details
-
ATA (Air Transport Association) chapters are applicable to the Affected Part of the Job Card but can be modified as required. ATA length requirements can be set in Company Settings.

-
JC Group may be modified using the ellipsis […].
-
JC Numbers are assigned during JC Issuance/Creation but may be modified using the ellipsis […]. If modifying to an existing JC Number, the user will be given the option to swap JC Numbers.
-
Status may be modified using the ellipsis […]. See Modifying Job Cards for further guidance.
JC Status workflows:
New → Open
Open → New, Open → Recalled, Open → Closed
Note: Recalling a Planned/Issued Tracked Job Card is recommended practice vs JC Closure if a JC was issued/created in error, as it will revert the status of the constraint to Pending and allow it to be re-issued.
Once a Job Card is Recalled or Closed it cannot be Re-Opened. If a Job Card is Recalled/Closed in error, it is recommended to create a Descendant Job Card from the Recalled/Closed Job Card. -
Int Repair indicates whether the Job Card is an Internal Repair Job Card.
-
Planned indicates whether the Job Card is Planned or Non-Planned and may be modified using the ellipsis […].
-
Tracked indicates whether the affected part of the Job Card has tracked constraints and may be modified using the ellipsis […]. This allows the user to change the Primary Limiter of the Job Card.
-
Log Page # indicates where the Job Card can be referenced.
-
Req Stamp indicates the stamp that is required for the Job Card and may be modified for Signature Requirements. The default stamp can be set in Job Card Templates. See also Stamps.
-
Planning Categories may be modified using the ellipsis […] and can be added/modified under Settings → Planning Categories.
Originating Job Card
-
Job Cards may be linked using the ellipsis […] or users can create a new descendent Job Card using the Create Desc JC button. Orig / Desc Tree allows the user to see linked Job Cards in a hierarchy.
Constraint / Limiter / Priority
-
Limits & Ext may be modified using the ellipsis […] (see Extensions & Tolerances.)
-
Priority may be modified using the ellipsis […] and can be added/modified under Settings → Job Priority List.
-
Estimated Due date is added during Job Card creation and can be based on Job Priority. The Estimated Due of the Job Card may be modified manually or by changing the Job Priority (see 13).
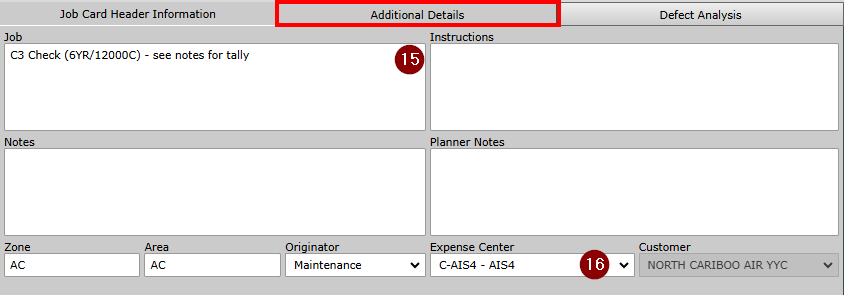
Additional Details Tab
-
Job, Instructions, Notes and Planner Notes, Zone, Area, Originator can be based on the Job Card Template (JCT) information for Issued/Planned Job Cards and may be modified manually in the Job Card Additional Details.
-
Expense Center may be based on the Affected Aircraft and/or Job Card Group for the Job Card and may be modified manually in the Job Card Additional Details.
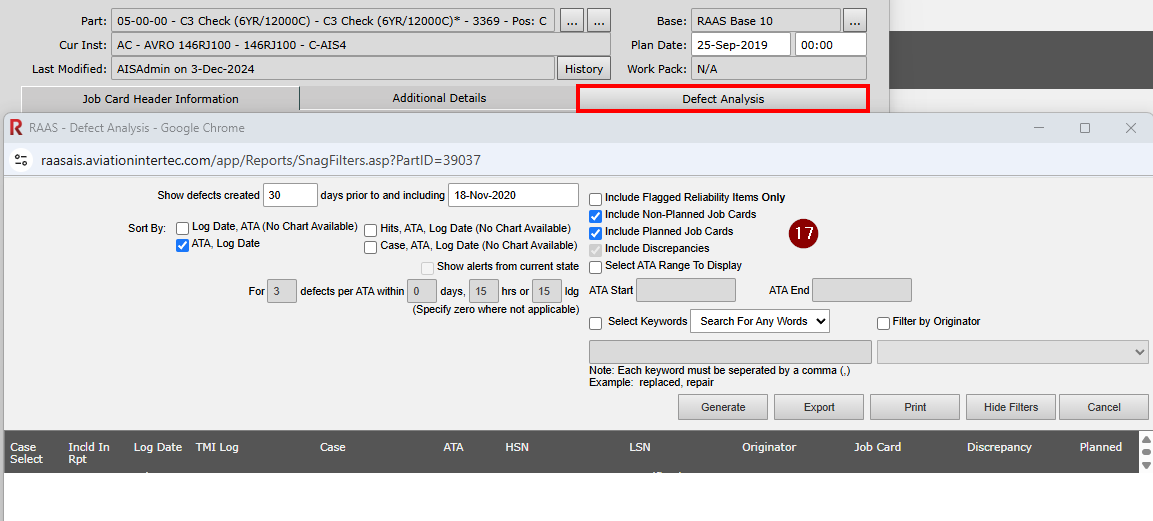
Defect Analysis Tab
-
Aircraft Defects can be researched as per the filters selected.
Section 3:
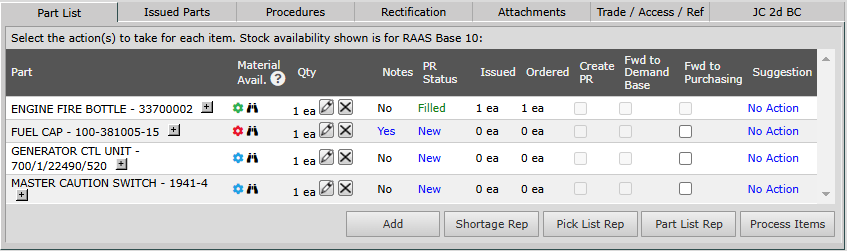
Part List Tab
See Job Card Part Requirements.
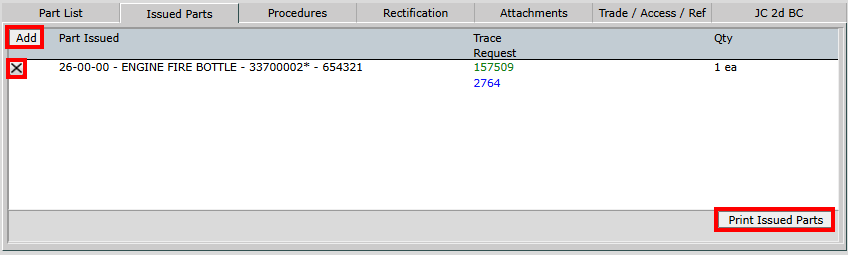
Issued Parts Tab
Parts that are issued to the Job Card can be viewed, added [Add], or reversed [X] (some rules apply, see Reversing Expense Center Items for more detail). The Issued Parts List can also be printed.
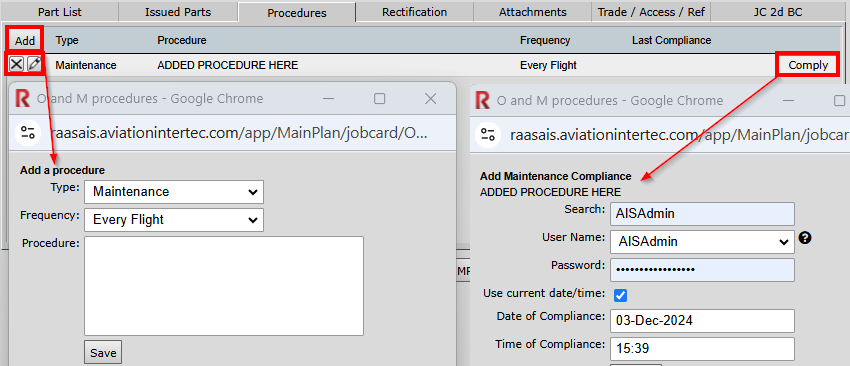
Procedures Tab
Special Maintenance or Operational Procedures may be added to Job Cards, as well as removed or modified. To comply with a Procedure, the Employee must have the specific Maintenance or Operational Personnel flag on at the Employee Information.
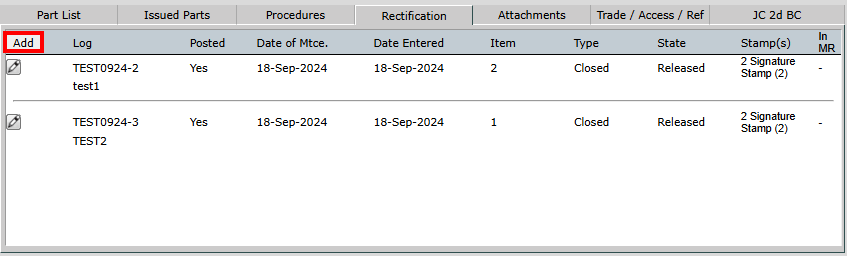
Rectification Tab
Job Card rectifications are added by TMI Entry or Manual Rectifications, and can be viewed, added, or modified from the Job Card in certain circumstances, with any modifications being recorded in an audit trail.
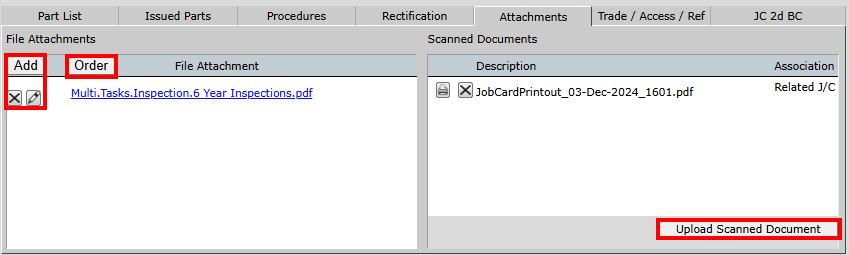
Attachments Tab
Job Card Attachments can be added to the File Attachments section of a Job Card Template (JCT) and would then be automatically populated when the Job Card is issued from the Maintenance Forecast. These File Attachments can be printed with the Job Card. Users can also manually add File Attachments by clicking the Add button, as well as change the Order of multiple File Attachments by clicking on the Order button.
Scanned Documents are uploaded into a Job Card and are not printed with the Job Card and are not part of the Job Card Template.
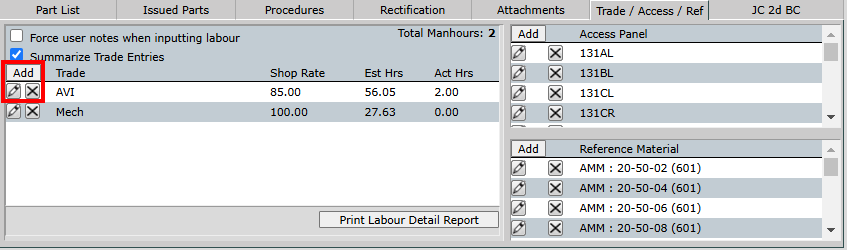
Trade / Access / Ref Tab
Trade/Labour, Access Panels, and Reference Materials can be added to the Trade / Access / Ref section of a Job Card Template and would then be automatically populated when the Job Card is issued from the Maintenance Forecast. Users can also manually add, edit or remove Trade/Labour, Access Panels, and Reference Materials by clicking the Add, Edit or Delete icons in the applicable section.
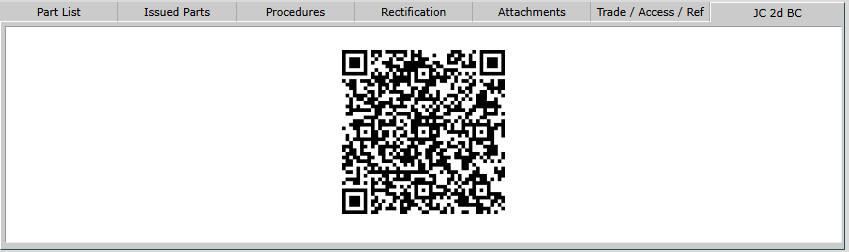
JC 2d BC Tab
The Job Card 2d Barcode allows users to scan the Job Card information when using Labour Scanning, Part Issues, Tool Allocation.
The 2d barcode can also be double-clicked on the screen to open the Labour Entry screen specific to that Job Card.
Section 4:

Moment Arm
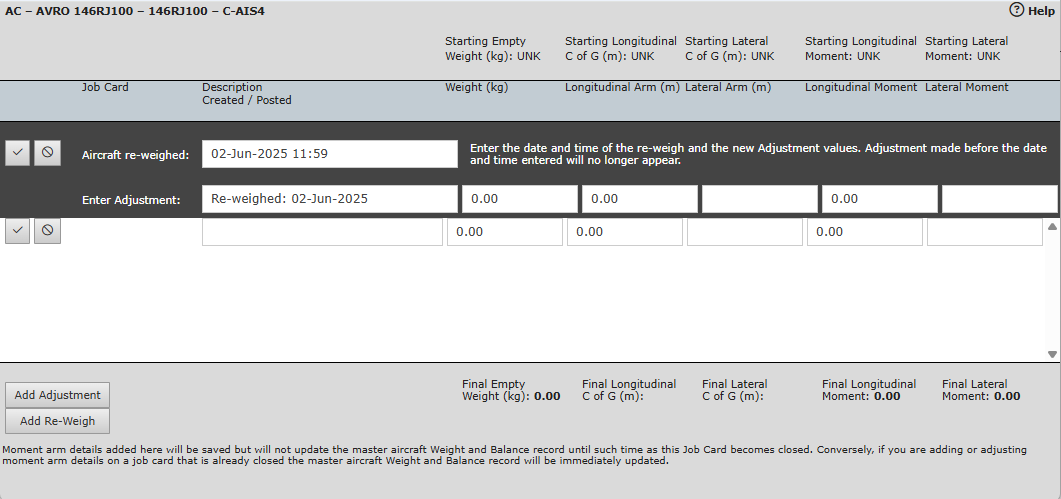
Weight and Balance
This screen allows Weight and Balance information to be entered and tracked in RAAS.
Weight and Balance data may be entered from a Job Card or from Options -> Aircraft Information. Additionally, Weight and Balance adjustments may be entered on Job Card Templates in order to have adjustment data automatically brought forward to Job Cards during the Job Card issuing process.
Adding an adjustment will create a new entry in the list of adjustments on this screen. The adjustment can then be edited by clicking the corresponding icon.
Adding a Re-Weigh record allows for the date and time of a Re-Weigh to be entered along with the new weight data. Only one Re-Weigh may be entered per Job Card. If more than one weight is used (multi scale weighing), each scale weight and moment should be entered as an adjustment.
In order to view historical data related to weight and balance, an aircraft information record must be present. If no record is present, creating one in Options -> Aircraft Information will allow the information to be accessed.
Custom formulas for display, such as percent mean aerodynamic chord, may be configured per aircraft type. Contact RAAS Support for configuration.
Job Card Weight and Balance Adjustments
Moment arm details added here will be saved, but will not update the master aircraft Weight and Balance record until the Job Card is closed. Adjustments on Job Cards that have been closed can no longer be edited. If it is necessary to change this data, a Descendant Job Card should be created and the adjustments made there.
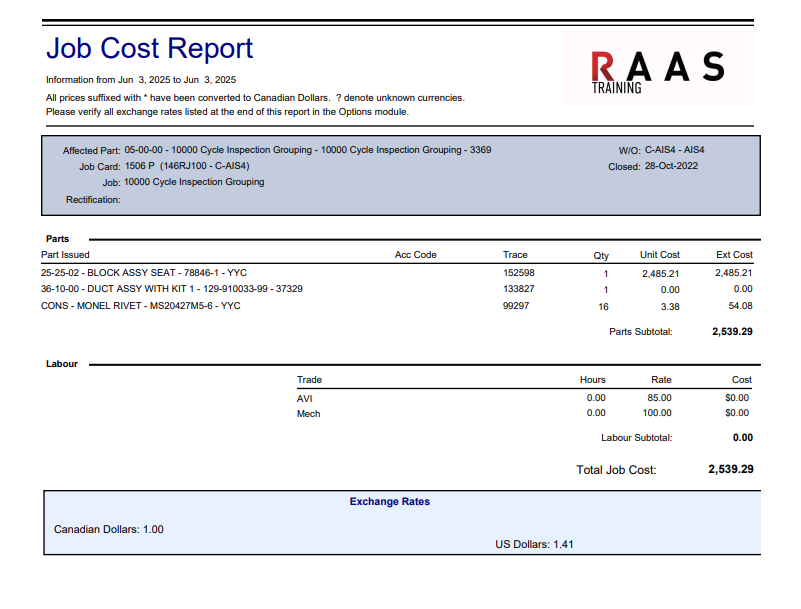
Job Cost
Allows the user to print a Job Cost Report based on Parts Issued and Labour/Trade applied to the Job Card.
Import
Allows the user to import Job Card information from a selected Job Card Template.
Print
Allows the user to view/print the printed Job Card output.
Subtasks
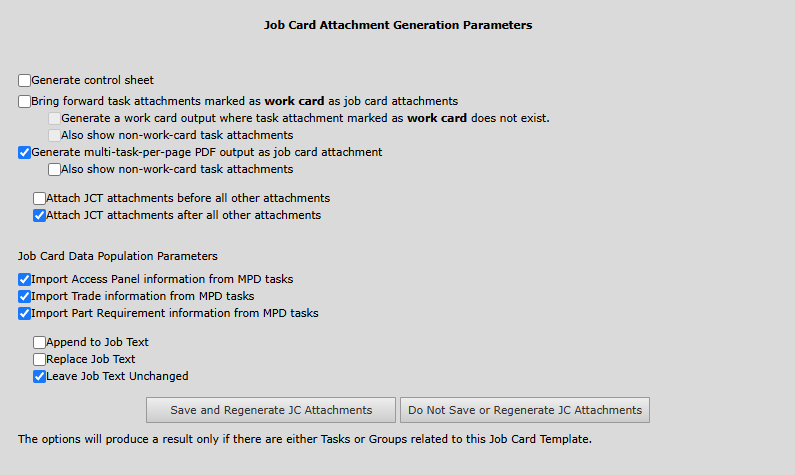
Provides a list of the applicable MPD Tasks from Inspection Documents. Users can remove tasks by selecting the [X] icon, run the IDM Task Findings History by selecting the Printer icon, or add more tasks using the [Add Task(s)] button.

Click Next to apply Job Card Attachment Generation Parameters.
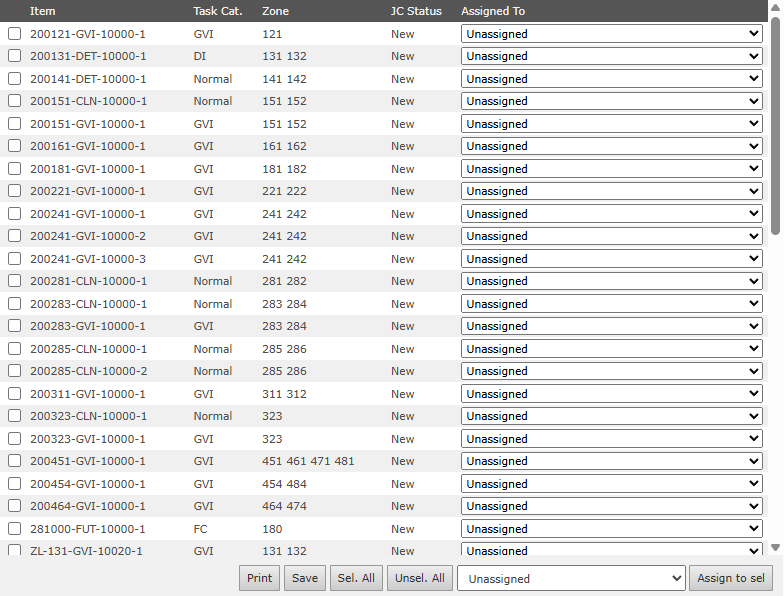
Subtask Assign
Allows the user to Assign Subtasks (IDM MPD Tasks) to applicable employees.
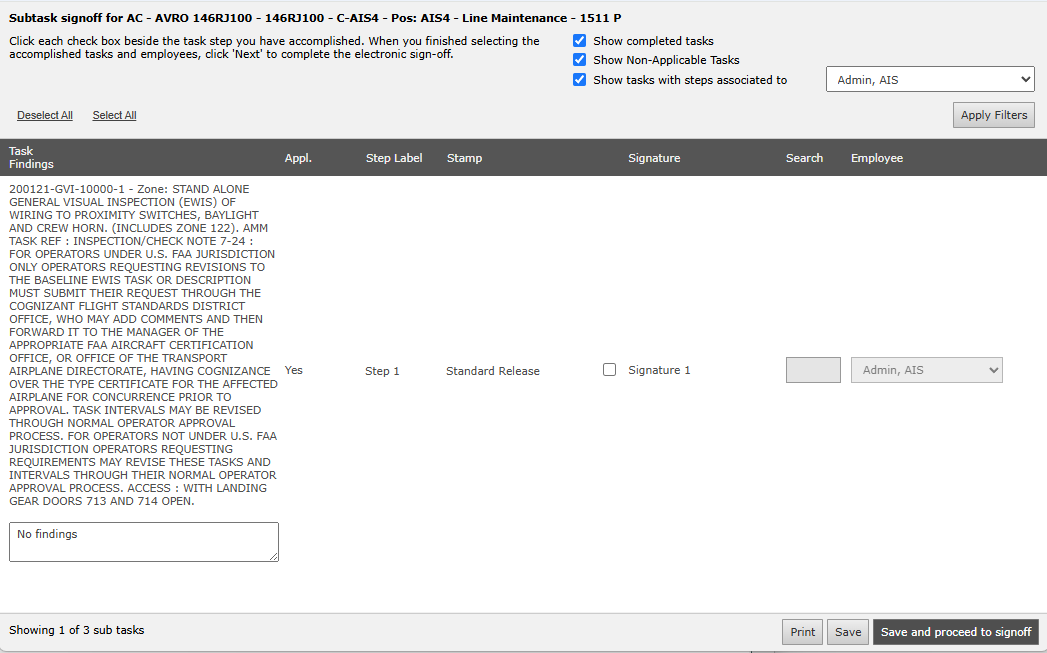
Subtask Signoff
Allows the user to digitally sign off an assigned task. Signoff Requirements must be preset on each IDM Task.
Save
Saves any modifications made to the Job Card.