Invoicing is performed in Stores – Expense Center Transactions. It is recommended to add at least one generic customer and customer Expense Center, and specific customers and Expense Centers for regular customers. This makes reporting much simpler. Customers are added in Settings – Vendor/Customer List and expense centers are added in Settings – Expense Center.
Transactions invoiced at a flat rate can be created in advance of the Job Card being processed. To create a transaction manually, click the Add Expense Center Item button at the bottom of the selected Expense Center. The transaction is then selected, batched, and invoiced.
Invoices can also be based on transactions (such as parts, labour or purchases, etc.) “imported” from a Job Card or Order. This is done using the Import button in the lower-left corner. After importing, transactions can be modified if necessary (apply markup, change price) by clicking the magnifying glass on the left of each transaction.
The transactions to be added to an invoice are then selected as per Figure 1.
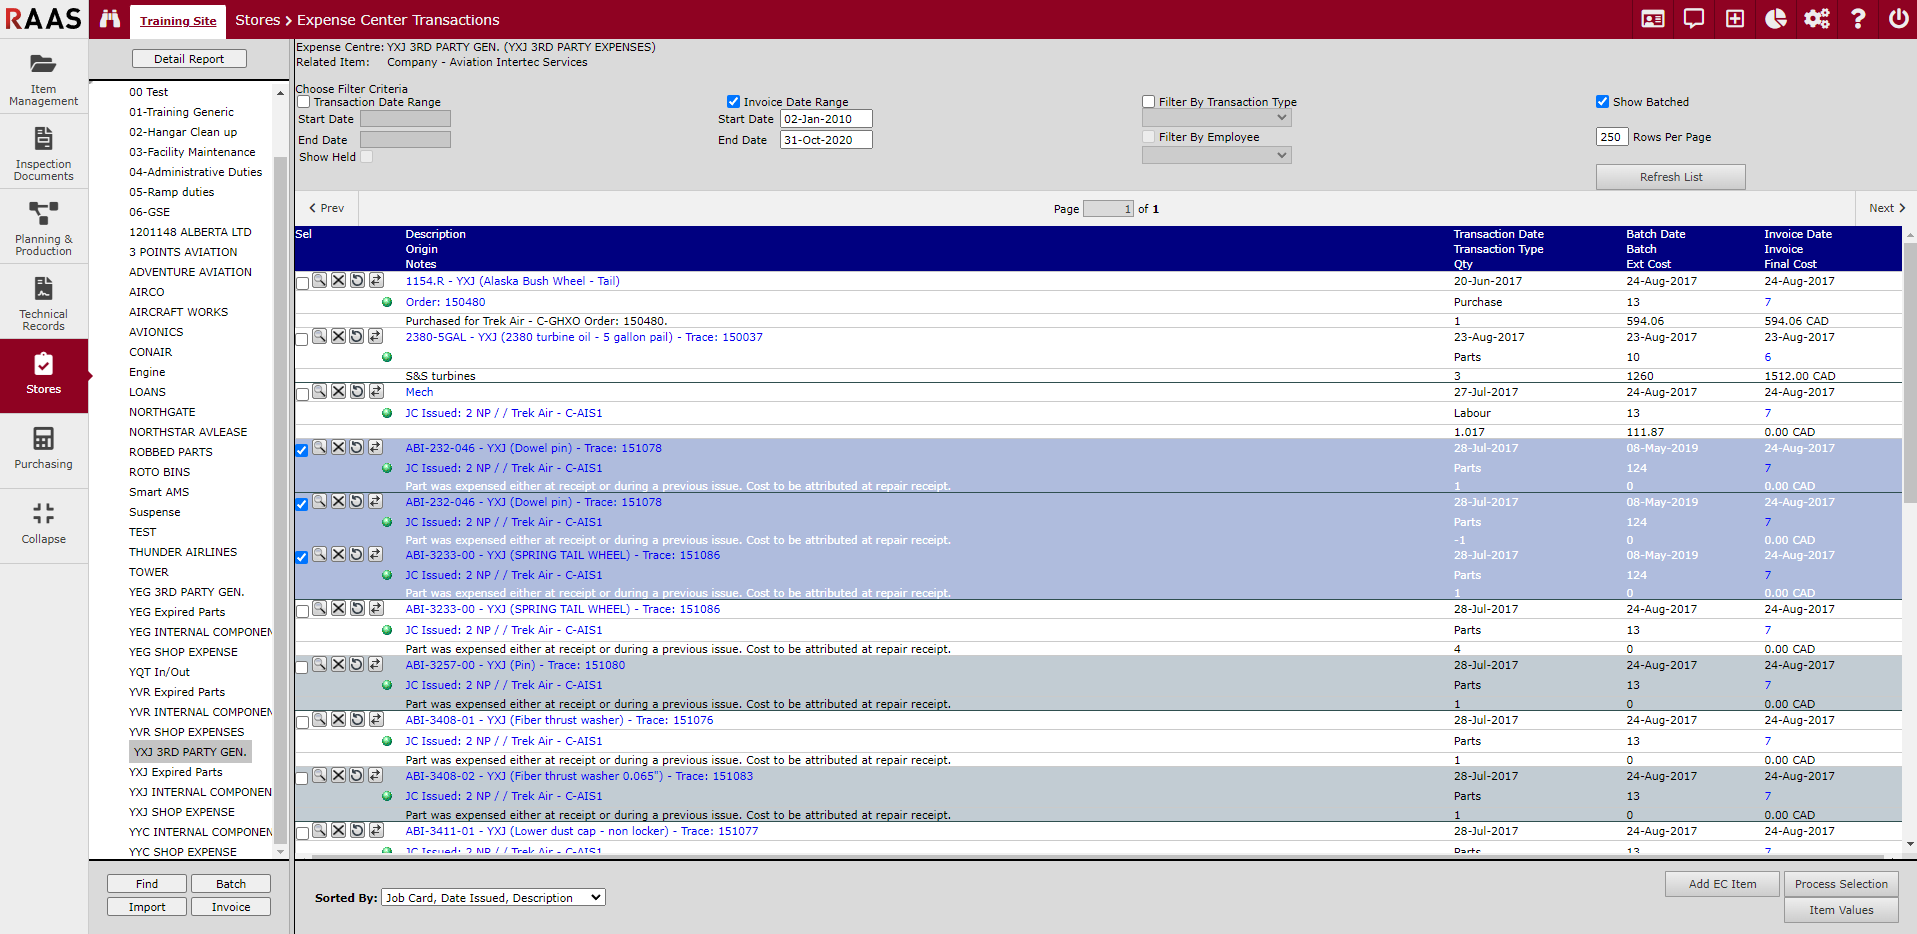
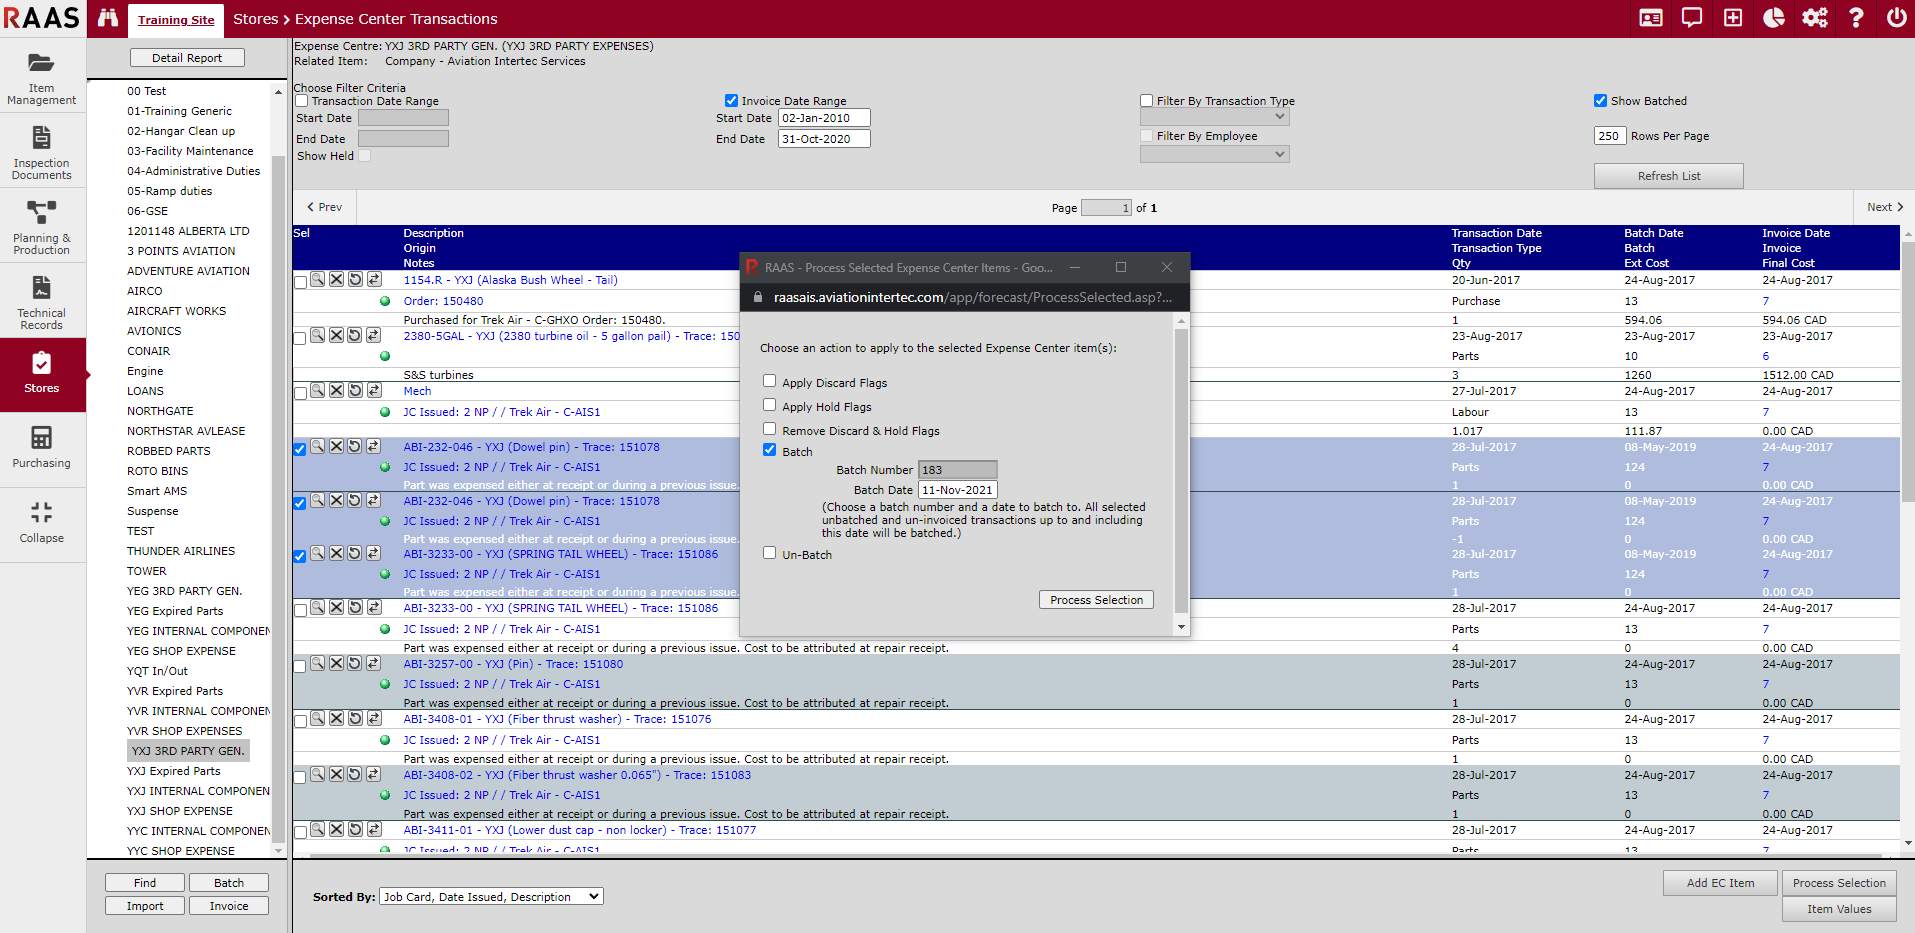
Selected transactions are then processed by clicking the “Process Selection” button in the lower right corner as per Figure-2. Select the “Batch” option and entered the desired Batch date.
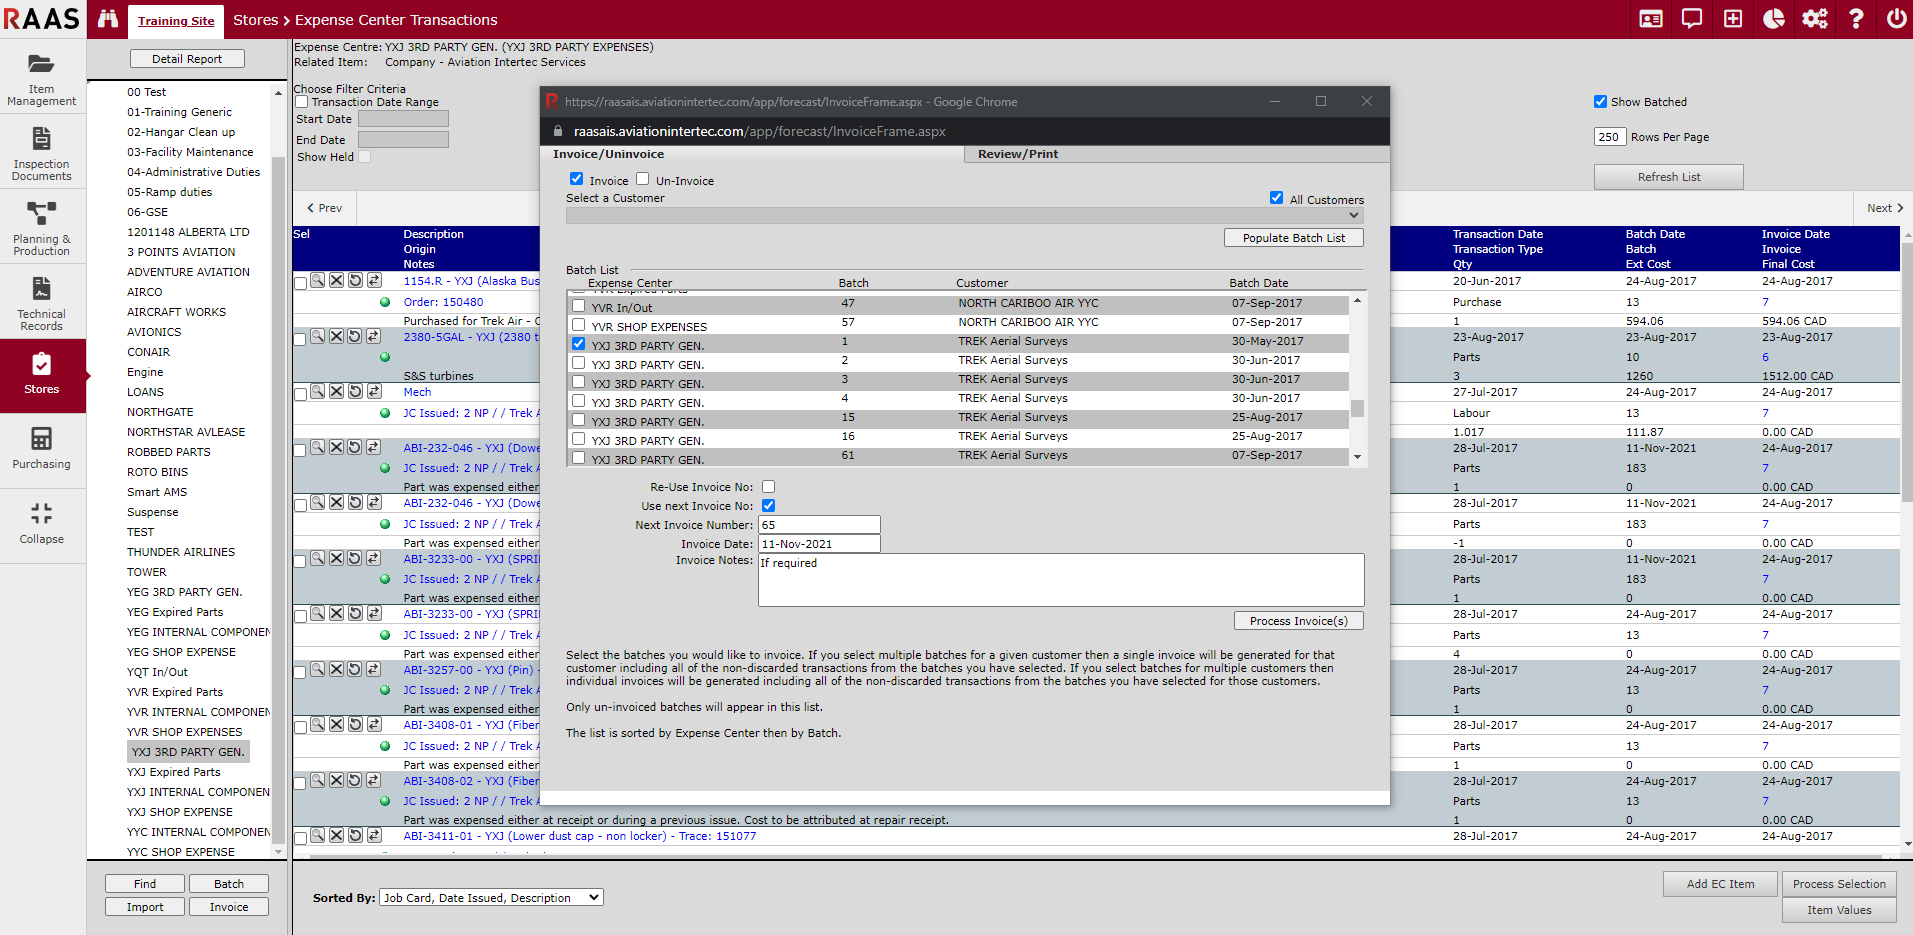
Once a Batch is created it is then invoiced by clicking the “Invoice” button in the lower-left corner. In the window that opens Figure-3, select the Invoice/Uninvoice tab, select a specific customer or “Populate Batch List” for all customers, select the Batch or Batches to be added to the invoice, enter the desired invoice number and date and notes if required, and click “Process Invoice”.
The invoice can be reviewed/printed by clicking the Review/Print tab in the same window, entering the invoice number, and printing the Invoice Backup Report Format.
If changes are necessary, the reverse process is necessary – reverse invoice, un-batch, then change/remove/add transactions and repeat the above process.